Skip to content
LogoTechnipages
LogoTechnipages
  • Topics
        • Android
        • Browsers
        • Gaming
        • Hardware
        • Internet
        • iPhone
        • Linux
        • macOS
        • Office
        • Reviews
        • Software
        • Windows
        • Definitions
        • All Recent Posts
  • Product Reviews
  • About

Window 11: How to Limit Bandwidth for Updates

Judy SanhzNovember 23, 2022 Comments (0)
Windows Header

You always make sure that your computer always has the latest updates. That way, you get fixes to bugs you’re experiencing, and those important security fixes are also a must. But, the problem when those updates come is that the update can take up more bandwidth than you’d like. The good news is that there are some changes you can make to control the bandwidth during updates.

Contents

  • 1 How to Control the Bandwidth During Updates
    • 1.1 View the Upload and Download Statistics for Windows 11
    • 1.2 Conclusion

How to Control the Bandwidth During Updates

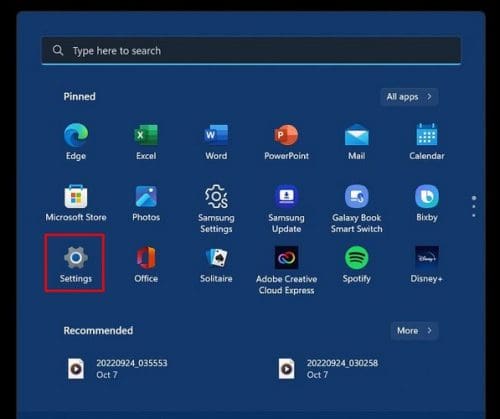
To have your computer only use the bandwidth you want it to use, you’ll need to go to Settings. Click on the Windows Start menu and click on Settings.

W11 Settings

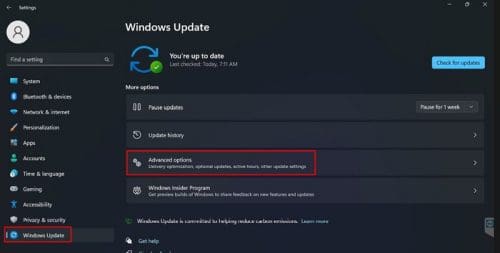
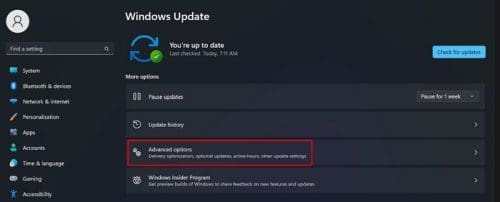
Once you’re in Settings, click on the Windows Update option at the bottom left. Click on Advanced options under the More options section.

Advanced options Windows update

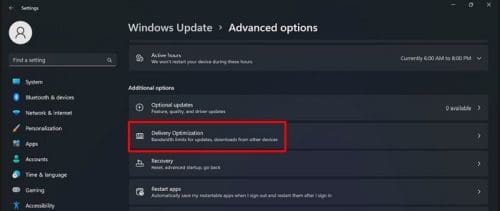
In Advanced Options, go to Additional options and click on Delivery Optimization.

Delivery optimization W11

Once you’re in Delivery Optimization, make sure to click on the option for Devices on the Internet and my local network. Enabling the Allow downloads from other PCs option is also a good idea. This is for the upload settings to function properly. Ensure that the options are chosen and click on the Advanced options setting.

Delivery optimization bandwidth W11

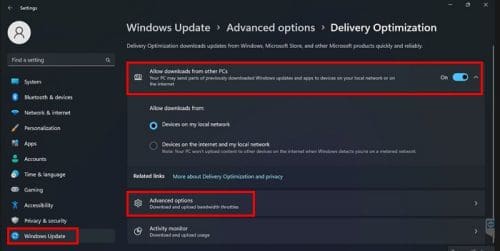
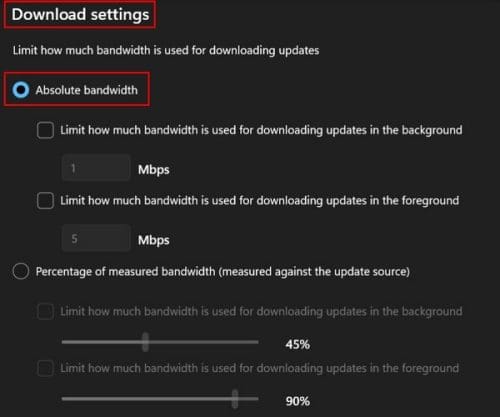
Look for the Download settings section and chose the option that says Absolute bandwidth. By checking the option called Limit how much bandwidth is used for downloading updates, you can use the slider below to restrict the bandwidth as much as you want. You can also do the same by selecting the option for Limit how much bandwidth is used for downloading updates in the foreground.

Absolute bandwidth W11

You can also make changes in the Upload settings by checking the Limit how much bandwidth is used for uploading updates to other PCs on the Internet option. It’s also possible to do the same for the Monthly upload limit option.

Upload setting W11

That’s all there is to it. Once you make these changes, you’ll have the bandwidth under control. If you ever change your mind and want to make any changes, you can do so at any time.

View the Upload and Download Statistics for Windows 11

Here’s how you can view the upload and download statistics. Click on the Windows Start menu, followed by the Settings option. Click on Windows update at the bottom left and then choose Advanced options.

Advanced options W11

Look for the Additional options section, and that’s where you should find the Delivery optimization option.

Delivery optimization W11

Scroll towards the bottom and click on the Activity monitor option. In this last option, you can review the available statistics.

Review Statistics W11

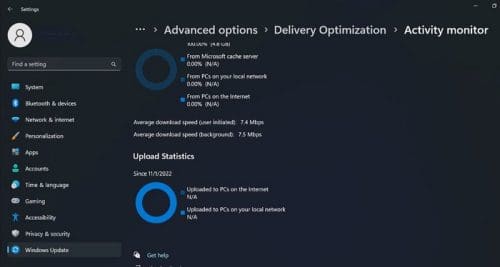
In this section, you’ll get all sorts of information from sources such as computers in the local network, Microsoft, and others.

Conclusion

As you can see, finding and reviewing this information is easy to find. If at any time you want to adjust any of the changes you made, simply follow the same steps. You’ll have access to all types of info on your bandwidth. Did you find the info you needed? Share your thoughts in the comments below, and don’t forget to share the article with others on social media.

Categories: Windows

Author Judy Sanhz

I am a tech geek who loves technology. I have been writing about tech for over a decade, covering various devices and programs. I write about Android, Apple, and Windows devices and programs. I stay updated on the latest gadgets, upgrades, features, and news. I aim to make complicated tech information easy for everyone to read. I've been with TechniPages from the beginning to help others fix their tech issues with the easy-to-follow guides.

You Might Also Like

  • Inclusion list for high risk file types policy

    Windows: Disable “Publisher Could Not Be Verified” Messages

    Mitch BartlettWindows
  • Windows Header

    Windows: Open Command Prompt to Specific Folder Location

    Mitch BartlettWindows
  • How-to-Use-Windows-File-Recovery

    How to Use Windows File Recovery to Recover Data

    Madalina DinitaWindows
  • windows-11-error-0x800f0950

    How Do I Fix Error Code 0x800f0950 on Windows 11?

    Madalina DinitaWindows

Leave a Reply

Your email address will not be published. Required fields are marked *

how to allocate more memory to a program

How to Allocate More Memory to a Program in Windows

marvel rivals memory leak fix

Marvel Rivals Using Too Much Memory – How to Fix

how to create a macro in word

How to Create a Macro in Word

how to set video as screen saver

How to Set a Video as Your Screen Saver on Windows 11

how to fix 0xc000007b Error

Error 0xc000007b – What Is It and How to Fix It

profile pic

The Experts Behind Technipages

My name is Mitch Bartlett. I've been working in technology for over 20 years in a wide range of tech jobs from Tech Support to Software Testing. I started this site as a technical guide for myself and it has grown into what I hope is a useful reference for all.

Learn More

technipages logo white
linkedin icon

Technipages is part of Guiding Tech Media, a leading digital media publisher focused on helping people figure out technology. Learn more about our mission and team here.

© 2025 Guiding Tech Media All Rights Reserved

  • About Us
  • Contact
  • Legal & Privacy

© 2025 Guiding Tech Media All Rights Reserved

Information from your device can be used to personalize your ad experience.
Do not sell my personal information.

Last Updated on November 23, 2022 by Judy Sanhz