The Google Home app is a versatile and user-friendly application that serves as a centralized hub for managing various smart devices within your home. It allows users to control and monitor compatible devices such as smart speakers, smart displays, thermostats, lights, and more, all from a single interface. In addition to its device management capabilities, the Google Home app offers customization options to tailor the user experience according to individual preferences.
While the Google Home app provides seamless integration and control over smart devices, there are instances where removing devices becomes necessary. Removing devices from the app allows users to declutter their list and maintain a more organized and efficient setup.
Contents
How to Remove Devices in the Google Home App
Whether replacing a device with a new one, experiencing connectivity issues, or simply no longer using a particular device, removing it from the Google Home app ensures that only relevant and active devices are displayed, streamlining the management process. Additionally, removing devices can help resolve conflicts or troubleshoot problems that may arise when multiple devices are connected to the same app.
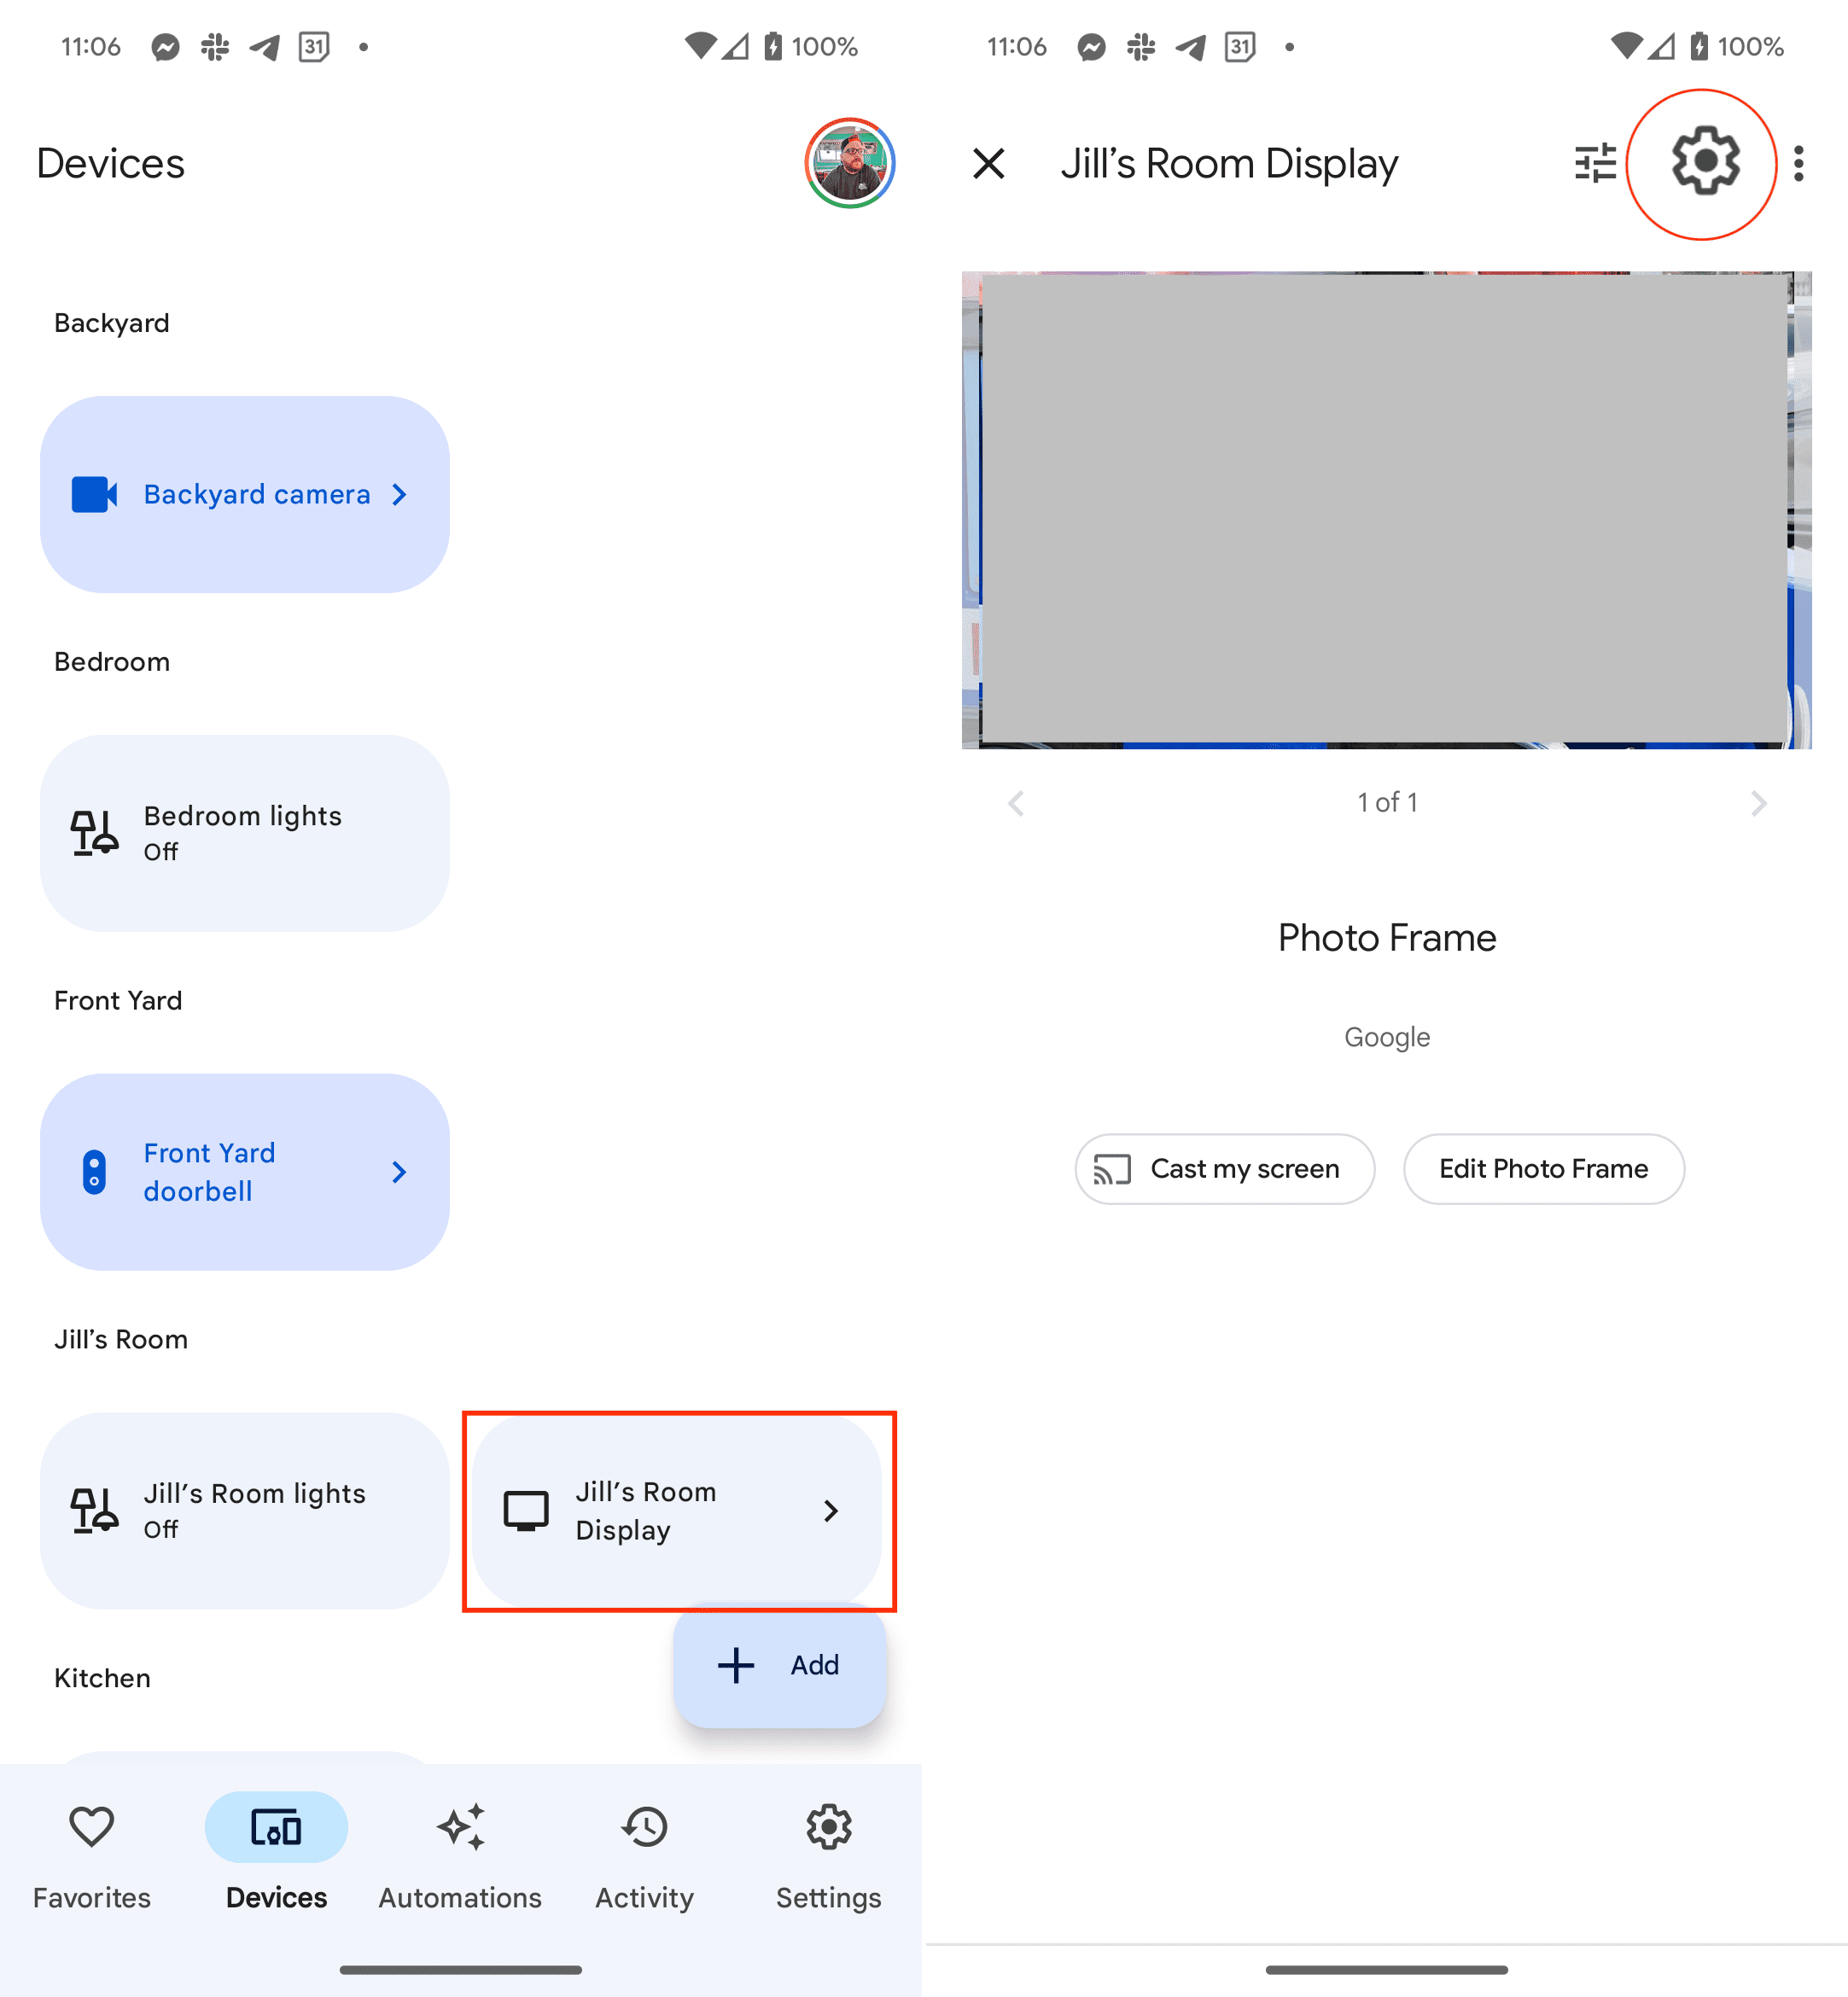
- Open the Google Home app on your phone.
- Locate and long-press the device that you want to remove.
- In the top right corner, tap the Settings (Gear) icon.

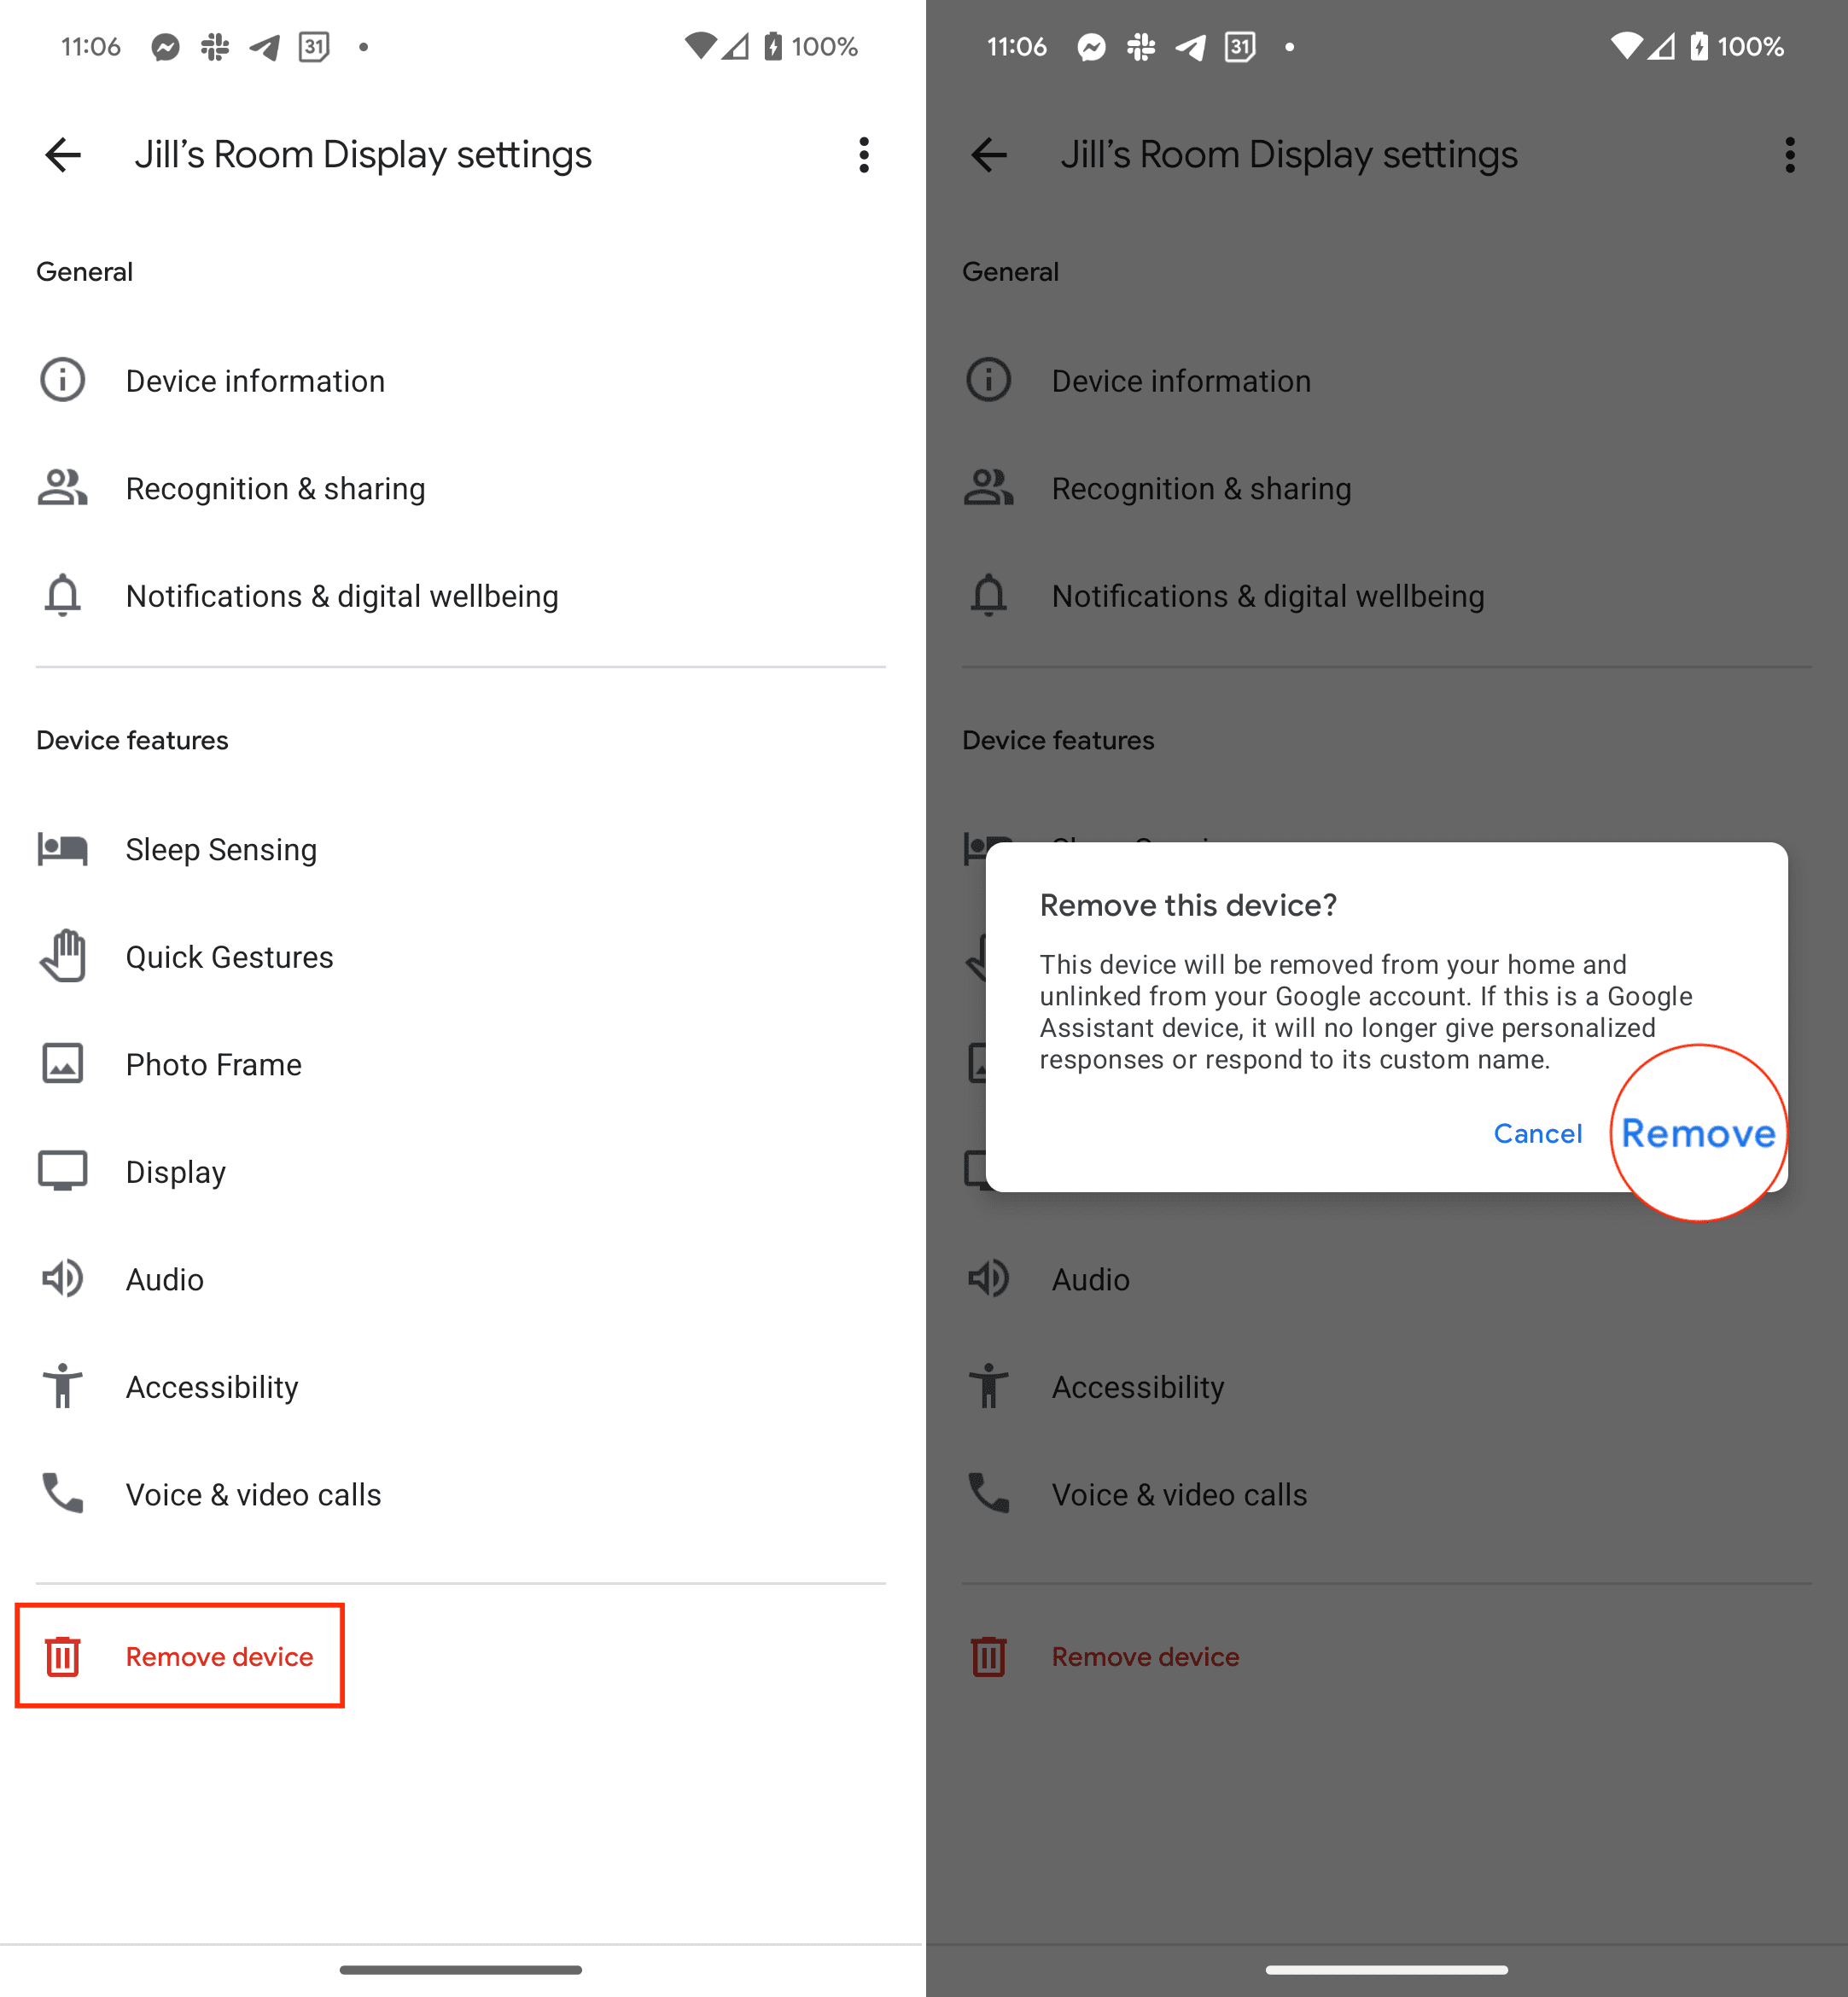
- At the bottom of the page, tap the Remove device button.
- When prompted, tap Remove to confirm.
By removing unnecessary devices, users can optimize their experience and focus on controlling the devices that are actively in use.
How to Reorganize and Customize the Google Home App
Customizing the Google Home app allows users to personalize their smart home experience and tailor the app’s interface to their preferences. With the option to customize the app, users can optimize their interaction with smart devices, ensuring that the most frequently used features and controls are easily accessible.
Whether rearranging device tiles, creating custom room groups, or setting up routines and shortcuts, customization empowers users to create a personalized and streamlined interface that aligns with their unique needs and usage patterns. By customizing the Google Home app, users can enhance convenience, efficiency, and overall satisfaction in managing their smart home ecosystem.
Create a New Room
Creating a new room in the Google Home app enables users to categorize and organize their smart devices based on their physical location or function. Users can efficiently control and manage multiple devices within a designated space by assigning devices to specific rooms, enhancing convenience and simplifying their smart home experience.
- Open the Google Home app on your phone.
- Locate and long-press any device listed in the app.
- Tap the Settings icon in the top right corner.
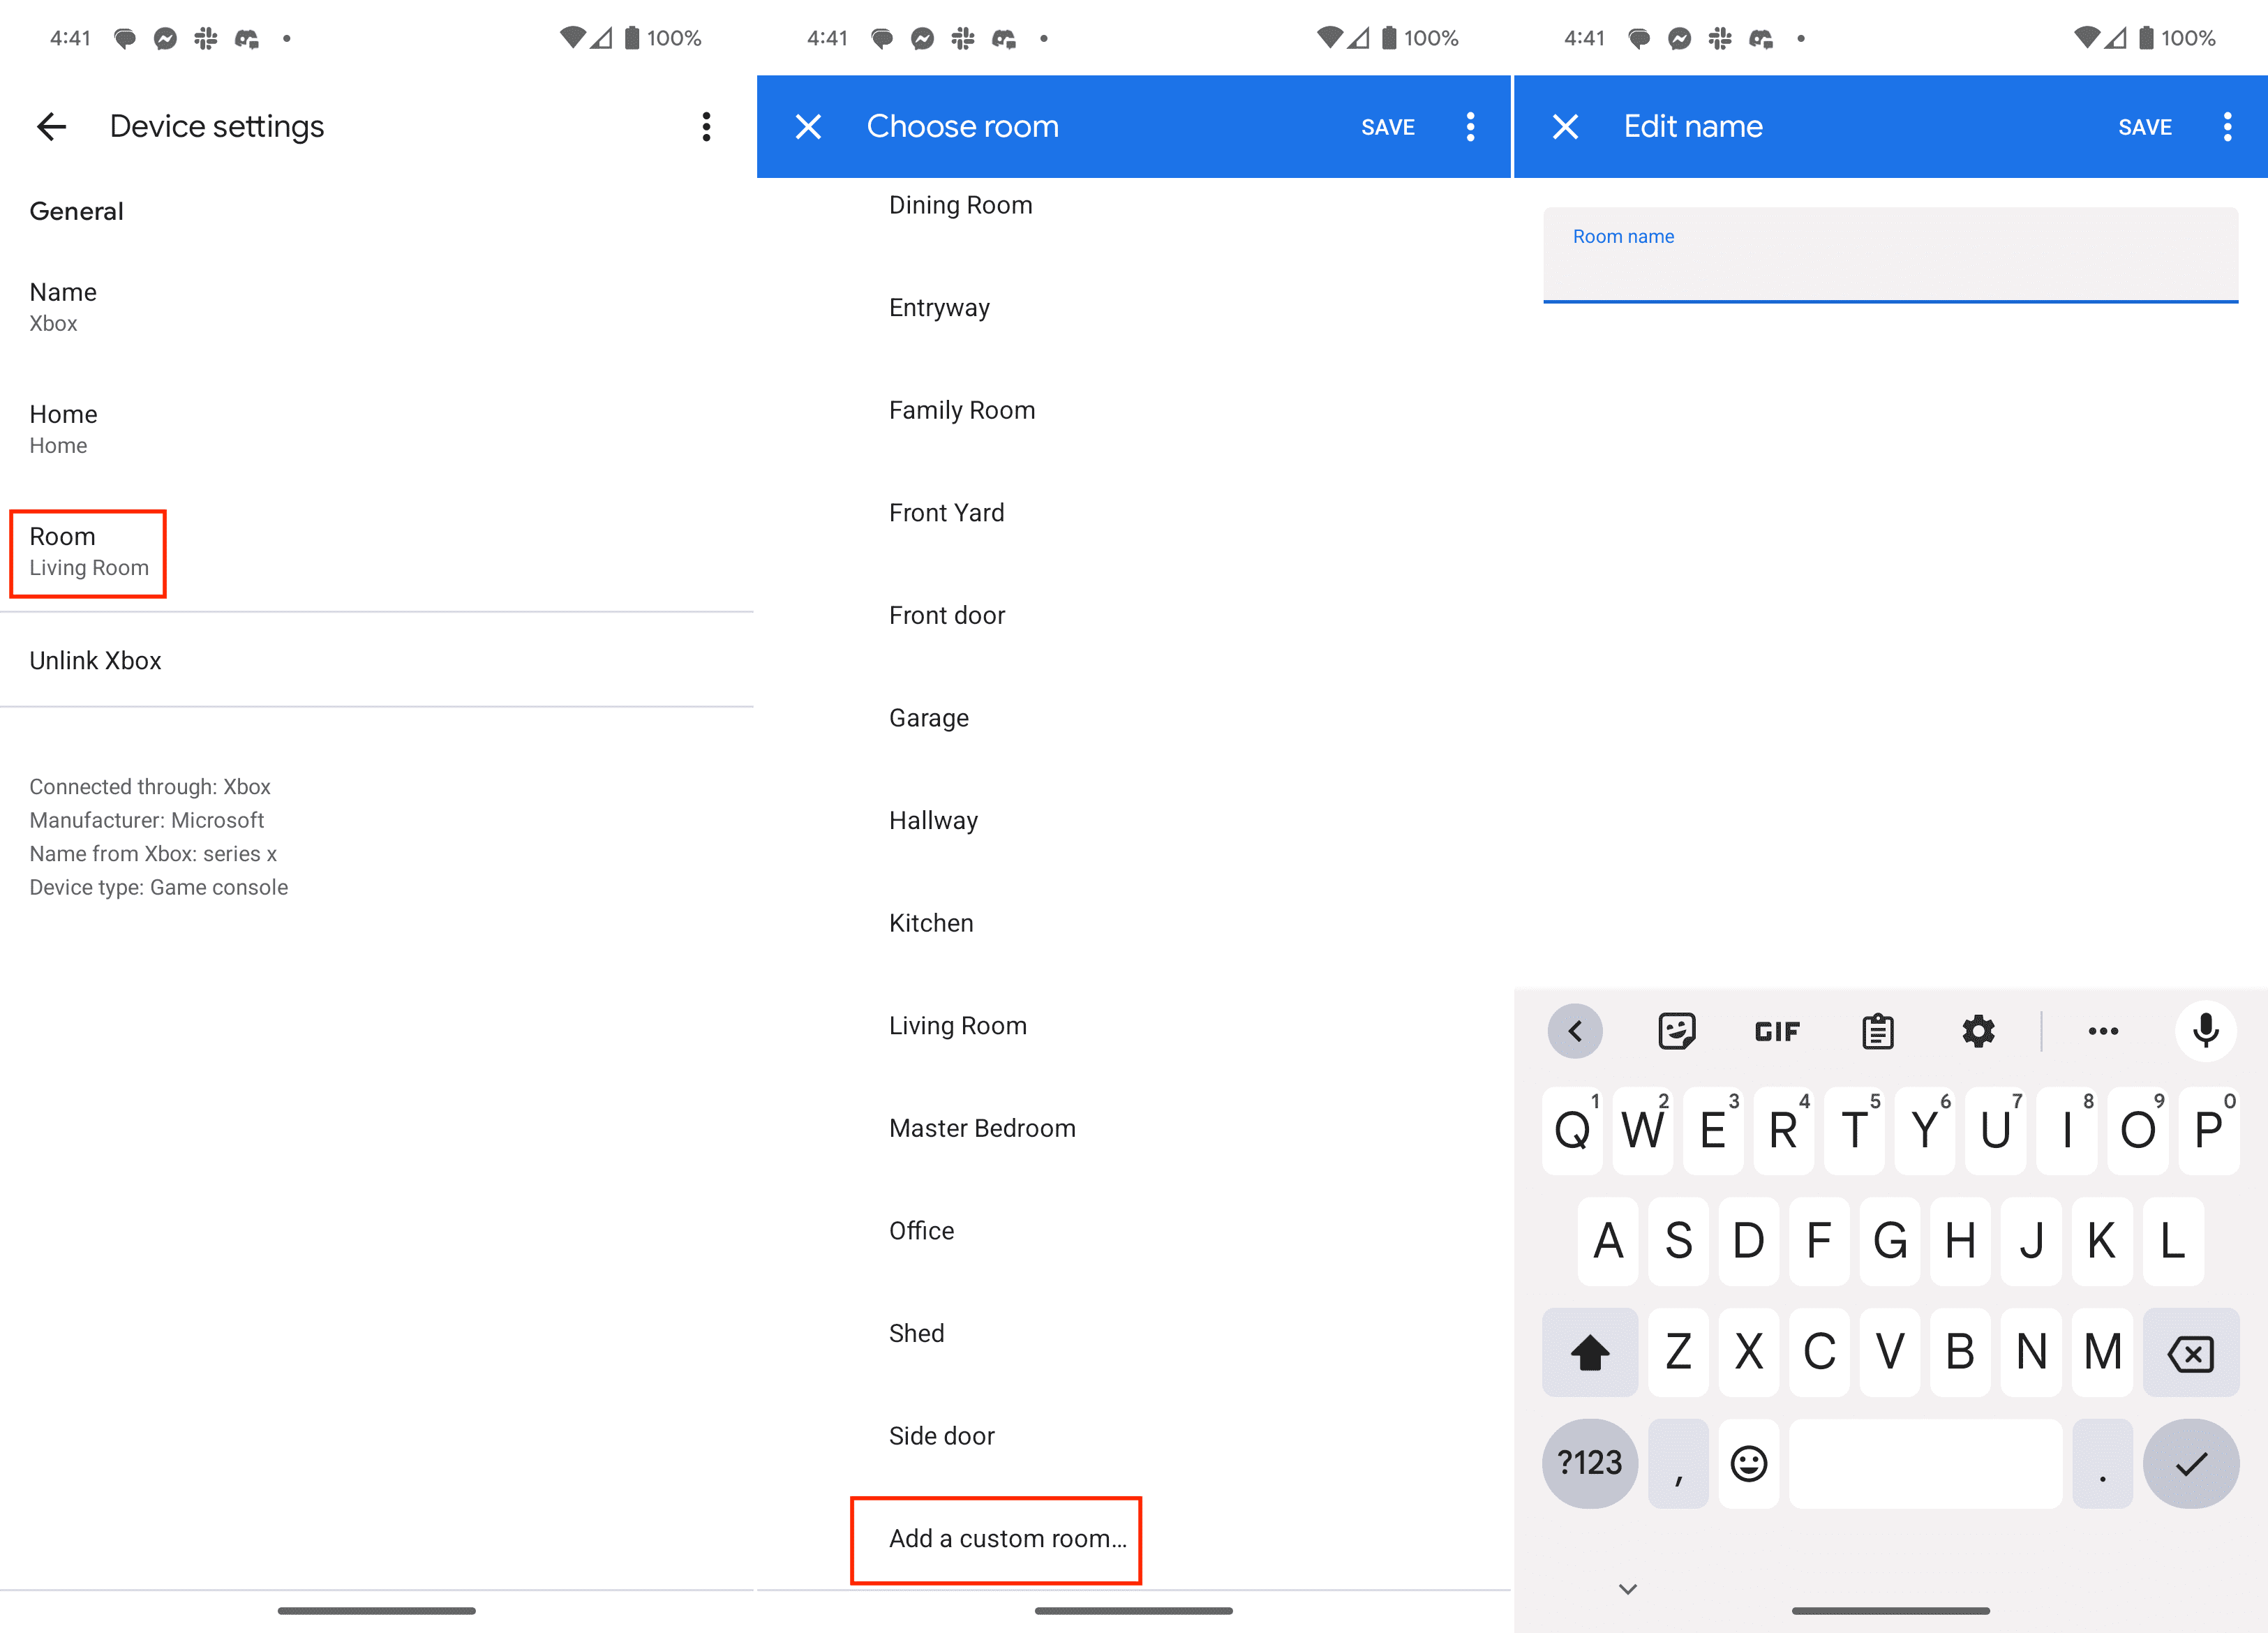
- Tap Room.
- Scroll down to the Create new section.
- Select one of the pre-created room suggestions.
- You can also scroll to the bottom and tap Add a custom room…
- Enter the name of the room.
- Tap the Save button in the top right corner.
Of course, this isn’t something you’ll need to mess with unless you add an addition to your home. But more than likely, you’ll find yourself creating a new room in the Google Home app when you start adding devices and accessories to a room that didn’t already have any.
Move Devices to a Different Room
Moving a smart home device to a different room in the Google Home app allows users to update its location and ensure accurate device organization.
- Open the Google Home app on your phone.
- Locate and long-press any device listed in the app.
- Tap the Settings icon in the top right corner.
- Tap Room.
- Select a different location under the My rooms section.
- Tap the Save button in the top right corner.

By easily reassigning devices to the appropriate room, users can maintain a well-structured and intuitive layout within the app, making it more convenient to control and manage their smart devices according to their desired locations.
Add Favorites For Quick Access
Another great feature of the updated Google Home app is the new “Favorites” tab. This is the first screen you are taken to whenever you open the app, giving you quick and easy access to the smart home devices you control most. Plus, if you have any security cameras, you can add them to your Favorites page and take a quick glance at them.
- Open the Google Home app on your phone.
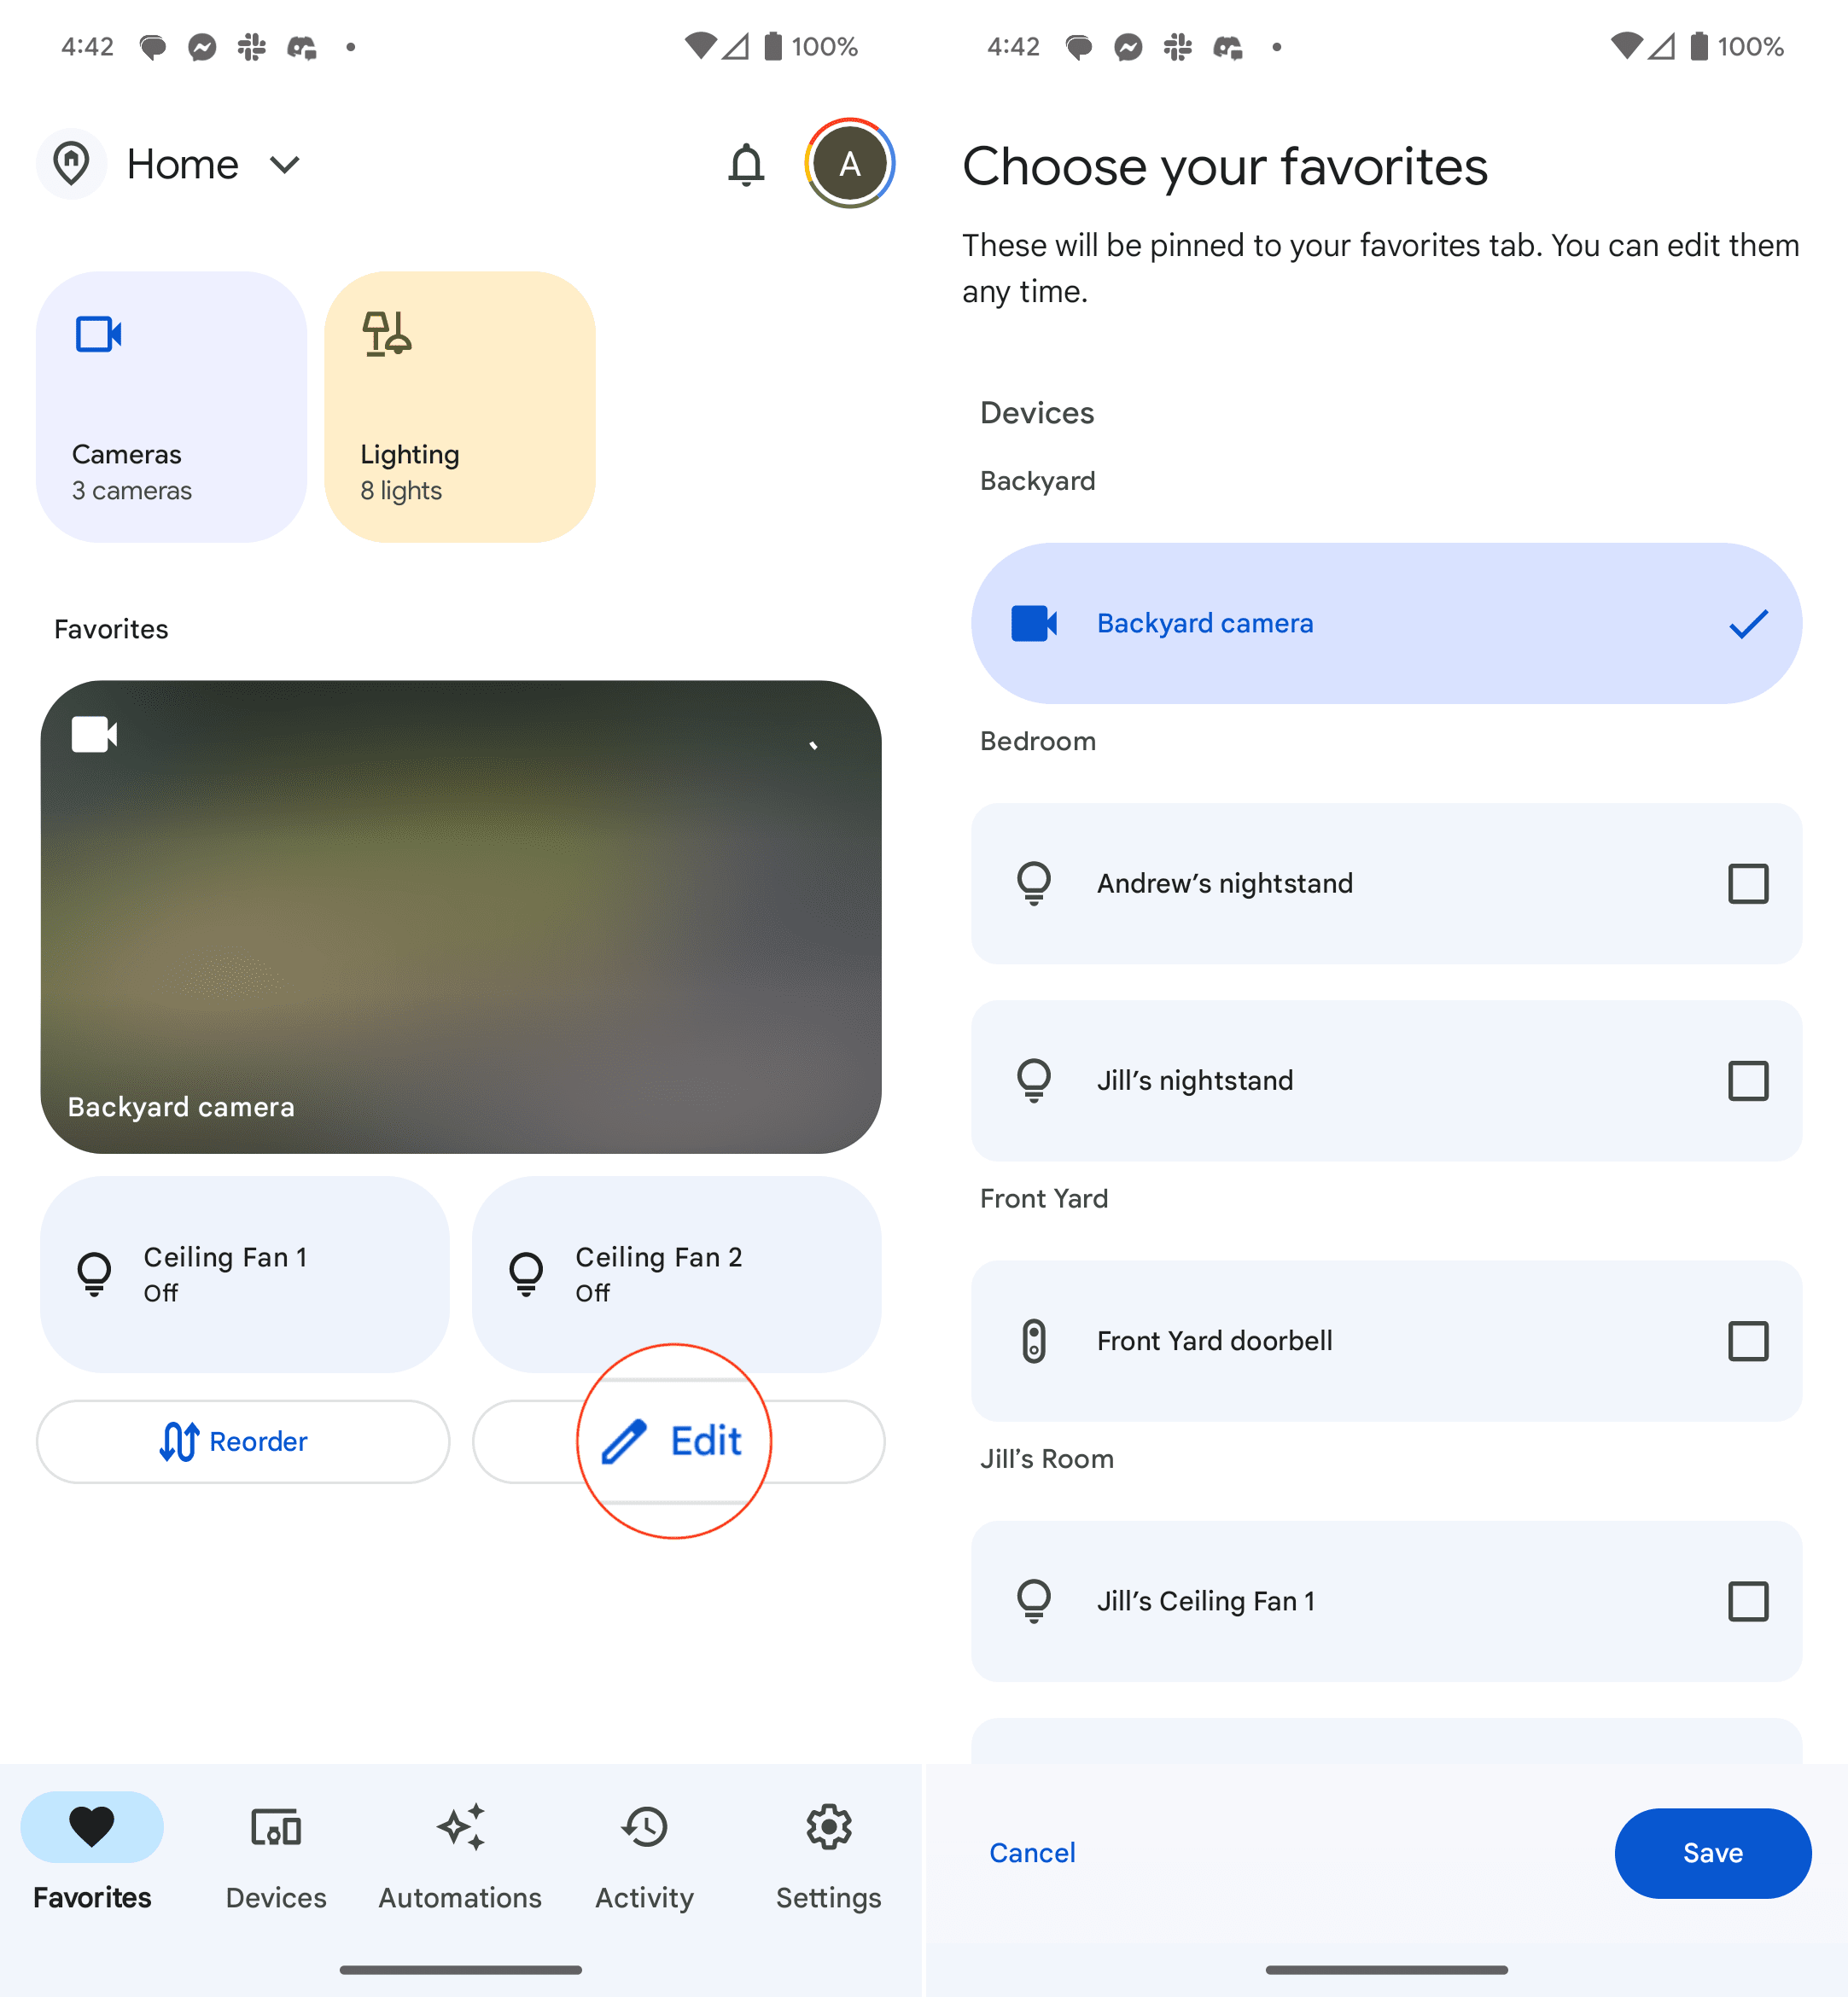
- Tap the Favorites tab in the bottom toolbar.
- At the bottom of the page, tap the Edit button
- Tap the checkbox next to the devices that you want to favorite.
- Once selected, tap the Save button in the bottom right corner.
The new Google Home app also makes it easier than ever to rearrange the layout of devices from the Favorites page. All you need to do is tap the Reorder button at the bottom of the Favorites screen. Then, drag and drop the devices in the order you want them to appear.
Check the “Linked To You” Section
You may have skipped over or forgotten to add a smart home device to a specific room. This doesn’t mean those accessories and devices aren’t available, but they aren’t currently assigned. Thankfully, there’s a dedicated section for these types of accessories, and here’s how you can move them to their appropriate rooms:
- Open the Google Home app on your phone.
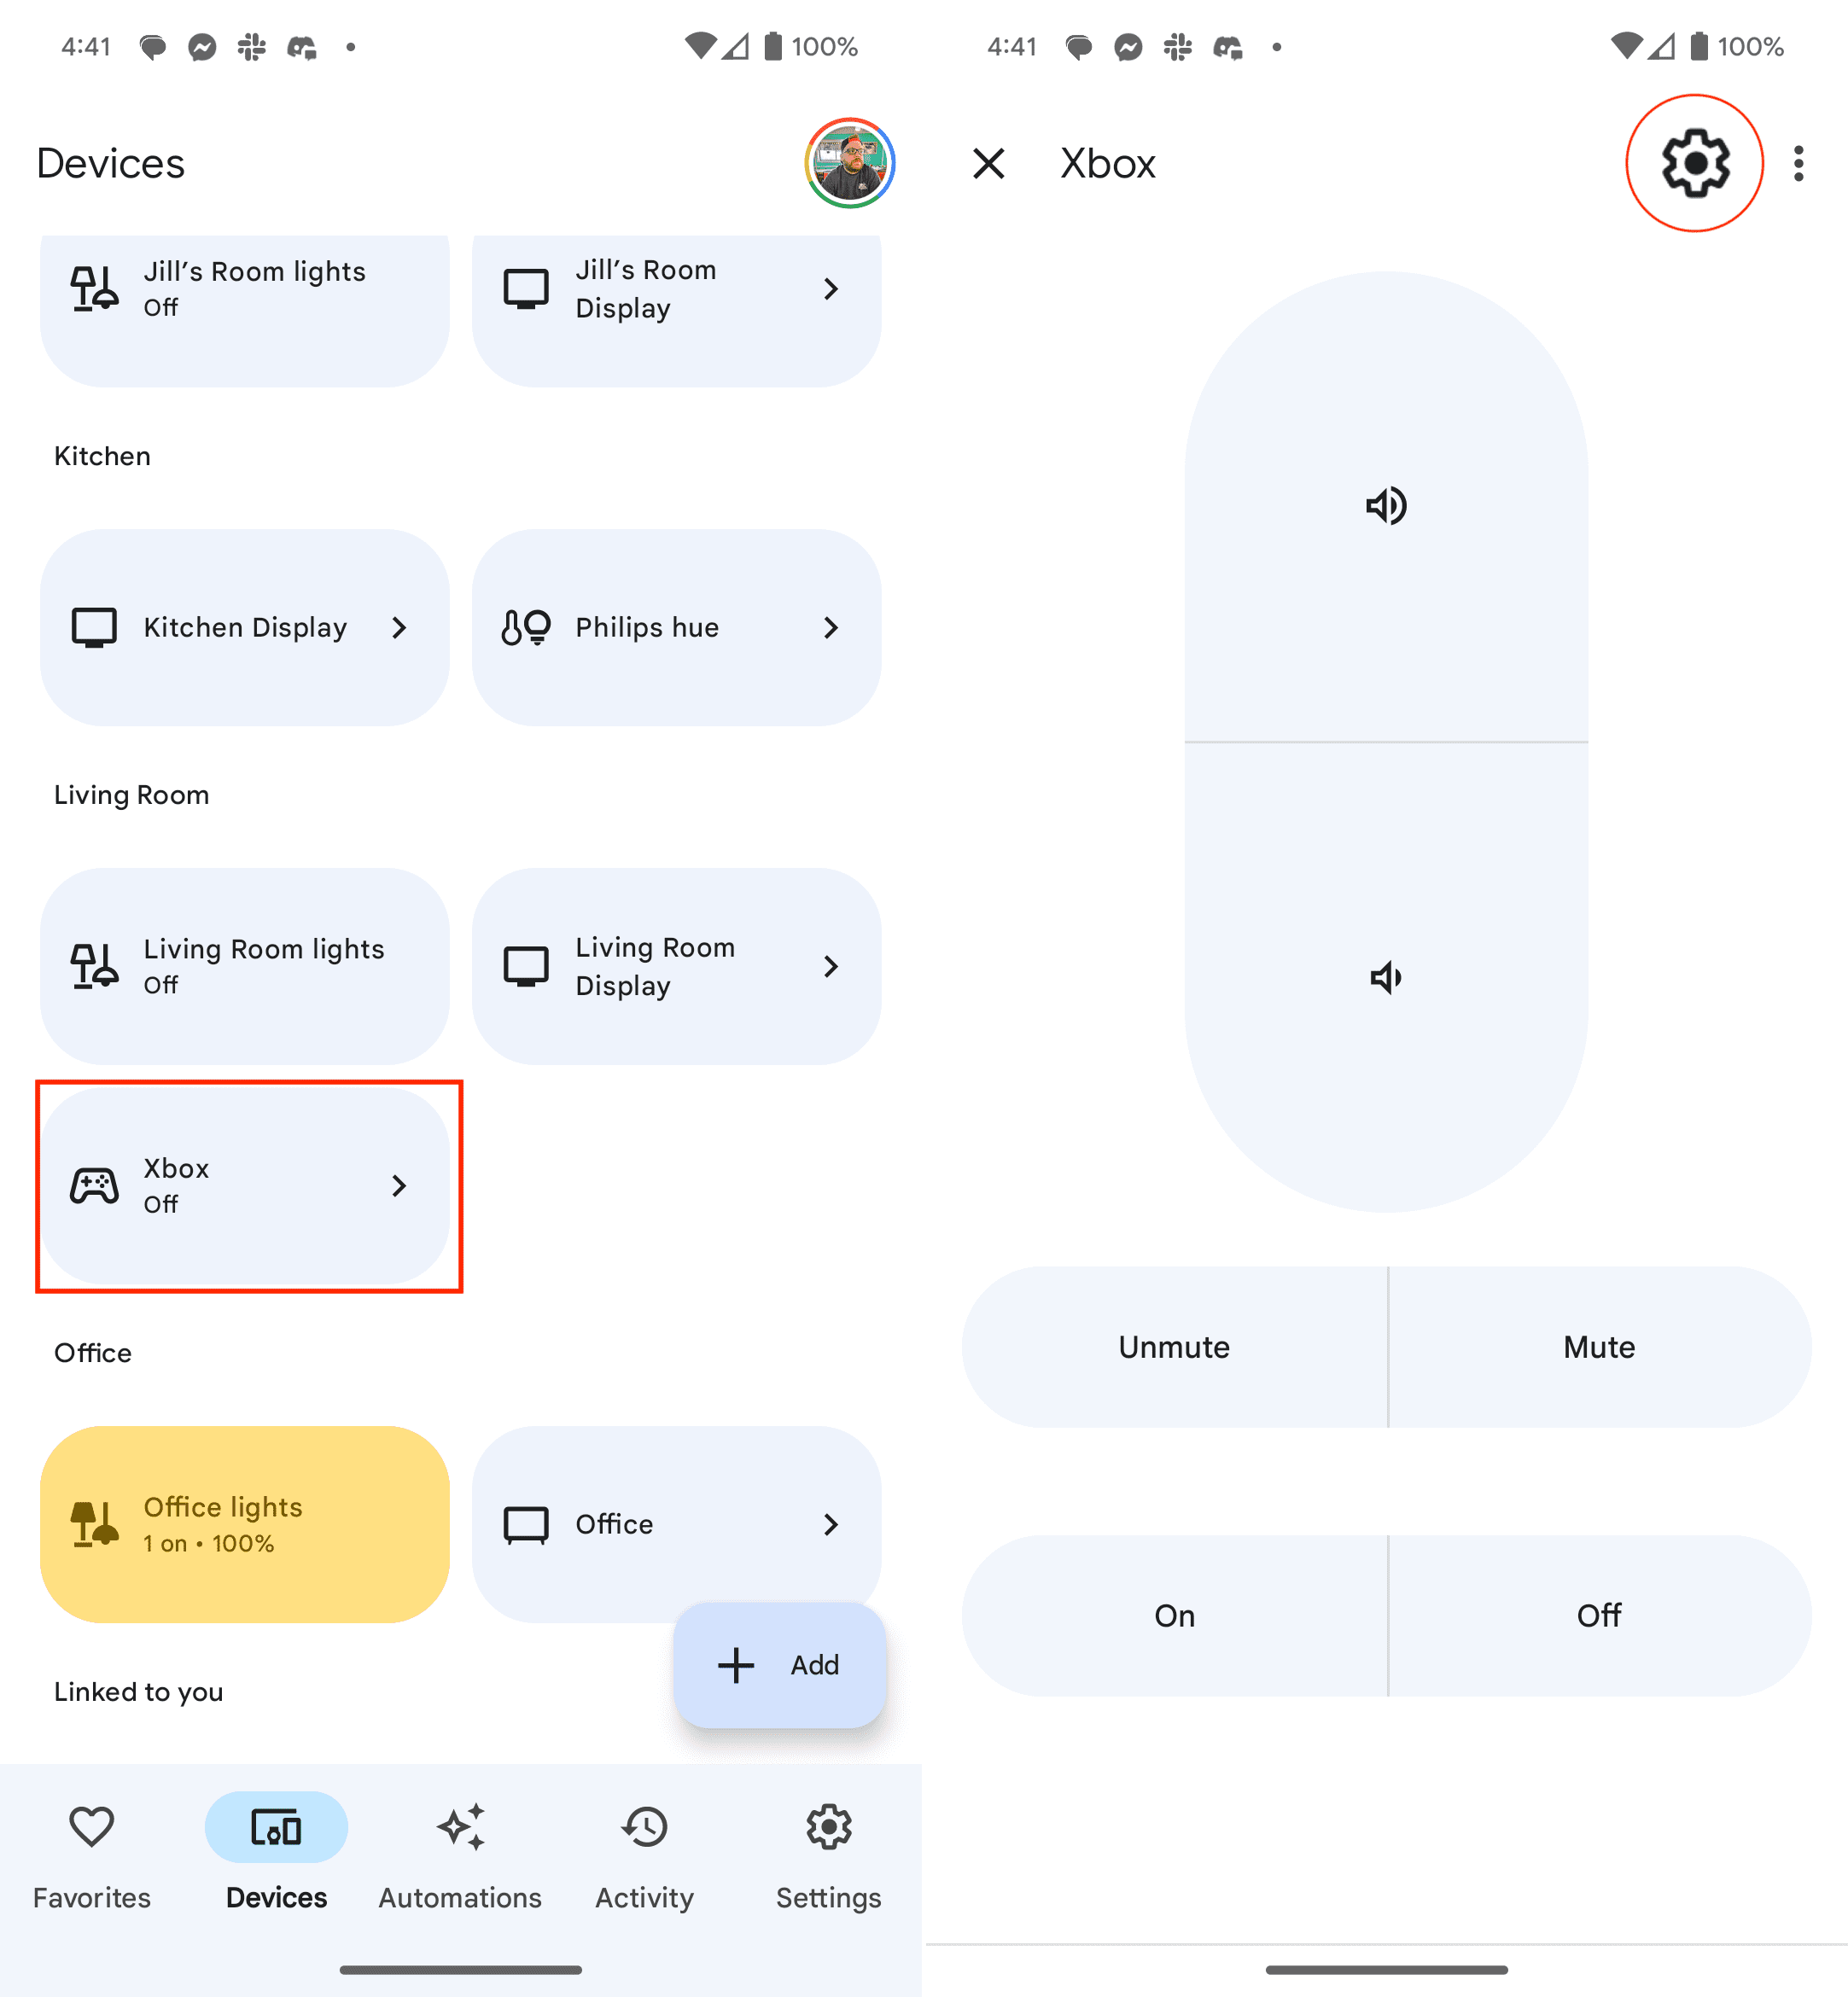
- Tap the Devices tab in the bottom toolbar.
- Scroll to the bottom until you reach the Linked to you section.
- Long-press the device you want to move.
- Tap the Settings button in the top right corner.
- Tap Room.
- Select a different location under the My rooms section.
- Tap the Save button in the top right corner.
This is a nice way to keep your Google Home app clean and organized. Plus, you might find some older devices that are no longer in use but still appear in the app. The “Linked to you” section is quite convenient, so long as you remember to look for it if you can’t find a recently added device.