Skip to content
LogoTechnipages
LogoTechnipages
  • Topics
        • Android
        • Browsers
        • Gaming
        • Hardware
        • Internet
        • iPhone
        • Linux
        • macOS
        • Office
        • Reviews
        • Software
        • Windows
        • Definitions
        • All Recent Posts
  • Product Reviews
  • About

Create Rounded Corners With Paint.NET

Mitch BartlettFebruary 27, 2023 Comments (12)
Paint dot net Header

So you want to do rounded corners using Paint.NET? You must learn how. I mean your web site would be so not in style without images with rounded corners! I’m going to show you the easiest method with these steps.

Here we have a nice picture of downtown Chicago. I want to give it rounded corners.
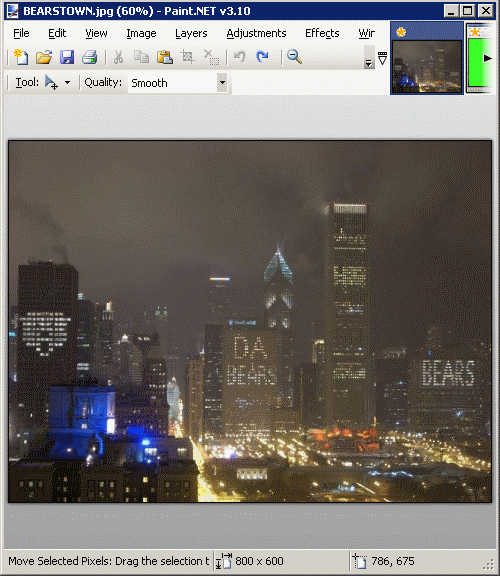
Picture Before

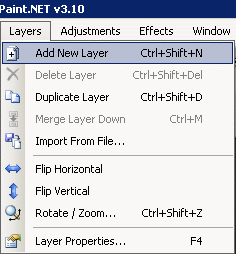
  1. First I want to add a new layer by selecting “Layers” > “Add New Layer“.
    Add New Layer
  2. Now select “Tool” > “Rounded Rectangle“.
    Rounded Rectangle Tool
  3. Select a color that is not used in your photo. In this example, I chose bright green.
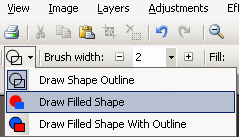
  4. In the upper left corner, select “Draw Filled Shape“.
    Draw Filled Shape
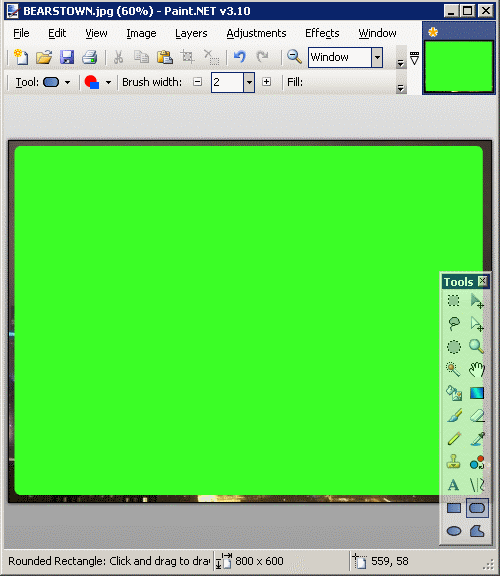
  5. Draw the rounded rectangle over the area you would like to keep for your rounded corners image.
    Make Rounded Square
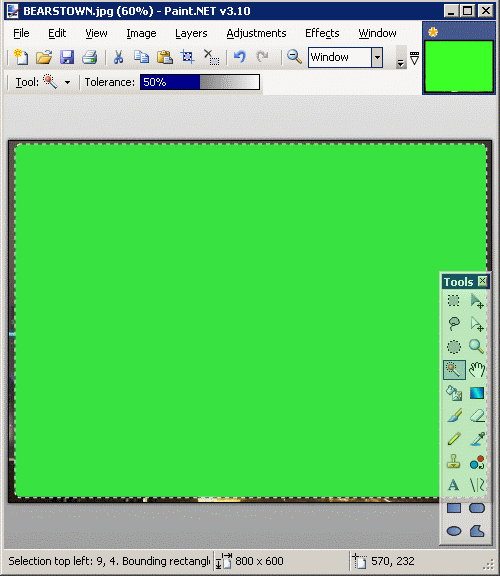
  6. Use the Magic Wand to select the area of the rounded rectangle.
    Use Magic Wand
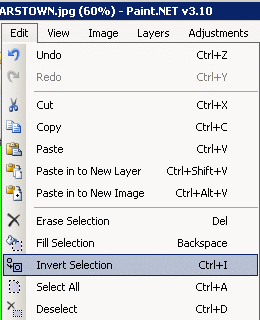
  7. Select “Edit” > “Invert Selection“.
    Invert Selection
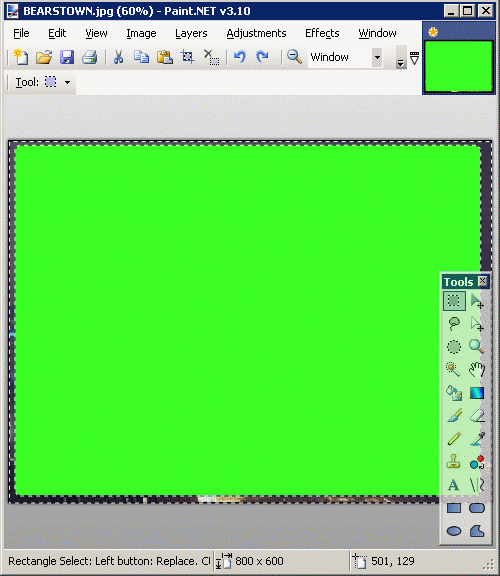
  8. Now the area outside of the rounded square will be selected.
    Selection Inverted
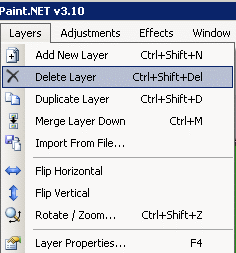
  9. Select “Layers” > “Delete Layer” to delete the layer we made our rounded square on.
    Delete Layer
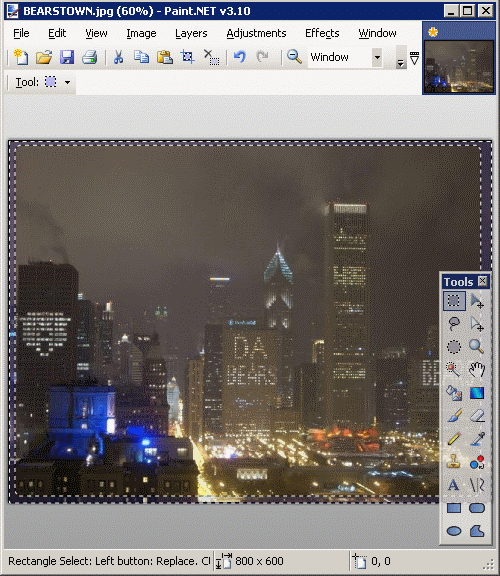
  10. The area outside of the rounded square will still be selected.
    Layer Deleted
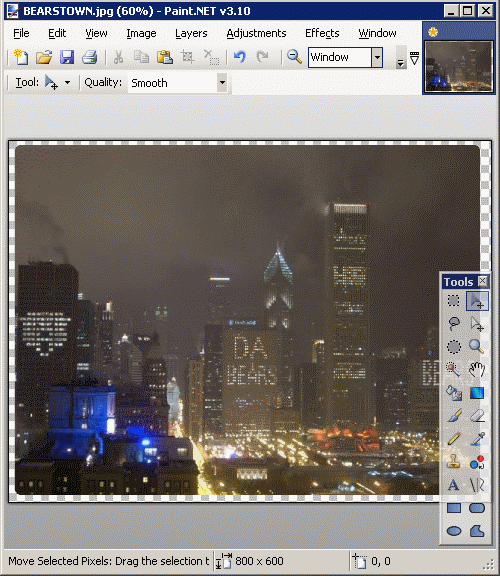
  11. Simply press “Delete” on your keyboard and you are left with your image, now with rounded corners.
    Rounded Corners Result

If you have trouble where the lines are jagged, you may have better results using a different color in step 8.

How did this tutorial work for you? Drop me a comment below and let me know.

Categories: Software

Author Mitch Bartlett

Through my career that spans over 20 years I have become an expert in Microsoft Systems Administration, Android, and macOS. I started this site as a technical guide for myself and it has grown into what I hope is a useful knowledgebase for everyone.

You Might Also Like

  • How to Send Files in Email When the File is Too Big

    Kat ArmstrongInternet
  • How to Fix Dropbox Preview Not Working

    Madalina DinitaSoftware
  • Microsoft-Teams-Error-211-Fix

    How to Fix Microsoft Teams Error 2: 211 on Mac

    Madalina DinitaSoftware
  • fix-signal-app-wont-install

    Fix: Signal App Won’t Install on Android, iOS or PC

    Madalina DinitaSoftware

Comments

  1. Andrew Lietzow says:
    November 30, 2021 at 12:35 pm

    Excellent instructions! Truly appreciated this. Thank you, technipages!

  2. Karolyn says:
    March 6, 2021 at 9:57 pm

    And how do I pick the color? How do you pick transparent? You don’t show how to do that.

  3. Karolyn says:
    March 6, 2021 at 9:50 pm

    Cropped the image but now I’m left with an image with a bright green border around it… why isn’t the border transparent like your tutorial shows? I followed your instructions exactly…twice.

  4. Lavamantis says:
    September 3, 2020 at 10:22 am

    A+

  5. Lamar says:
    April 5, 2018 at 8:59 am

    What a time saver. Thank you very much. The steps were detailed and correct. Got the job done in no time at all.

  6. Berry Wing LLC says:
    February 16, 2018 at 8:59 am

    Thanks! Easy and simple. Paint.net surprises me everyday.

  7. Mateus says:
    February 1, 2018 at 10:57 am

    Thank you!

  8. KD says:
    January 12, 2018 at 9:36 am

    1] Copy the picture with Snipping Tool and paste into PAINT.
    2] Choose the Rounded Rectangle shape and change the color to WHITE.
    3] Choose the largest size for the Rectangle.
    4] Then put the white rounded border around the picture.
    5] Then COPY and PASTE the rounded picture wherever you need it.

  9. skyzo says:
    March 27, 2017 at 3:10 am

    It work like a magic. Very easy tutorial, thanks.

  10. Raja says:
    December 20, 2015 at 9:03 am

    Love it !!! I should have come here before…

  11. Rich says:
    November 19, 2015 at 12:40 pm

    Great Instructions!

    Question: How do I add a solid boarder to my rounded rectangle?

  12. Mohit says:
    May 11, 2015 at 1:59 pm

    Thanks, Saved me hours to install and try new software to do the sames :)

Leave a Reply

Your email address will not be published. Required fields are marked *

how to allocate more memory to a program

How to Allocate More Memory to a Program in Windows

marvel rivals memory leak fix

Marvel Rivals Using Too Much Memory – How to Fix

how to create a macro in word

How to Create a Macro in Word

how to set video as screen saver

How to Set a Video as Your Screen Saver on Windows 11

how to fix 0xc000007b Error

Error 0xc000007b – What Is It and How to Fix It

profile pic

The Experts Behind Technipages

My name is Mitch Bartlett. I've been working in technology for over 20 years in a wide range of tech jobs from Tech Support to Software Testing. I started this site as a technical guide for myself and it has grown into what I hope is a useful reference for all.

Learn More

technipages logo white
linkedin icon

Technipages is part of Guiding Tech Media, a leading digital media publisher focused on helping people figure out technology. Learn more about our mission and team here.

© 2025 Guiding Tech Media All Rights Reserved

  • About Us
  • Contact
  • Legal & Privacy

© 2025 Guiding Tech Media All Rights Reserved

Information from your device can be used to personalize your ad experience.
Do not sell my personal information.

Last Updated on February 27, 2023 by Mitch Bartlett