One of the selling points of many Razer peripherals is the RGB lighting that comes with them. On Razer keyboards, each key has its own configurable backlight so you can configure the lighting of your keyboard key-by-key.
The lighting functionality is managed through the Razer Synapse 3.0 software in one of two places.
Basic lighting settings
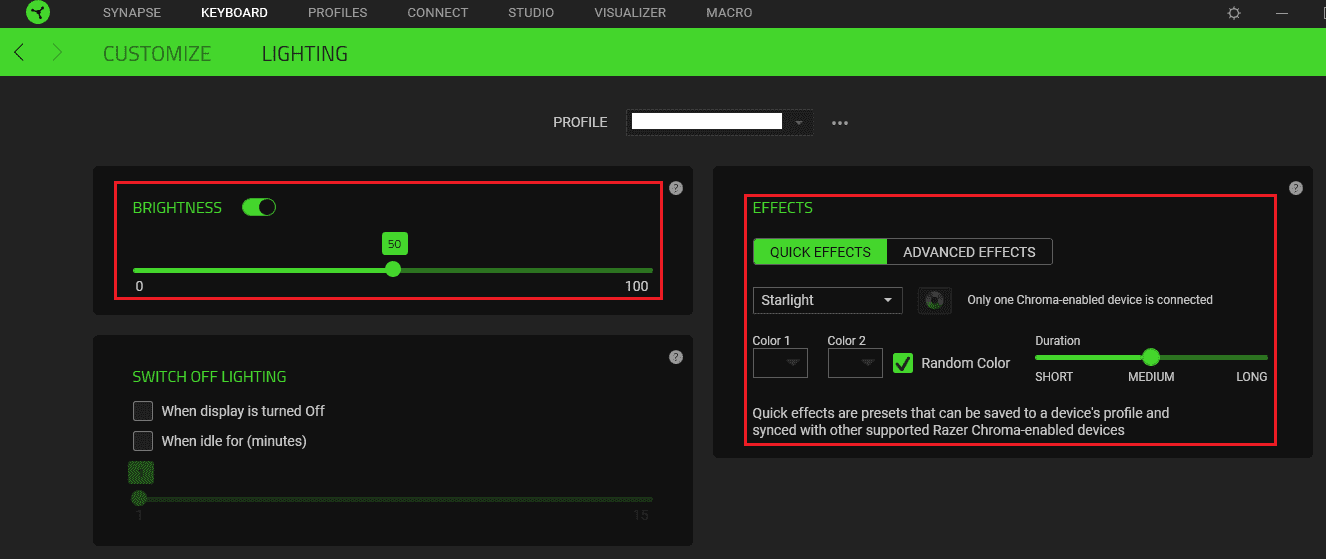
The basic lighting settings can be found in the “Lighting” sub-tab of the “Keyboard” tab and applies to the entire keyboard at once. Here you can configure the brightness of the keyboard backlighting in the “Brightness” box and choose between any of the “Quick Effects” in the “Effects” box.
The “Quick Effects” are a series of predefined backlighting effects that you can choose between. Generally, you can make minor configuration changes, such as the colours being used or the speed of transitions between colours. These effects are designed to be quick and easy to apply.
For example, in the “Spectrum Cycling” setting, you can’t configure any additional settings. In the “Starlight” setting, however, you can configure the colour of the twinkling lights and how long they last before fading.
Advanced lighting settings
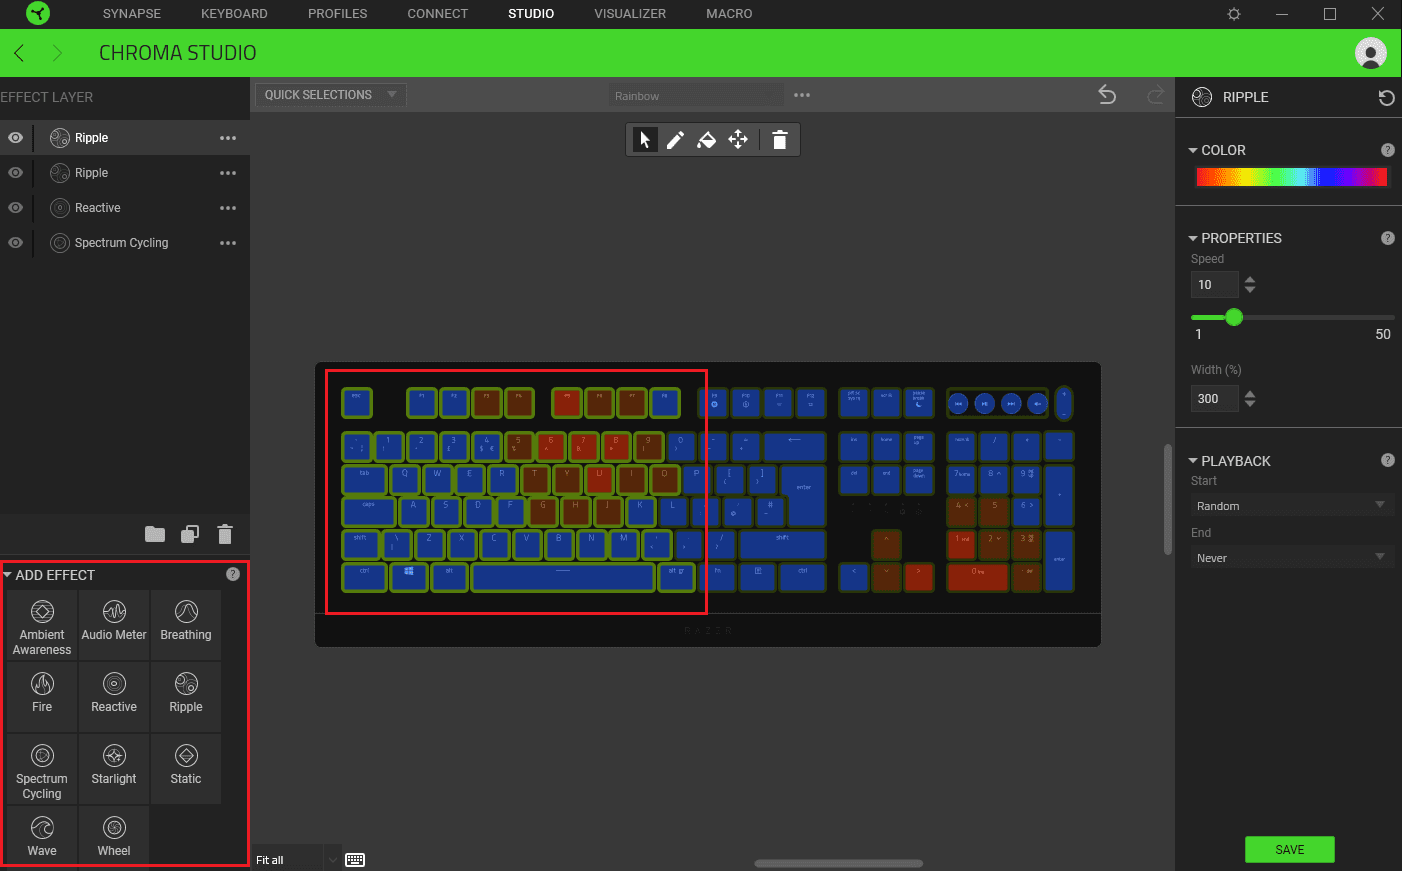
You can configure more advanced lighting settings if you enable “Advanced Effects” in the “Lighting” sub-tab of the “Keyboard” tab and then switch to the “Studio” tab. Here you can see a representation of the keyboard, select any combination of keys and any combination of advanced lighting effects.
To select a set of keys that you want to apply an effect to, either click and drag a box over them, or use Ctrl + Left click. Once you’ve selected a group of keys to affect, click on an effect in the bottom-left corner, under “Add Effect”.
Tip: Selected keys will be highlighted with a green outline.
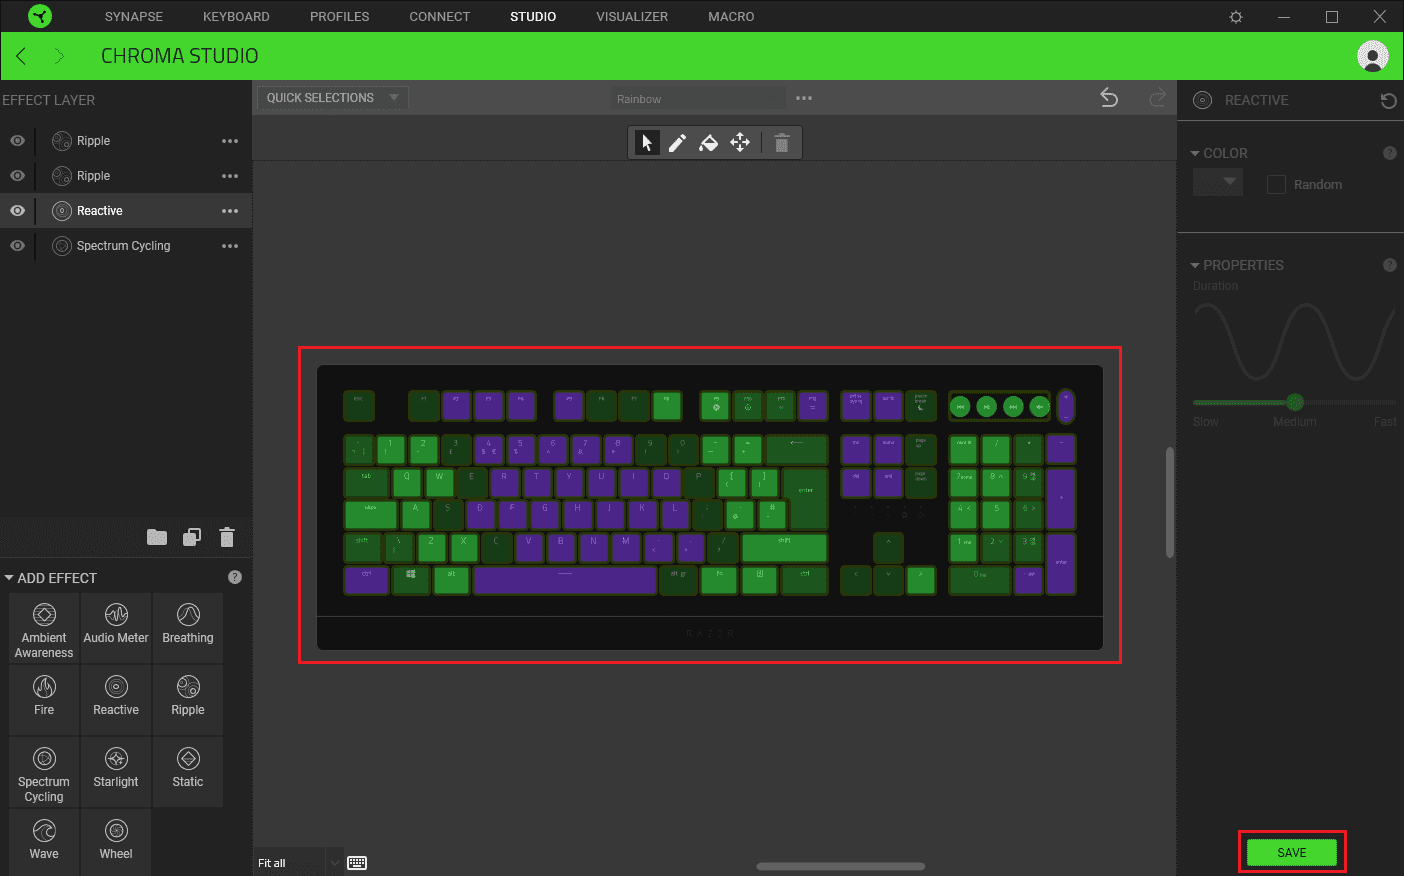
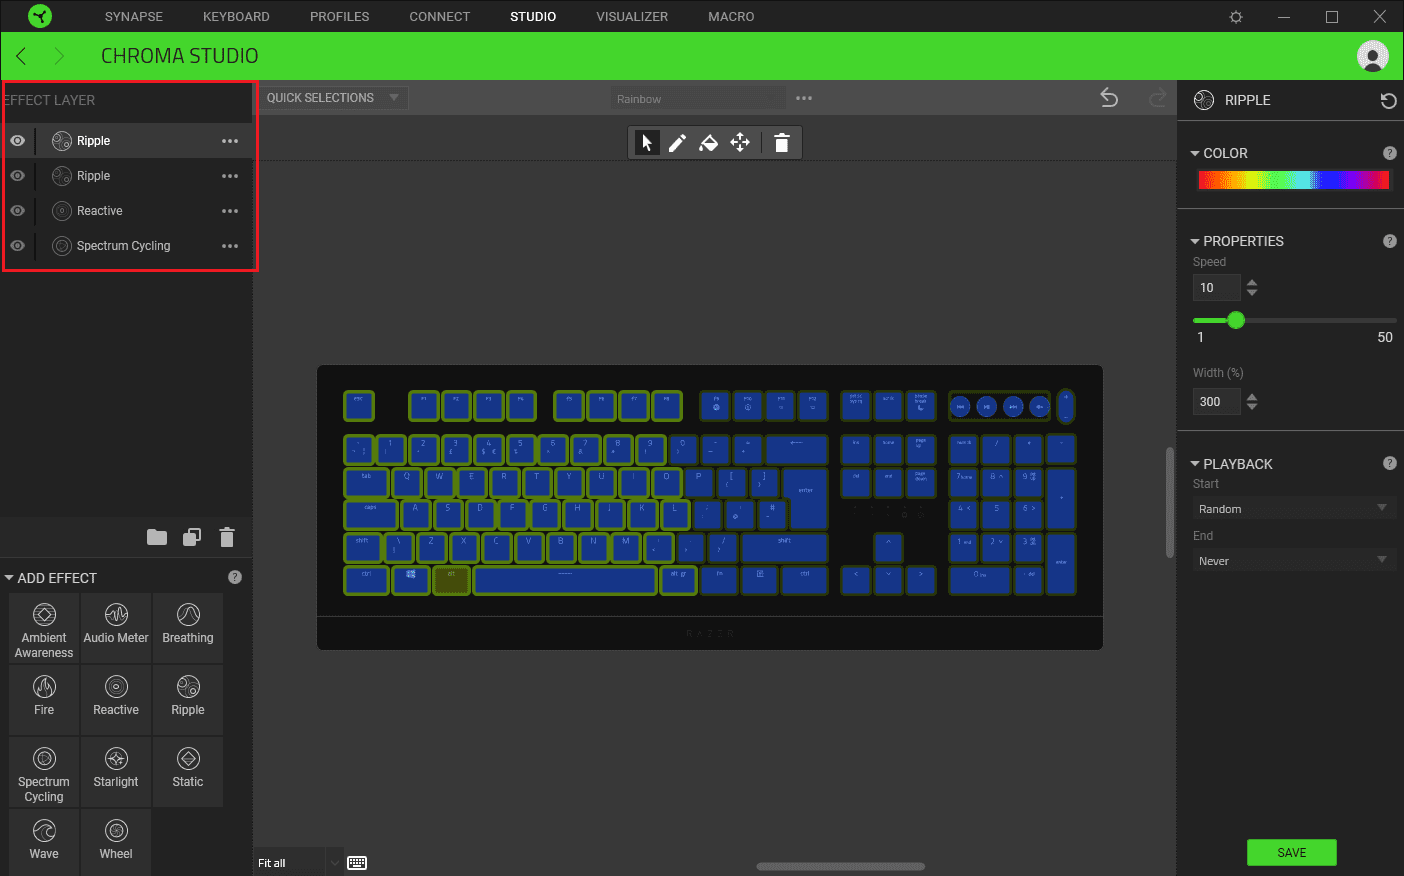
When you add an effect, it will appear in the top-left column as a layer. You can stack as many layers of effects as you want, although certain combinations will essentially hide everything below them.
For example, in this setup, the whole keyboard has four effects applied: An overall rainbow spectrum cycling, a random reactive colour when a key is pressed, then a pair of rainbow ripple effects. The cycling rainbow sets the background, and the other effects are placed over the top on the specific keys that they temporarily affect, essentially being transparent the rest of the time. If the spectrum cycling effect was listed on top, the other effects would not be visible as it sets a colour to all keys at all times.
You can choose to disable a layer by clicking the eye symbol on the left, or you can click and drag them to re-order the list. If you want to change the effect of a layer you can choose a different one using the respective triple-dot icon. You can rename or delete a layer by right-clicking on it.
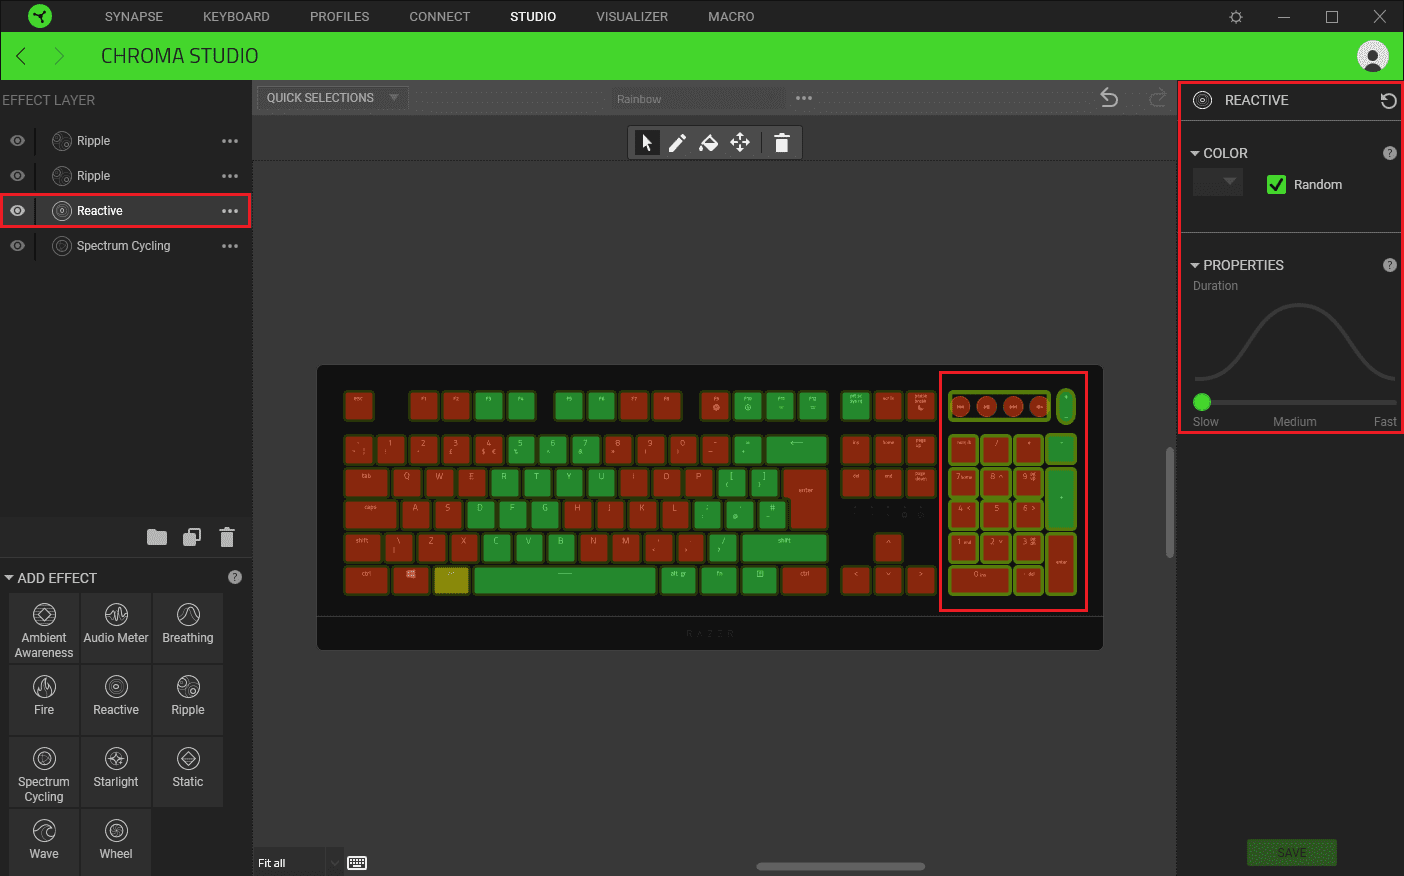
You can configure how the effect in a layer looks by using the column on the right. The exact settings vary for each effect, but the concepts are generally similar. For the “Reactive” setting you can configure the colour that a key changes to when it is pressed, and how long that colour lasts before returning to a “transparent” state.
You can select a colour with the drop-down box in the “Color” section or tick the checkbox for a random colour. To configure the duration of the effect, drag the “Duration” slider from left to right.
The changes you make in the right column only apply to the currently selected keys and layer. This means you can configure one layer that addresses each half of the keyboard with a different variation of the effect. This can get complex to manage if you configure many different sections independently as there is no visual indication of which area is which.
The combined effect of your current settings is previewed in the on-screen keyboard representation. If you’re happy with how it looks, you can apply your changes to the keyboard by clicking “Save” in the bottom-right corner.