Want to make your live streams engaging, fun, and outstanding? Learn how to add an overlay to OBS Studio in four easy ways that anyone can follow. Then, apply the skill in your live streams of gameplay, video podcast, YouTube live streams, and so on.
Performing live streaming is super easy with all these video-sharing platforms, like YouTube, Twitch, Facebook, etc., around you.
But, if you’re passionate about streaming video content or want to make it your career, you must be craving subscribers, likes, shares, comments, and sometimes donations.
Video streamers use various tactics to accomplish the above, but the most convenient is showing off your creativity and knowledge of technology. What could be easier than using streaming overlays for your OBS stream sessions to flaunt your style, creativity, and above all, your brand?
But how do you do that? I’m going to show you below. Stick to the article until the end to discover how to add overlays to OBS Studio.
Contents
How to Add Overlay to OBS Studio: Using a URL
You can use the hyperlink to your stream overlay on OBS. It’s the easiest method of all. If you prefer creating your stream overlay on overlay editing sites, it’s the perfect approach.
In this tutorial, I’ll use one of the best free stream overlays from my Stream Elements account. Follow these steps to add overlays to OBS Studio via URLs:
- Copy the overlay URL from the editor app. For the Stream Elements editor, you should see the Copy overlay URL button on the top right corner beside the Preview button.
- Now, open the OBS Studio app and create a new scene for the stream overlay.
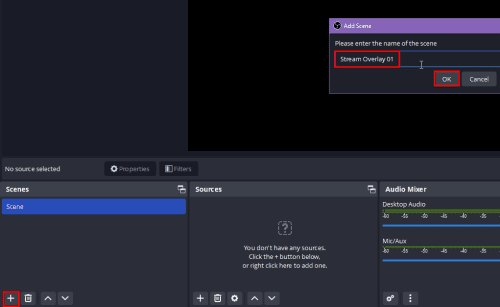
- On the Scenes card, click the plus (+) icon to add the new scene.
- Select the newly created scene.
- Click the Add Source button (the plus sign) and select Browser.
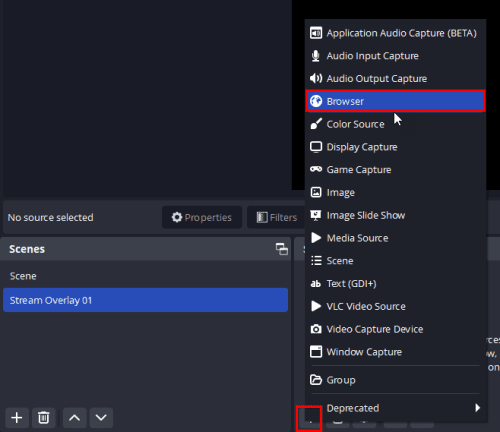
- Type a name for this browser source and select OK.
- Now, paste the URL copied from your overlay editor in the URL field of the Properties for Overlay URL dialogue box.
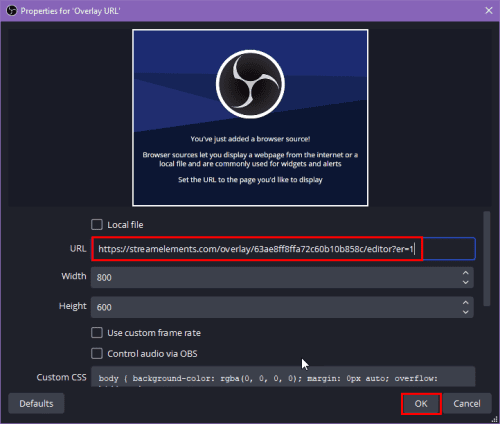
- Set the Width and Height value if you want to. Alternatively, you can use the free scaling option on the OBS canvas.
- Click OK to add the overlay to OBS Studio.
How to Add Stream Elements Overlay to OBS Studio?
Importing and setting up your overlays from Stream Elements to OBS is easy. You need to add the URL of the overlay canvas of Stream Elements as a browser source on OBS studio.
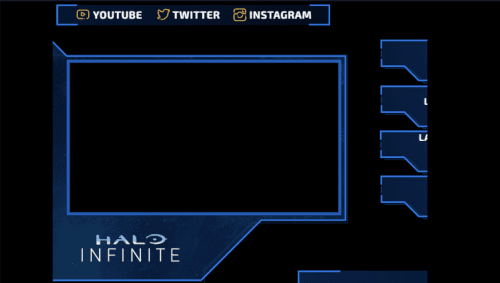
Hence, it would be best if you made all the Stream Elements overlay editor adjustments. Because whatever you create in the editor will show up on the stream canvas of OBS Studio.
How to Add Overlay to OBS Studio: Using an Image
If you’ve bought any stream overlay pack and you want to add its images as an overlay on OBS canvas, you can do that by following these steps:
- Unzip the file that you’ve got from a stream overlay marketplace.
- Note the file’s location, as you’ll have to point OBS to that later.
- Open OBS Studio.
- Click Add Scene (plus icon) below the Scenes card.
- Rename it to the main screen, chat box screen, etc.
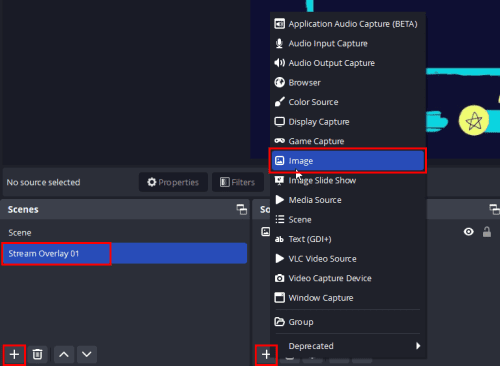
- Select the new scene and then click Add Source button below the Sources card.
- Click Image on the context menu that opens. You’ll get a prompt to rename the source.
- Click OK on the rename box and select Browse to locate the image you want to add as the main screen overlay.
How to Add Overlay to OBS Studio: Using a Video or GIF
You may want to use animated stream overlays to elevate your brand image among those streamers who use text or image overlays. Using a video overlay is simple when you broadcast your live video on YouTube or Twitch using OBS Studio.
Follow these steps to add a video or GIF overlay in the OBS streaming canvas:
- Create a new scene for the video overlay and give it a name.
- Select the scene name and then click Add Source button on the Sources card of OBS.
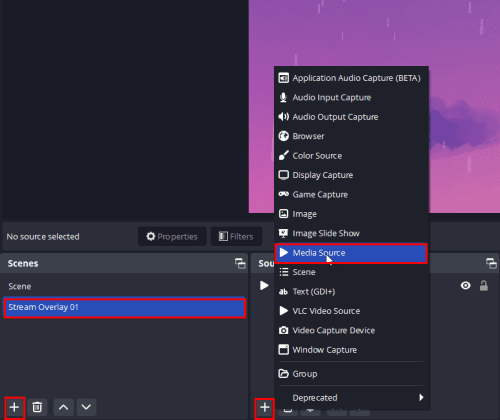
- Choose Media Source on the context menu and type in a name for it.
- Now, click the Browse button to locate the video or GIF content you want to insert as a stream overlay.
- Checkmark the box for Loop.
- Click OK.

- Now, use the free scaling feature to adjust the video overlay on the OBS canvas.
- Alternatively, use the hotkey Ctrl+F to fit the overlay to the canvas.
How to Add Twitch Chat Overlay to OBS Studio
The easiest way to add Twitch chat overlay to OBS Studio is the URL for the chat. Find below the quick steps you must perform:
- Click on your avatar or profile picture from the Twitch home page in the top-right corner.
- On the context menu that follows, click Channel.
- You should see the Chat tab on your channel. Click on it.
- The Stream Chat panel will appear on the screen’s right side.

- Click the cogwheel (Settings) icon available at the bottom-right corner of the chat panel.
- On the Chat Settings context menu, click Popout Chat.
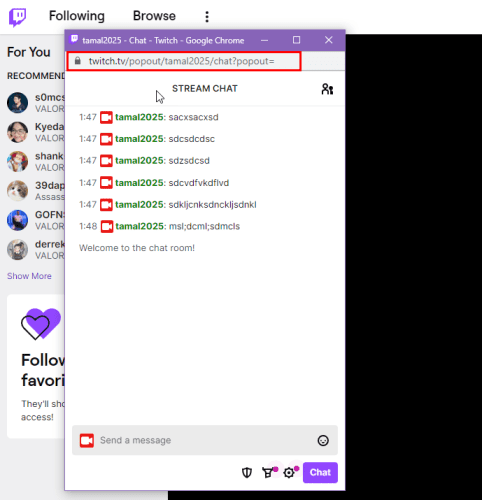
- Copy the URL of the chat pop-up.
So far, you’ve sourced the URL for the chat page. Now, follow these steps to place the Twitch chat pop-up on your OBS Studio streaming canvas:
- Create a dedicated scene for the Twitch chat pop-up from the Scenes card on OBS.
- Add a new source for the scene from the Sources card and choose Browser.
- On the Create/Select Source dialogue box, give it a name and click OK.
- Now, paste the chat pop-up URL in the URL field.

- Click OK, and the Twitch chat will appear on your OBS canvas.
Wrapping Up
So, now you know how to add an overlay to OBS Studio and stand out from the crowd of millions of streamers on YouTube, Twitch, Facebook, and more.
Your viewers will love to see a creative yet distraction-free stream overlay when you stream
gameplay, an interview, a live discussion with your subscribers, and so on.
Start using a stream overlay and build your brand in the live-streaming niche! Share your comments below to suggest a good stream overlay or streaming tips to the streamers’ community.
Next up, build the best streaming PC and free VPN for streaming live video.