Enabling the onscreen keyboard on your Windows computer gives you the liberty to use your computer in tablet mode. This option can be helpful if a key on the physical keyboard is not working and you need to get some work done. The good news is that enabling the feature is quick and easy, but there is more than one way to turn it on. If you experience issues with one, you can always try the other. You’ll also see how you can personalize the keyboard with all the available colors.
Contents
How to Turn on the Onscreen Keyboard on Windows 11
Let’s start with the easiest way to access the option to enable the onscreen keyboard. You’ll need to access Settings. The quick way is to press the Windows and I keys. Or, you can click on the Windows Start icon, followed by the Settings app. Once you’re in Settings, go to Personalization, followed by Taskbar.
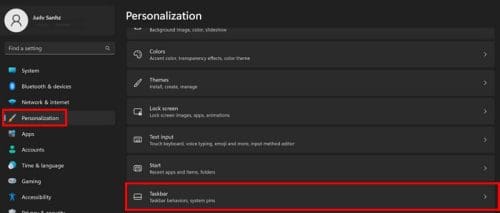
On the next page, toggle on the option for the Touch Keyboard option. Once you enable the option, a keyboard icon should appear on the taskbar. You’ll need to click this icon to use the onscreen keyboard. But, if you prefer keyboard shortcuts, you can use the Ctrl + Win +O keys.
You can also access the onscreen keyboard through the Run box. Press the Windows and R keys. When the Run box appears, type osk and press enter. The keyboard should appear. Another easy way to access it is by using the search bar. Start typing onscreen keyboard, and the option to open it should appear.

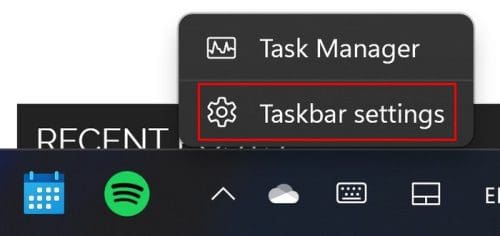
You can also enable the Touch Keyboard option by right-clicking on the taskbar and choosing the Taskbar Settings option.
Another path you can take is by going to:
- Settings
- Accessibility
- Keyboard
- On-screen keyboard
That’s all there is to it when it comes to enabling the onscreen keyboard. If you’re unhappy with the keyboard’s design, you can make changes, but we’ll get into that later.
How to Disable the Windows 11 Onscreen Keyboard
Now that you know how to turn it on, here is how to turn it off if you ever decide you don’t need it anymore. To disable the onscreen keyboard, go to:
- Settings
- Personalization
- Taskbar
- Toggle off the Touch Keyboard option
How to Customize the Onscreen Keyboard
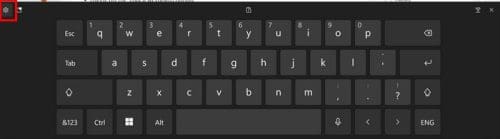
If you feel that the onscreen keyboard is missing something, you can customize it by clicking or tapping on the cogwheel on the upper-left-hand side of the keyboard.
You should have access to all sorts of options, such as:
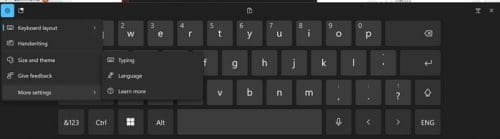
- Keyboard layout – You can choose from size options such as default, small, split, and traditional
- Handwriting
- Size and theme
- Give feedback
- More Setting: In this section, you’ll see additional options such as Typing, language, and Learn more
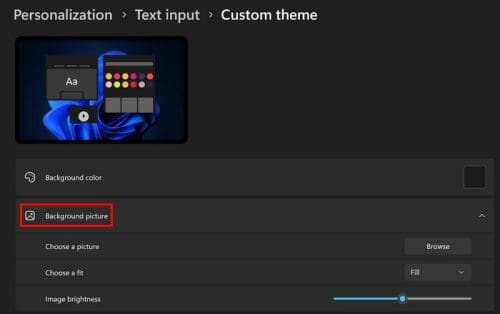
In the Size and Theme section, you can choose from a large variety of colors for the keyboard. As soon as you select a color, you’ll see a preview of how the color will look at the top. If you’re not happy with any of the colors, you can choose the Custom Theme option. Here you can do things such as add a picture as the keyboard’s background.
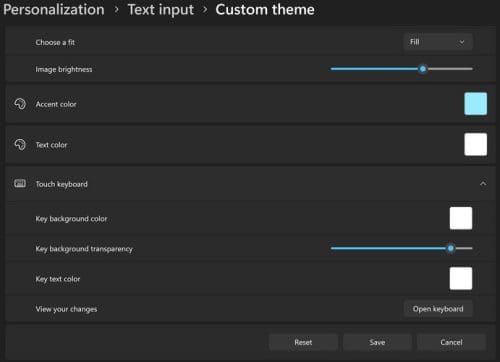
When you’re done adding the image, you can do other things, such as:
- Adjust the image brightness
- Accent color
- Text Color
- Key background color
- Key background transparency
- Key text color
- View your changes
If you’re unhappy with your final options, you can start over by choosing the Reset button. But if you like what you see, don’t forget to select the Save button.
Ensure you get the most out of the keyboard by using emojis. You can access them by clicking or tapping on the heart icon. On the upper right-hand corner, you can also access it by using the Windows and period keys ( Win + . ).
Further Reading
As long as we’re on the subject of keyboards, here are some suggestions for some new physical keyboards if you’re in the market to buy new ones. But if you need suggestions for gaming keyboards, here are some suggestions as well. Since you’ll also deal with keyboards on your Android device, here are some tips when switching or adding one. Here are some suggestions to start with, but you can search for more articles using the search bar. Happy reading!
Conclusion
The onscreen keyboard is essential when you feel like using your Windows computer as a tablet. You can see that you can access the option to enable or disable the keyboard in various ways. You can also add your personal touch to it by adding your favorite colors and a background image as well. There are also options to adjust the brightness and change the text color. If you ever want to go back and change anything, you can since none of the changes are permanent. What changes will you be making to the onscreen keyboard? Let me know in the comments below, and don’t forget to share the article with others on social media.