There are two types of channels in a Slack workspace: public and private. Channels are public by default but can be configured to be private instead when they are created or at any time. Private channels can’t be changed back to being public channels.
Public channels are visible in the channel browser to all members of the workspace and can be joined at any time. Private channels are hidden from non-members and can only be viewed or joined by invitation.
This difference in privacy and accessibility makes public channels ideal for most communications. For example, having a team’s channel be public means that if anyone needs to contact them, they can choose to temporarily join to ask their question. Similarly, people can see if there are any special-interest channels that they are interested in that they can then easily join. Private channels are ideal for discussing more sensitive topics that most users should not see. For example, if there is an HR complaint against someone, or if the company is planning layoffs, etc.
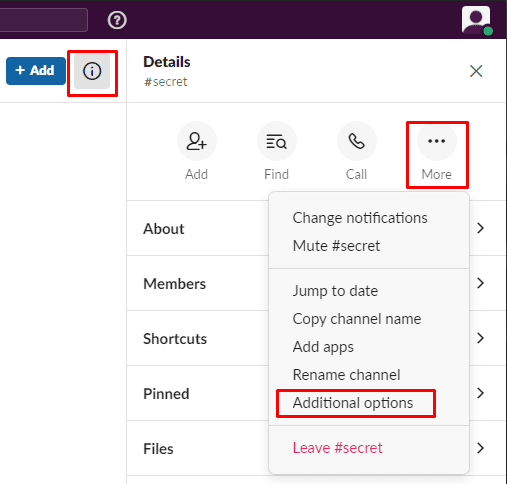
If you want to change the status of a public channel to make it private, you need to go into the additional channel options. To do so, open the channel you want to change, click the “Show channel details” button in the top-right corner, then click the triple-dot icon labelled “More” and select “Additional options”. Alternatively, you can right-click on the channel in the list and select “Additional options” from the right-click menu, but it is easier to accidentally click on the wrong channel.
In the additional options, select “Change to a private channel”.
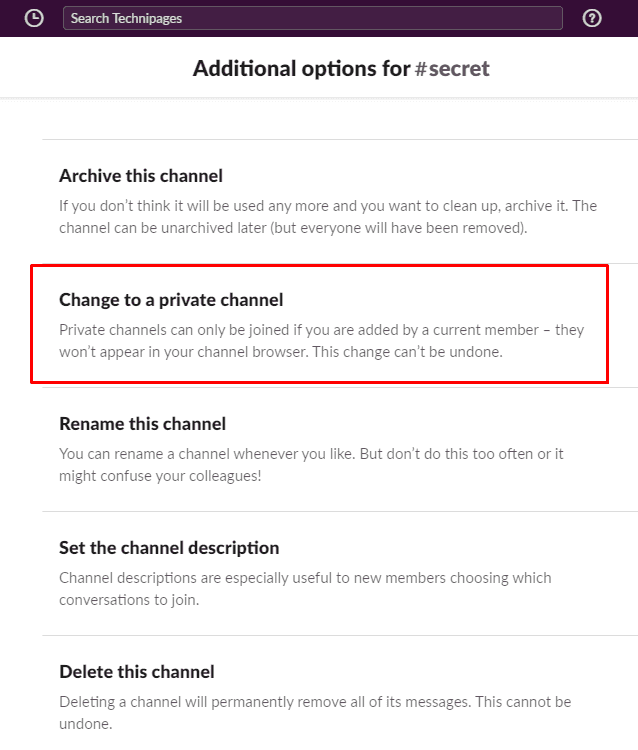
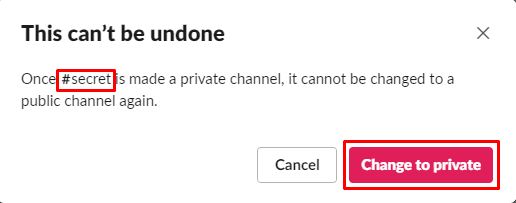
Changing the channel to private will not make files that have been shared already private, they will remain public. Additionally, the channel history and the member list will be unaffected by the change. If you want to continue and are aware that it is impossible to make a private channel public again, click “Change to private”.

A final pop-up notice will appear to remind you that you will be unable to make the channel public again. If you’re sure, double-check that the channel name is correct, then click “Change to private” to finalise the change.
Setting a Slack channel to private means that users can only see or join it by invitation. By following the steps in this guide you can change a channel to private.


Unfortunately, with an update to Slack since these instructions were made, these instructions no longer work. If there’s a way to make a public channel private now, I’m not seeing it.