
Selective Sync is a very useful Dropbox feature that lets you choose which files sync to your local drive. In other words, you can select which files sync to your machine and which don’t. This is a very handy feature, especially if you have a large amount of data stored in the cloud. In this manner, you can avoid clogging up your hard drive with large files.
In this guide, we’ll show what are the steps to follow to enable Selective Sync. Unfortunately, this feature may not always work as intended. That’s why the second part of this guide is actually a troubleshooting section. We’ll explore how you can fix various Selective Sync issues on Dropbox.
How To Use Dropbox Selective Sync
Selective Sync is available to all Dropbox users. So, if you’re on the free Basic plan, you can enable it without any problems.
Here’s how you can turn on Selective Sync on Dropbox:
- First, you need to install the Dropbox desktop app on your computer.
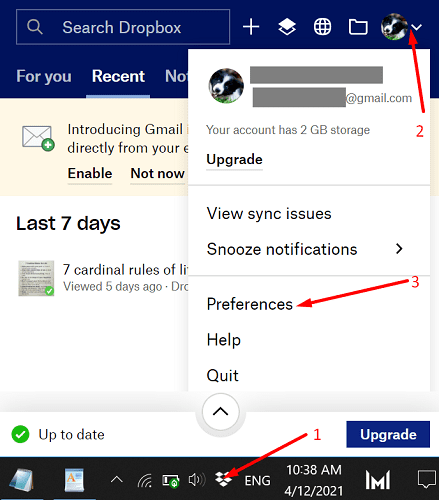
- Then, launch the app, click on your profile picture (top-right corner), and go to Preferences.

- Select the Sync tab and go to Selective Sync.
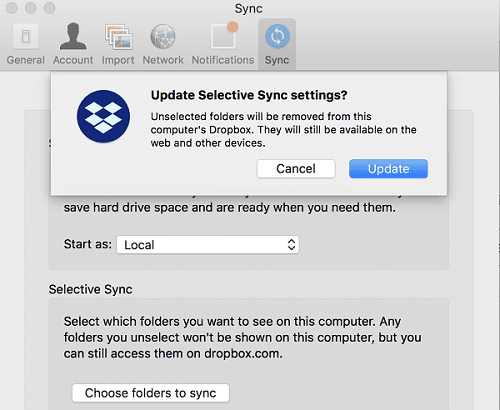
- Click on Selective Sync (Windows). By the way, if you’re on Mac, select Choose folders.

- Select the folders you want to save on your local hard drive. Simply, uncheck those that you don’t want to sync locally.
- Hit the Update button to apply the changes. That’s it.

Smart Sync vs Selective Sync: What’s the Difference?
There’s another interesting Dropbox option worth mentioning called Smart Sync. This option lets you make files online-only. This means you can free up more storage space on your computer by storing the contents of your files exclusively in the cloud.
So, the main difference between Selective Sync and Smart Sync is the place where you store your files (your local drive vs. Dropbox cloud). Online-only files won’t appear under Selective Sync because you can only store them in the cloud.
Fix Dropbox Selective Sync Not Working
When the Selective Sync feature is not working, Dropbox often fails to remove the files you selected and syncs them to your local drive. So, it’s doing the opposite of what it’s supposed to do. Let’s see how you can fix this issue and other common problems.
Fix Dropbox Selective Sync Conflicts
You may occasionally get the “Selective sync conflict” alert for certain files and folders. This usually happens because there’s already a folder with that name stored in the same location. So, when you try to sync the new file, Dropbox will alert you about the issue by adding the words “Selective sync conflict” after the file name. The quickest way to solve the problem is to change the name of the unsynced file.
Performing Initial Sync With Server
If Dropbox says it’s “Performing initial sync with server“, wait until the service has indexed all the files in your Dropbox folder. This alert may also indicate you paused syncing from the menu. If this is the case, you can resume syncing at any time you want. If you want to simply dismiss the message, hit the Cancel option.
Dropbox Was Unable To Update Your Selective Sync Preferences
This alert indicates the service could not apply your latest Selective Sync settings. There are three main reasons that could trigger this alert and we’ll list them below.
- The respective files are already in use. Check if you already opened the problematic files in another program. You need to close those apps to allow Dropbox to save your new sync settings. Additionally, make sure you’re not using symlinks or referenced files.
- You’re running low on storage space. Check if your hard drive is running low on space. If there’s no room to save the data, you need to declutter your drive and free up some space.
- You don’t have the necessary file permissions to edit or sync the files. The good news is that you can quickly fix this problem by changing the file permissions.
If you’re on Windows 10, you can run the iCACLS commands in Command Prompt. Run the commands below one at a time and hit Enter after each one. Wait until Command Prompt has finished running the current command before entering a new one.
icacls "D:\Dropbox" /grant "%USERNAME%":(F) /Ticacls "%HOMEPATH%\Dropbox" /grant "%USERNAME%":(F) /Ticacls "%APPDATA%\Dropbox" /grant "%USERNAME%":(F) /T
If your Dropbox folder location is not C:\Users\UserName\Dropbox, edit the commands accordingly. Launch Dropbox again and check if the issue is gone.
On Mac, launch Terminal and run the following commands:
sudo chflags -R nouchg ~/Dropbox ~/.dropbox ~/.dropbox-mastersudo chown "$USER" "$HOME"sudo chown -R "$USER" ~/Dropbox ~/.dropboxsudo chmod -RN ~/.dropbox ~/Dropboxchmod -R u+rw ~/Dropbox ~/.dropbox
Selective Sync Not Freeing Up Space

If you enabled Selective Sync but Dropbox doesn’t remove any files, check if you reached your Dropbox space usage quota. When that happens, Dropbox will stop syncing your files and won’t remove anything. You need to bring your account under quota for Dropbox to resume syncing and remove the files you selected under Selective Sync.
For example, leave large shared folders because they also take up space on your account. Additionally, you can use referral bonuses to increase your storage space quota or simply upgrade your account.
Selective Sync Not Showing All Folders
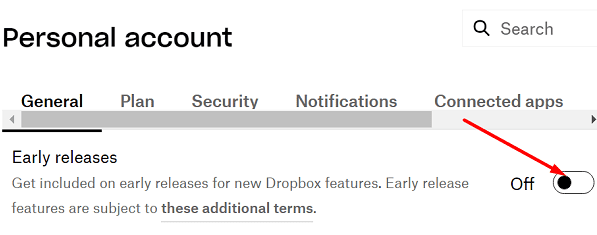
If Selective Sync doesn’t show any folders, that may happen as a result of Beta releases.
- Launch your browser and go to www.dropbox.com.
- Login to your account and click on your user name.
- Then go to Settings, select the Profile tab and scroll down to Preferences.
- Uncheck the Early releases option.

- Save the settings, launch your Dropbox app again, and check the results.
By the way, even if you disable early releases, you can still sign up to get emails about new features and tips.
Conclusion
Selective Sync is a handy Dropbox feature that you can use to select which files sync to your computer drive and which remain stored in the cloud. But this option may sometimes fail to work as intended. For example, SelectiveSync won’t save your settings or fails to free up space on your drive. This guide brought you a series of specific solutions for each issue. Hit the comments below and let us know if you managed to solve your Dropbox problems.


i still can’t get the Desktop app to show the shared folders, and that is where all my work is. Are there any other solutions?