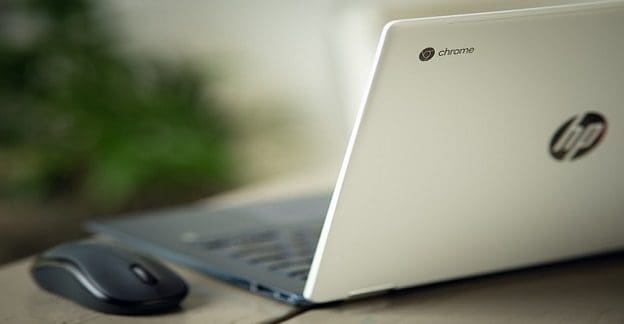
We’ve all been there. You’re ready to start your day, you open your Chromebook, and… nothing happens. It’s a frustrating situation, but don’t panic just yet. In this post, we’ll explore why your Chromebook might not be turning on and provide some troubleshooting steps that could help you get back up and running.
Contents
Is Your Chromebook Plugged In?
The battery is the lifeblood of your Chromebook, and if it’s not functioning correctly, your device won’t turn on. A simple test is to plug in your charger and see if there’s any indication that the device is charging – usually a light on the side of the Chromebook. If there’s no sign, try using another charger if one is available. Chargers can get damaged over time, and it could be the culprit. If a different charger doesn’t solve the issue, the problem might be with the battery itself. Over time, batteries lose their ability to hold a charge, and eventually, they must be replaced.
Additionally, the problem might not be with your Chromebook at all. It could be the power socket you’re using to charge your Chromebook. Try plugging the charger into a different socket to rule out this possibility.
Chromebook Screen Not Turning On
A black screen doesn’t necessarily mean your Chromebook isn’t turning on. It could be a display issue. First, try adjusting the brightness. If that doesn’t work, connect your Chromebook to an external monitor. If the external display works, it indicates your Chromebook’s screen is the problem. This could be due to various reasons, such as a faulty backlight or a loose or broken display cable. In such cases, professional repair or replacement is usually required.
Remove Anything That’s Connected to Your Chromebook
If you find that your Chromebook is not turning on, you can remove any peripherals from the various ports on the Chromebook, then restart the device. While ChromeOS pretty much offers a “plug and play” solution for many accessories, there are still some instances when the peripheral just isn’t properly communicating with your Chromebook. Once everything is removed, press and hold the Power button on your Chromebook to see if it will come back to life.
Hard Restart Your Chromebook
Operating system crashes can prevent your Chromebook from turning on. This usually happens due to software conflicts, corrupted files, or issues with recent updates. A hard reset often resolves this issue. To perform a hard reset, press and hold the Refresh and Power buttons simultaneously for about 10 seconds. This forces your Chromebook to restart, and in the process, it may fix the software issue, preventing it from booting up.

Check for an Update
Keeping your Chromebook updated ensures you have Google’s latest features, performance improvements, and security patches. The Chrome OS, Chromebook’s operating system, is designed to download and install updates when connected to the internet automatically. However, there might be times when you want to check for updates manually.
- Open the Settings app on your Chromebook.
- In the left side panel, click the About ChromeOS button.

- On the right side of the page, click the Check for Updates button.

- Wait for any updates to finish downloading.

- When prompted, restart your Chromebook to install the updates.

Remember, regular updates not only provide new features but also ensure your Chromebook remains secure against potential threats. As always, if you encounter any problems or have further questions, feel free to drop a comment below.
Try Signing in With Another User
Whether you’re sharing your Chromebook with a family member, a friend, or a colleague, adding a new user to your Chromebook is an excellent way to keep individual files and settings separate and secure. Users get their own space on the device for files, settings, and bookmarks, ensuring a personalized and clutter-free experience.
- Start from the main login screen, which displays all the current user accounts on the device. If you’re already logged into an account, click on the time in the bottom-right corner of the screen, and then click on the ‘Sign Out’ button in the pop-up menu to return to the main login screen.
- Click the Add Person button in the bottom left corner of the screen.

- When prompted, enter the Google account information for the user that you are adding.

- Follow the on-screen steps to finish adding and signing in with a different user.

Once the terms have been accepted, the new user will be logged in, and they can customize their account settings, such as setting a profile picture and choosing a theme. Adding a new user to your Chromebook is a straightforward process that allows multiple people to use the same device while still having their own personalized and secure space.
Powerwash Your Chromebook
Software glitches can sometimes cause power issues. If you’ve recently installed a new app or extension, or if your Chromebook has just updated, a software glitch could be the cause. A factory reset, or “Powerwash,” might be the solution in such cases. Remember, a Powerwash will erase all local data on your Chromebook, so back up any important files first. After the Powerwash, your Chromebook will be like new, with a fresh operating system and no apps or files. If the problem was due to a software glitch, this should resolve it.
- Open the Settings app on your Chromebook.
- Click the Advanced button in the sidebar on the left.

- Scroll down and click the Reset settings button in the sidebar.

- On the right side of the screen, click the Reset button next to Powerwash.

Enter Recovery Mode
Before initiating recovery mode, creating a recovery drive using a separate computer and a USB flash drive or SD card is important. Google has a handy Chromebook Recovery Utility that you can use to create this recovery drive. Remember that your USB or SD card will be formatted, meaning all existing data will be erased. Once your recovery drive is ready, you can initiate recovery mode on your Chromebook.
- Make sure that your Chromebook is turned off (if possible).
- Press and hold the ESC + Refresh keys at the same time.
- Press and hold the Power button.
- Once you see a screen that says ChromeOS is missing or damaged, let go of the keys.
- Insert the Recovery Drive into a USB port on your Chromebook.
- The recovery process should begin automatically.
- Follow the on-screen steps to finish the recovery process.
- When prompted, remove the USB drive and press the Enter key to reboot your Chromebook.
Entering recovery mode on a Chromebook is a straightforward process that can help resolve significant system issues. Always remember to back up your data regularly, as entering recovery mode will reset your device and erase all local data.
Conclusion
While it’s frustrating when your Chromebook won’t turn on, you can take several troubleshooting steps. If these solutions don’t work, don’t hesitate to contact a professional for help. You can hopefully identify and resolve each possibility by systematically troubleshooting each possibility. If all else fails, don’t hesitate to seek professional help. Remember, it’s always important to regularly back up your data to minimize the impact of such issues.
