The standard Windows 11 screen saver is fine, if a little boring. You’ll have a few images floating around a screen, often in a slideshow format. However, you might want something a little more…active. Something that’s far more interesting to watch.
You want a video screen saver.
We’ll show you how to set video as screen saver in Windows 11, including the specific software you can use to make it happen.
How to Set Video as Screen Saver in Windows 11
First, the bad news – Windows 11 doesn’t have a default method of selecting a video as a screen saver. That means no going through the “Settings” and simply choosing a video to use. You’ll need a third-party software to set a video as your screen saver, so follow these steps to get that software and use it to choose your video.
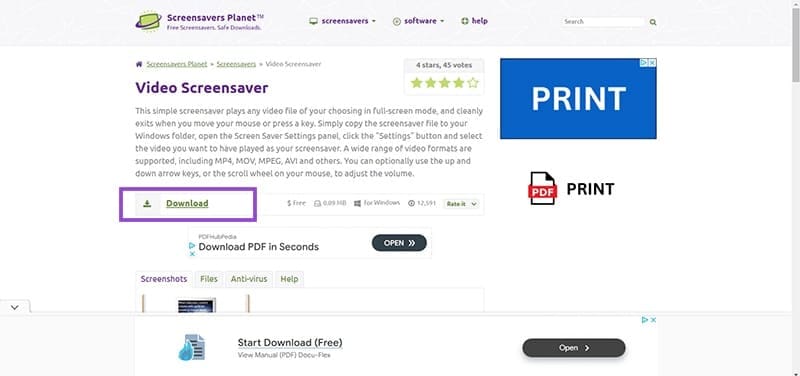
Step 1: Head to Screen Saver Planet and type “Video Screensaver” into the Search bar at the top-right corner of the screen. Hit the “Search” icon and select “Video Screensaver” from the software options displayed. It will typically be near the top of the page.

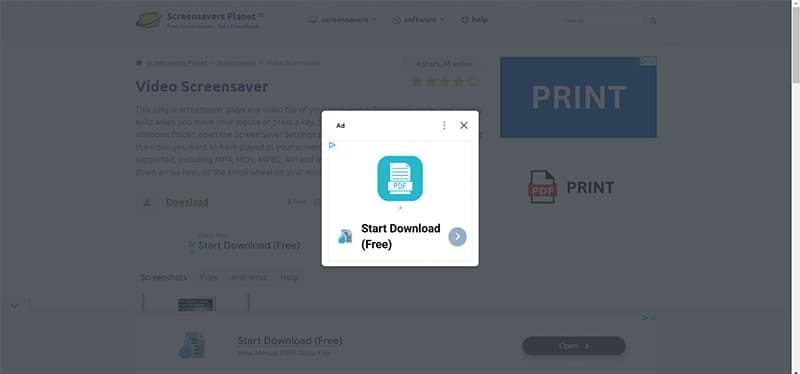
Step 2: Click the “Download” button on the resulting page. An ad will pop up telling you to “Click to Download.” Don’t do that. Instead, click the “X” at the top-right of the ad to close it and move on to the download page.
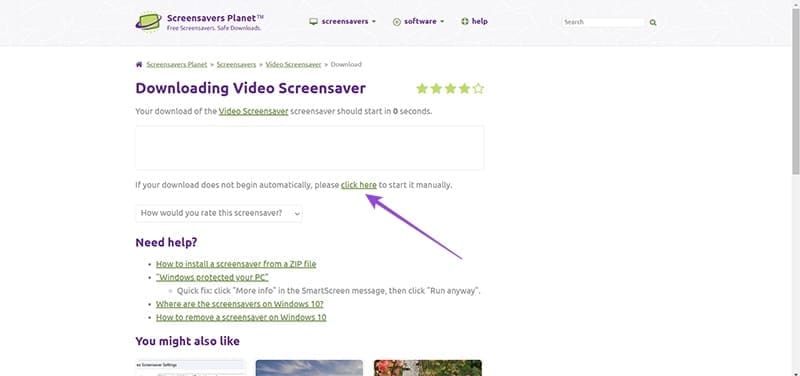
Step 3: Wait on the download page for three seconds and your software download should start automatically. If it doesn’t, hit the “Click here” link to begin the download manually.
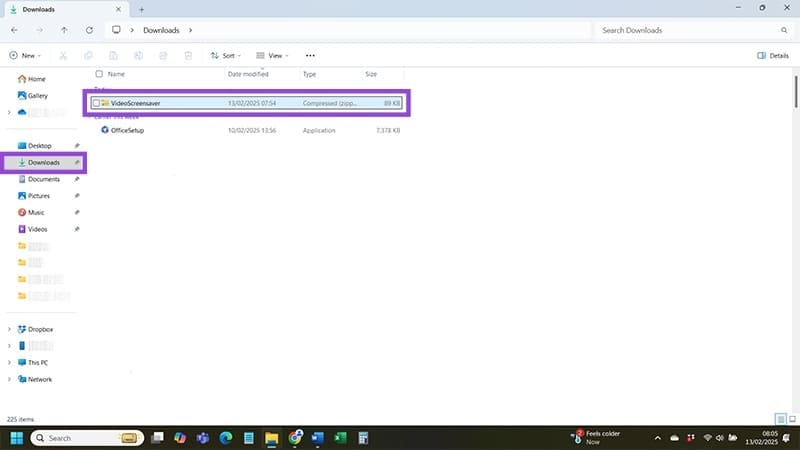
Step 4: Navigate to your “Downloads” folder and locate the “VideoScreensaver” zip file. Right-click the file and select “Extract All.”
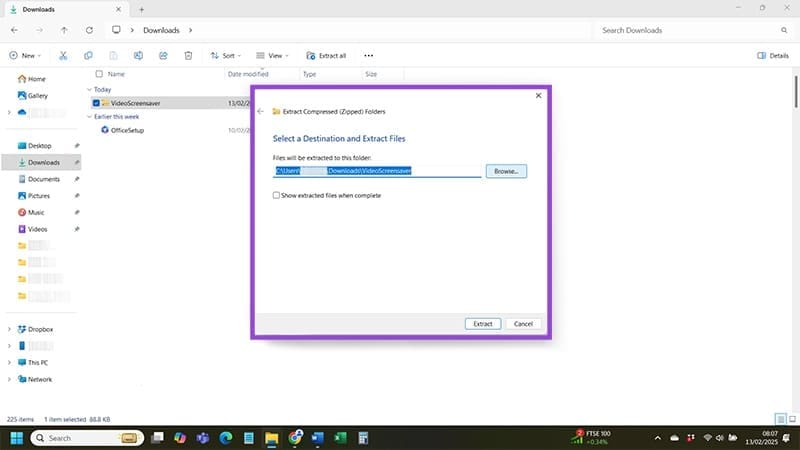
Step 5: When you’re prompted to extract the file, hit the “Browse” button. Don’t use the default file path because the extracted files need to be placed in your Windows directory.
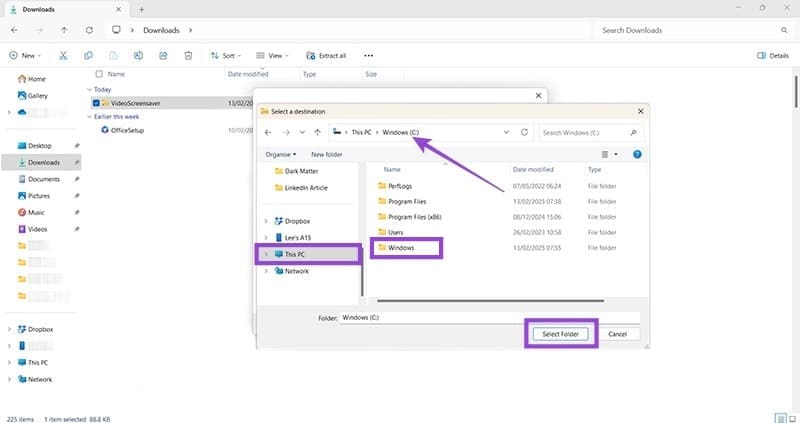
Step 6: Navigate to your Windows directory by clicking “This PC,” followed by selecting your “C” drive. Find the Windows folder inside your “C” drive and double click it. Hit “Select Folder.”

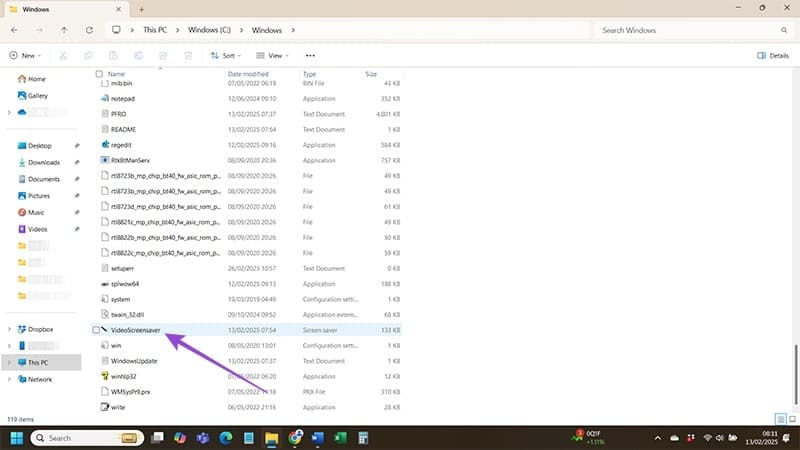
Step 7: With the extraction completed, navigate to your Windows folder using the following file path:
This PC > Windows (C:) > Windows
Locate the “VideoScreensaver” .src file that you extracted to this directory in Step 6.
Step 8: Double-clicking the VideoScreensaver.src file does nothing but pull up a blank screen telling you that the file isn’t configured. You still need to set your video screen saver. Right-click the “VideoScreensaver” file and click “Install.”
Step 9: Choose “Settings” from the menu that appears.

Step 10: Navigate through your folders to find the video that you want to use as a screen saver. Once found, either double-click the file or single-click and hit the “Open” button.

Step 11: You’ve now loaded your video file into VideoScreensaver.src. All that’s left is to set the file as your screensaver. Type “Settings” into your Windows search bar and select the icon of the same name.

Step 12: Head to “Personalization” via the navigation bar on the left side of the screen and select “Lock Screen” from the options.

Step 13: Choose “Screen saver” from the options and you will arrive at a pop-up box. Click the drop-down box underneath “Screen saver” in that menu and choose “VideoScreensaver” from the list of options.


Step 14: Hit “Apply” followed by “OK” and voila! You have set your chosen video as your new Windows 11 screen saver.