Today, we’re going to delve into a tool that can automate repetitive clicking tasks on your Chromebook: the Auto Clicker. This tool can save you time and effort, making it a powerful addition to your productivity toolkit. In this blog post, we’ll guide you through what Auto Clicker is and how to use it on your Chromebook. Let’s get started!
Contents
What is Auto Clicker?
Before we dive into the how-to, let’s briefly discuss what Auto Clicker is. An Auto Clicker is a tool that automatically clicks on your screen at set intervals. This can be useful for a variety of tasks that require repetitive clicking, such as playing certain games, filling out forms, or testing software.
Auto Clickers come in many forms, from standalone software to browser extensions. In this guide, we’ll focus on Auto Clicker extensions for the Google Chrome browser, which can be used on a Chromebook.
How to Use Auto Clicker for Chromebook Natively
For quite some time, if you wanted to use Auto Clicker for Chromebook, you needed to install a third-party extension from the Chrome Web Store. And while we’ve included a few options below, Google has actually made it possible to use this feature without installing anything else onto your Chromebook.
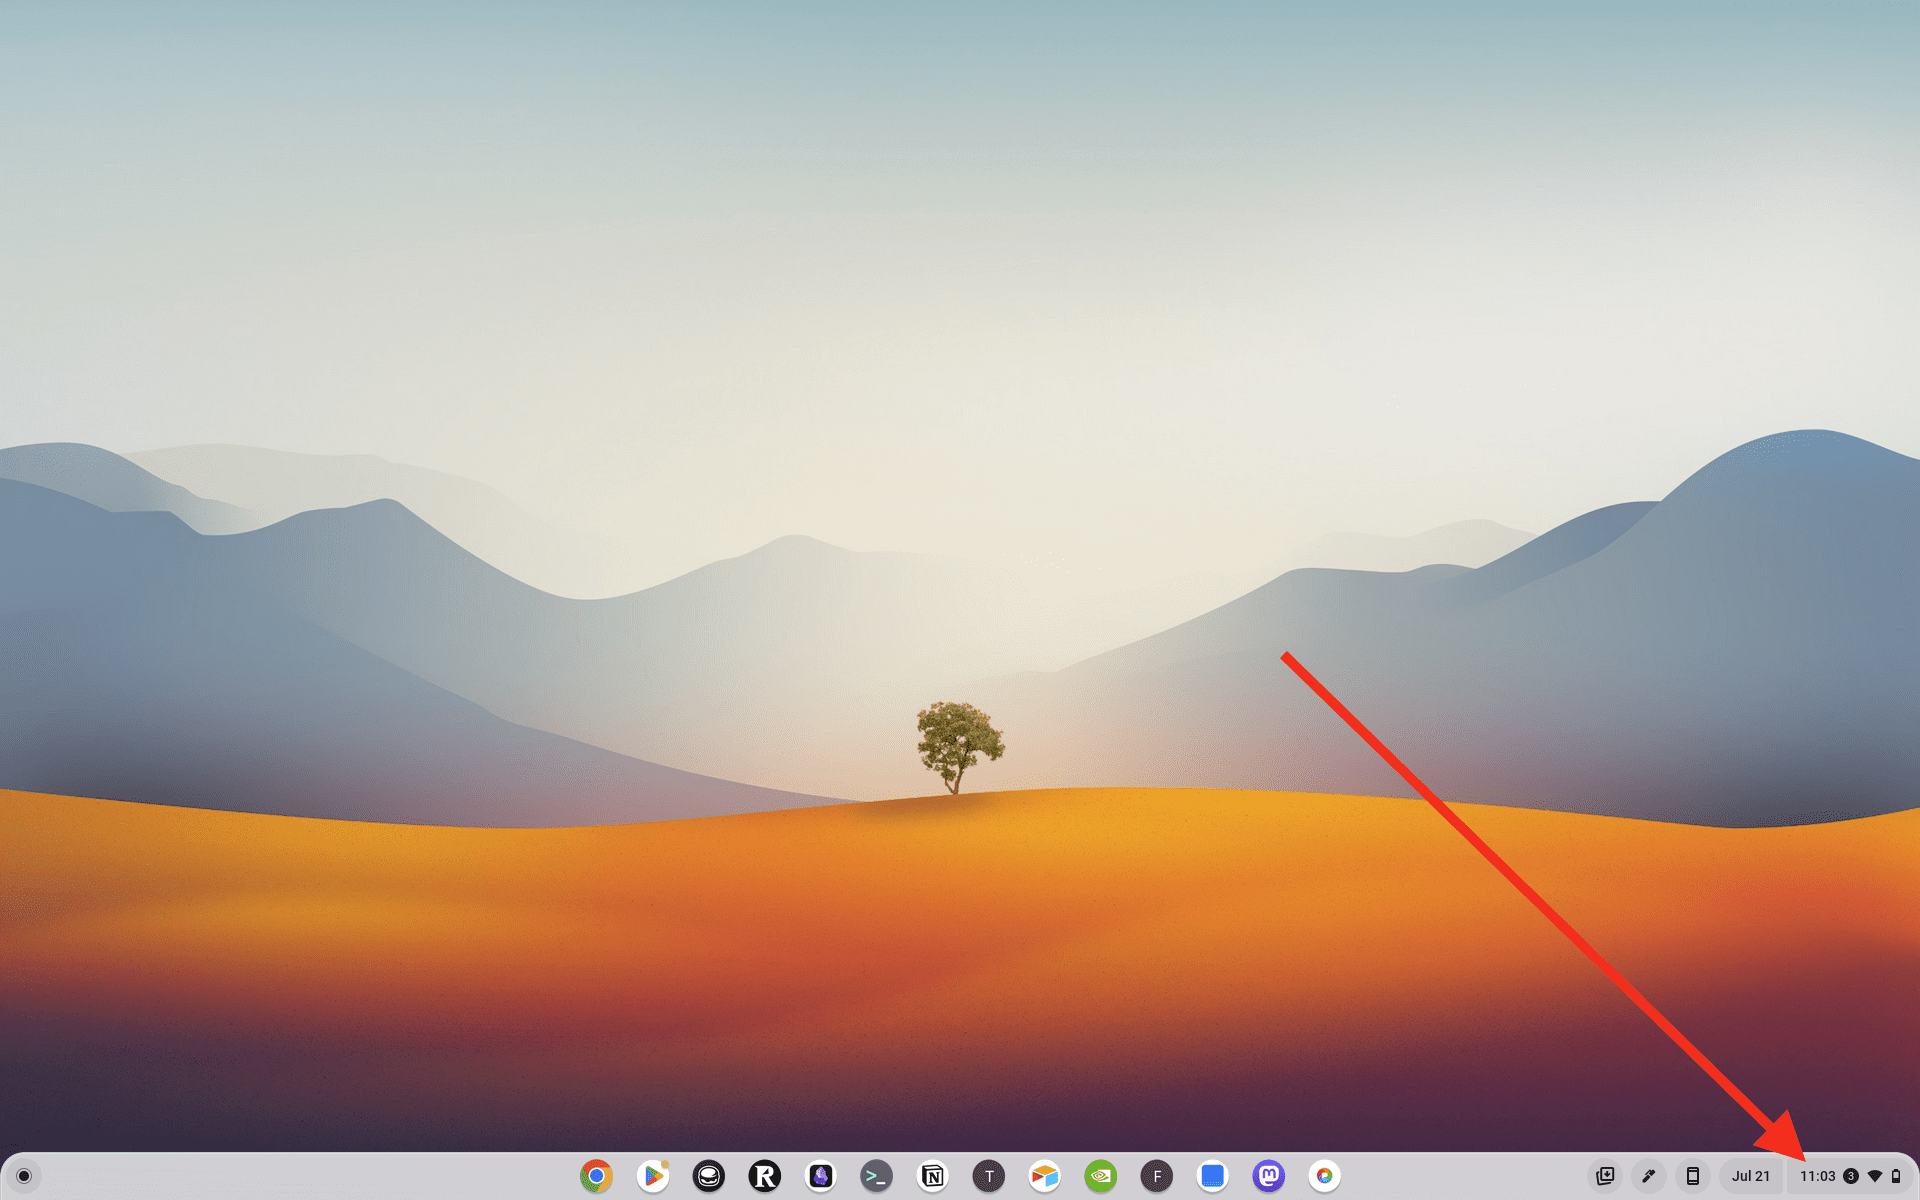
- Unlock your Chromebook.
- Click the Time in the bottom right corner.

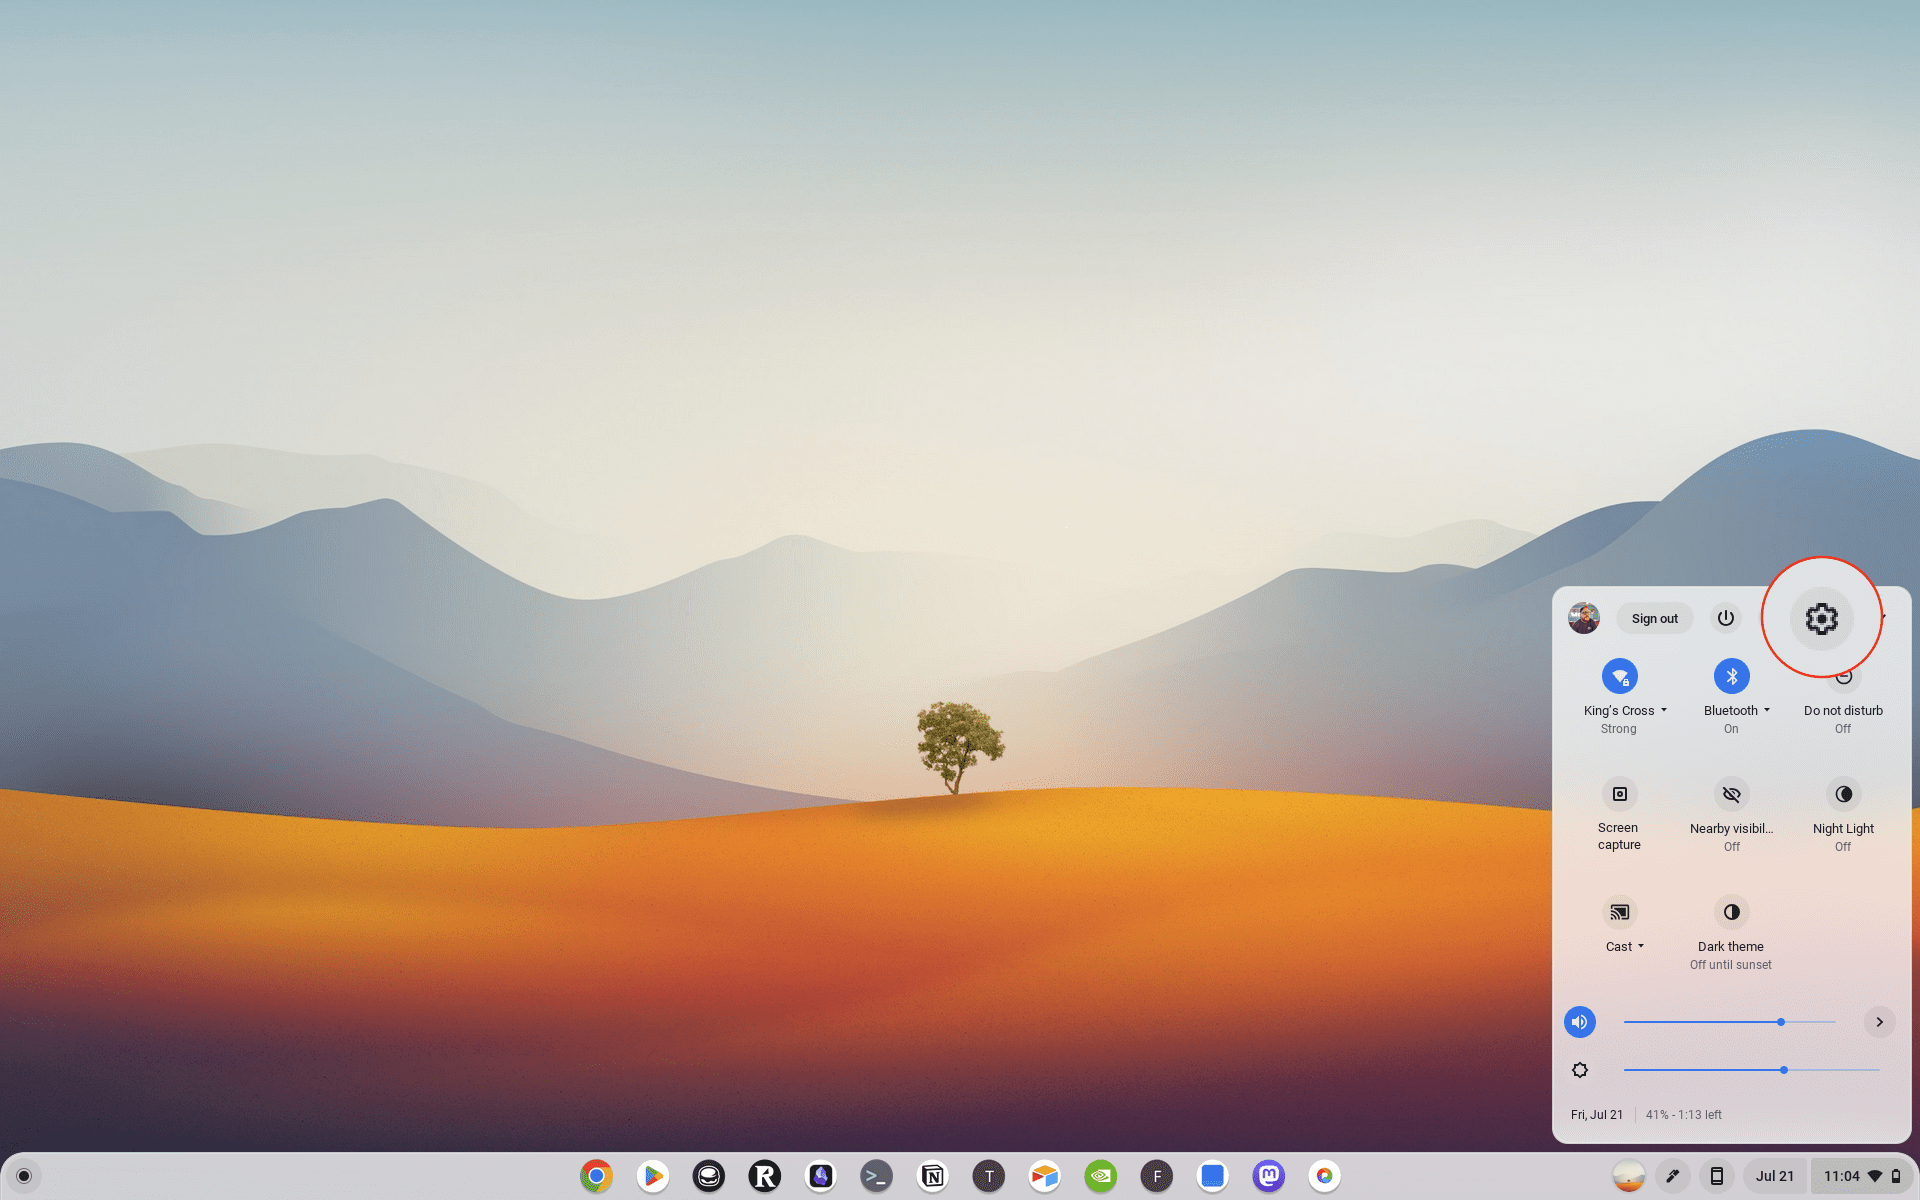
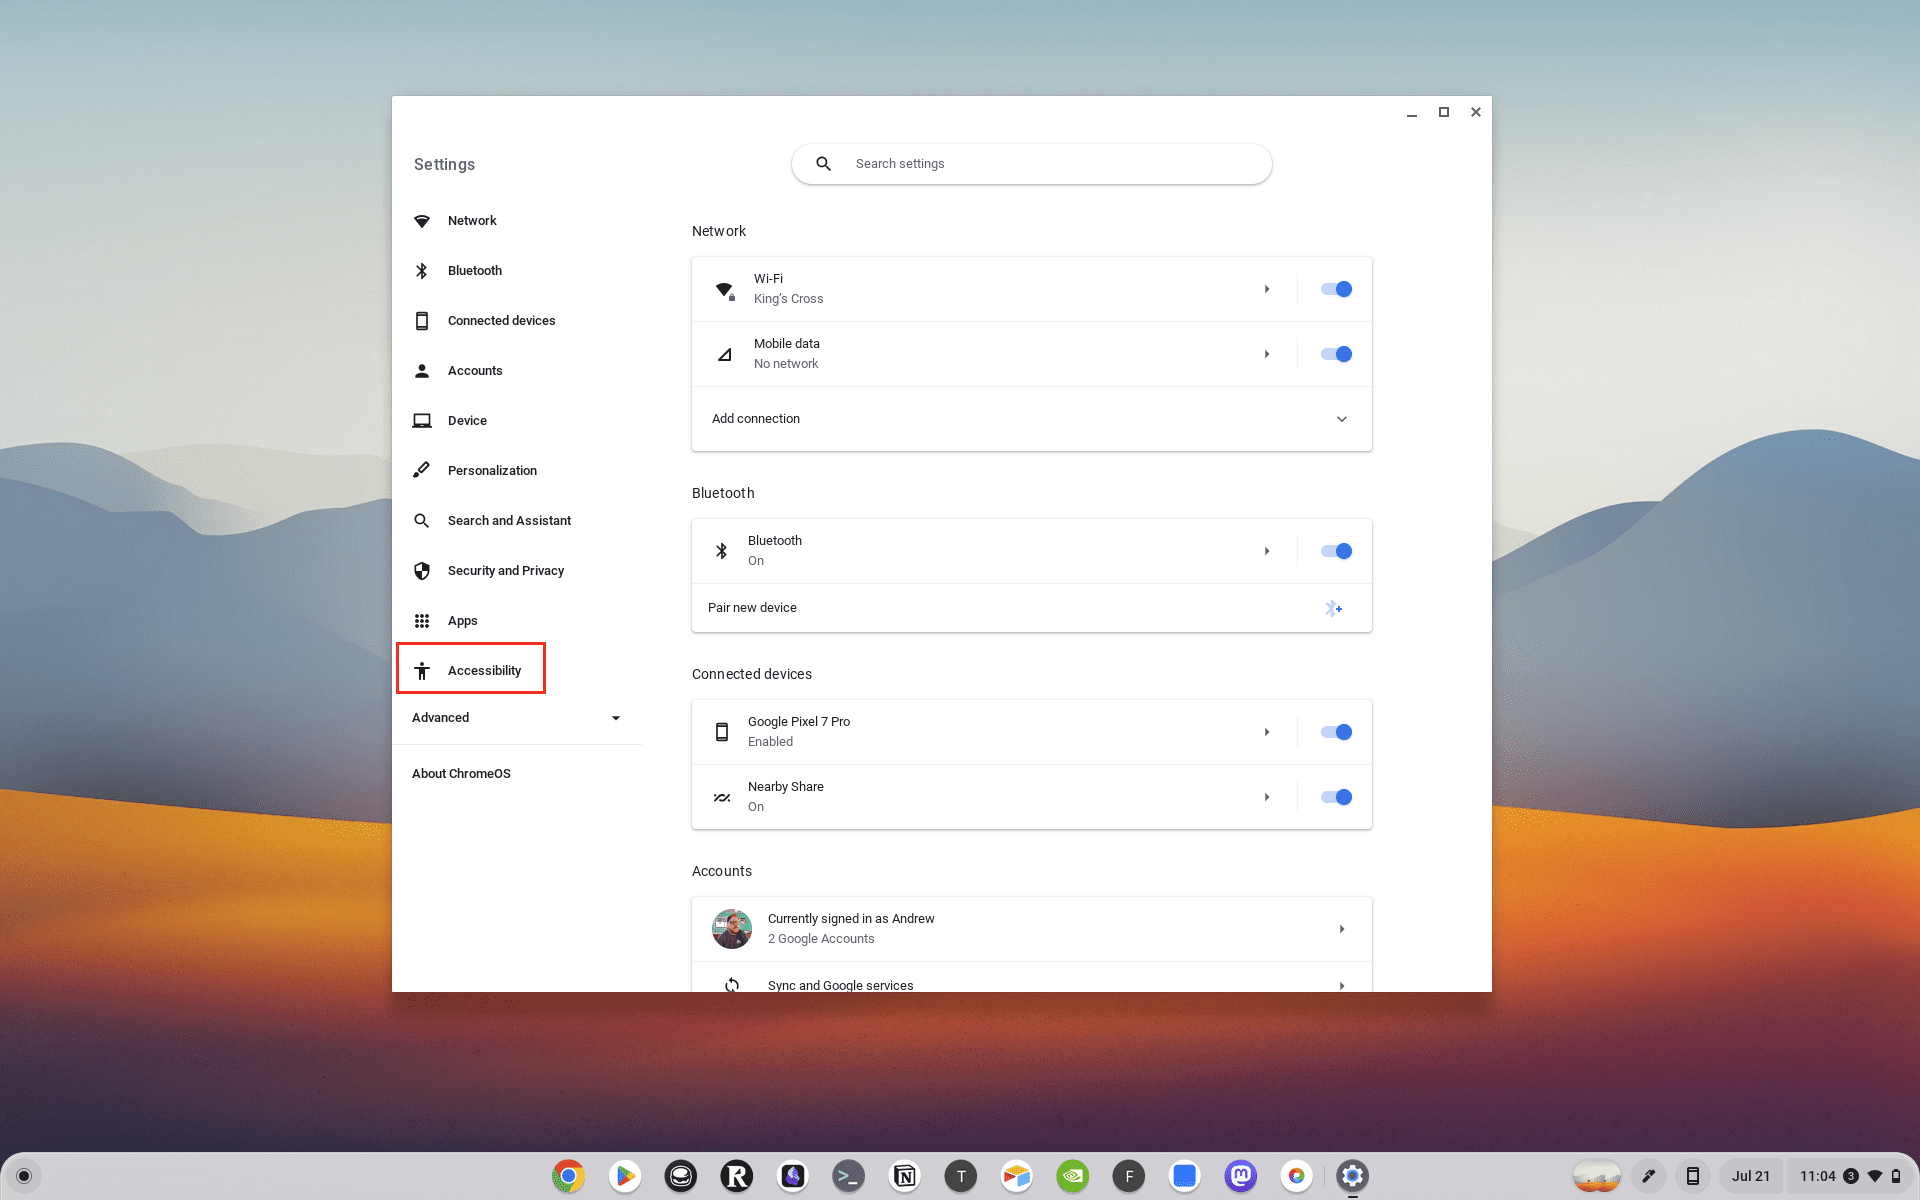
- In the window that appears, click the Settings (Gear) button.
- From the Settings app, click Accessibility in the left sidebar.
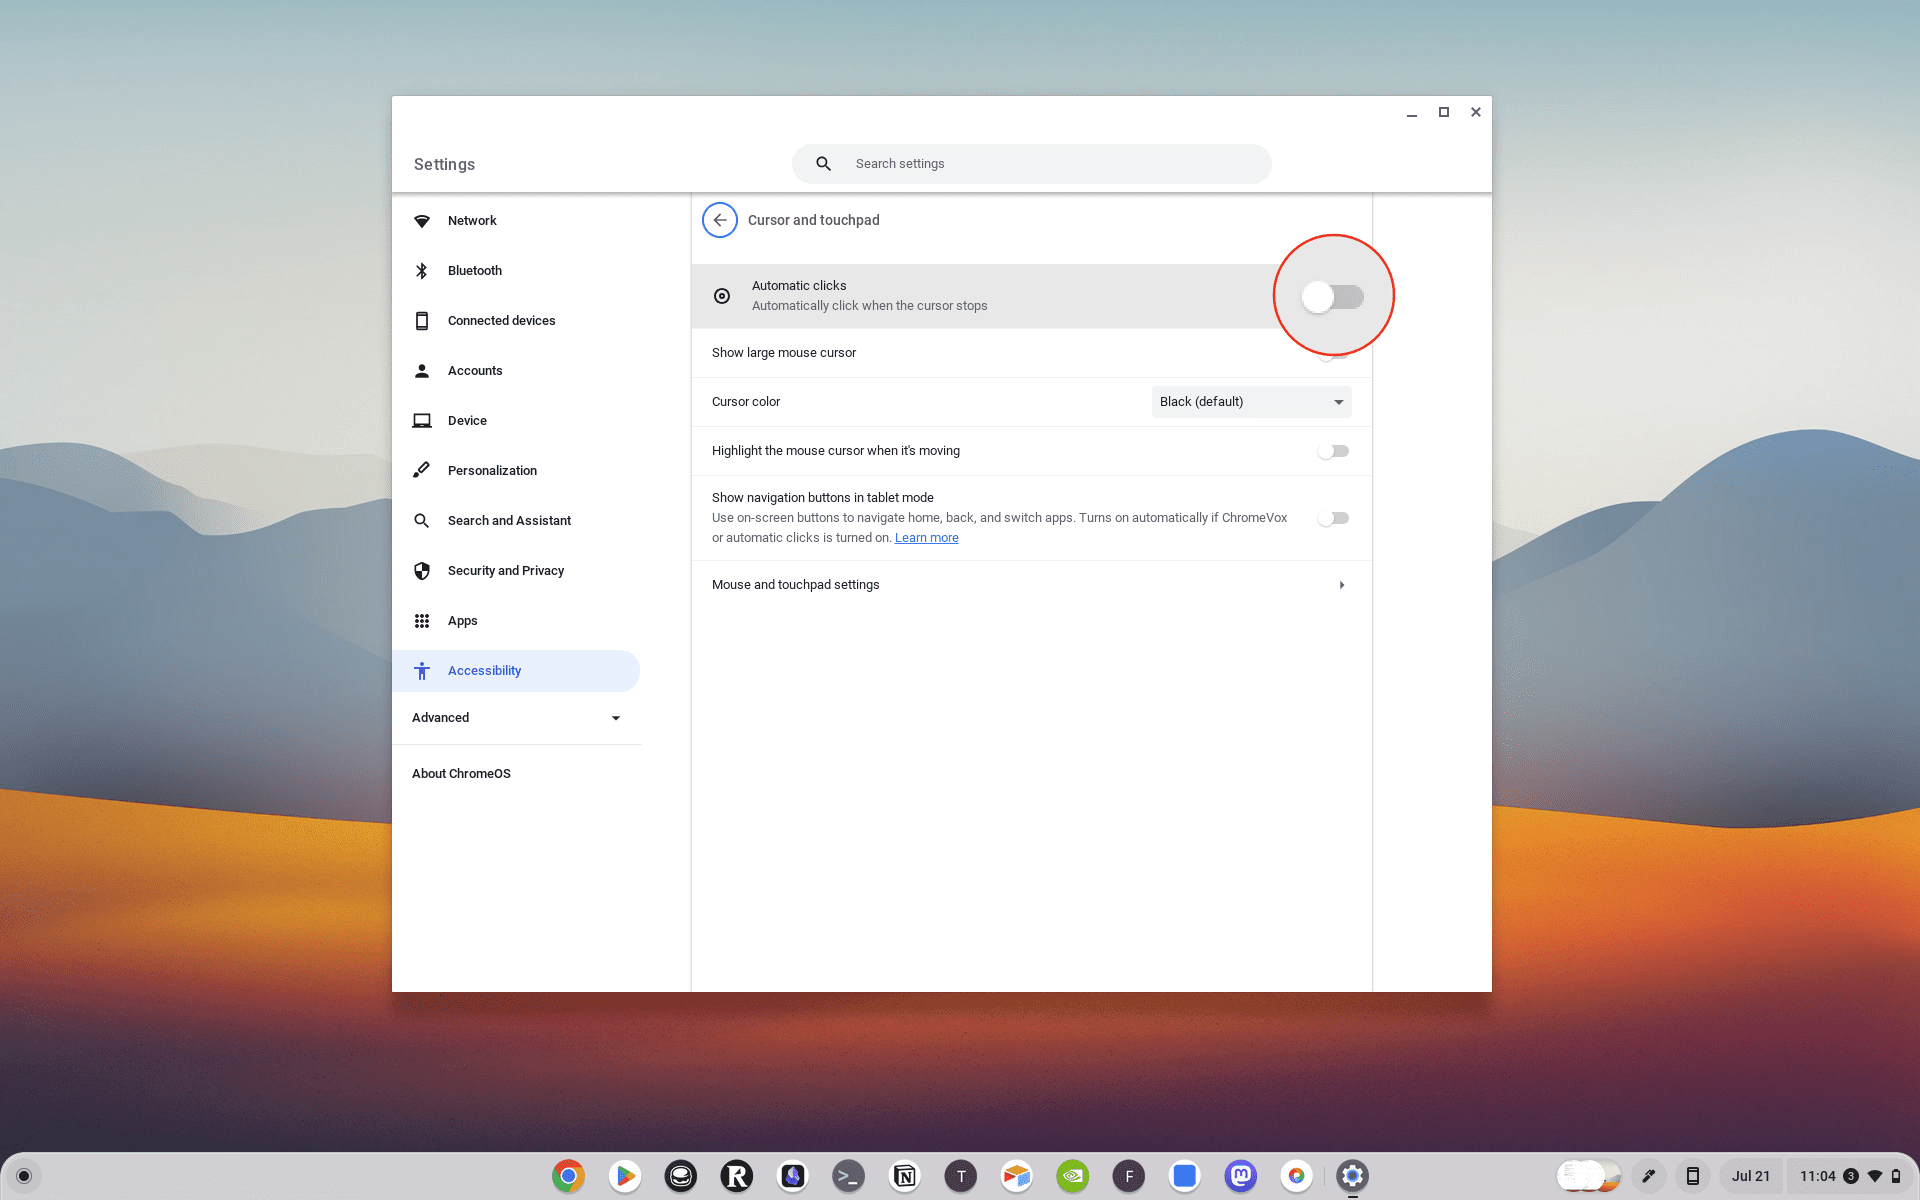
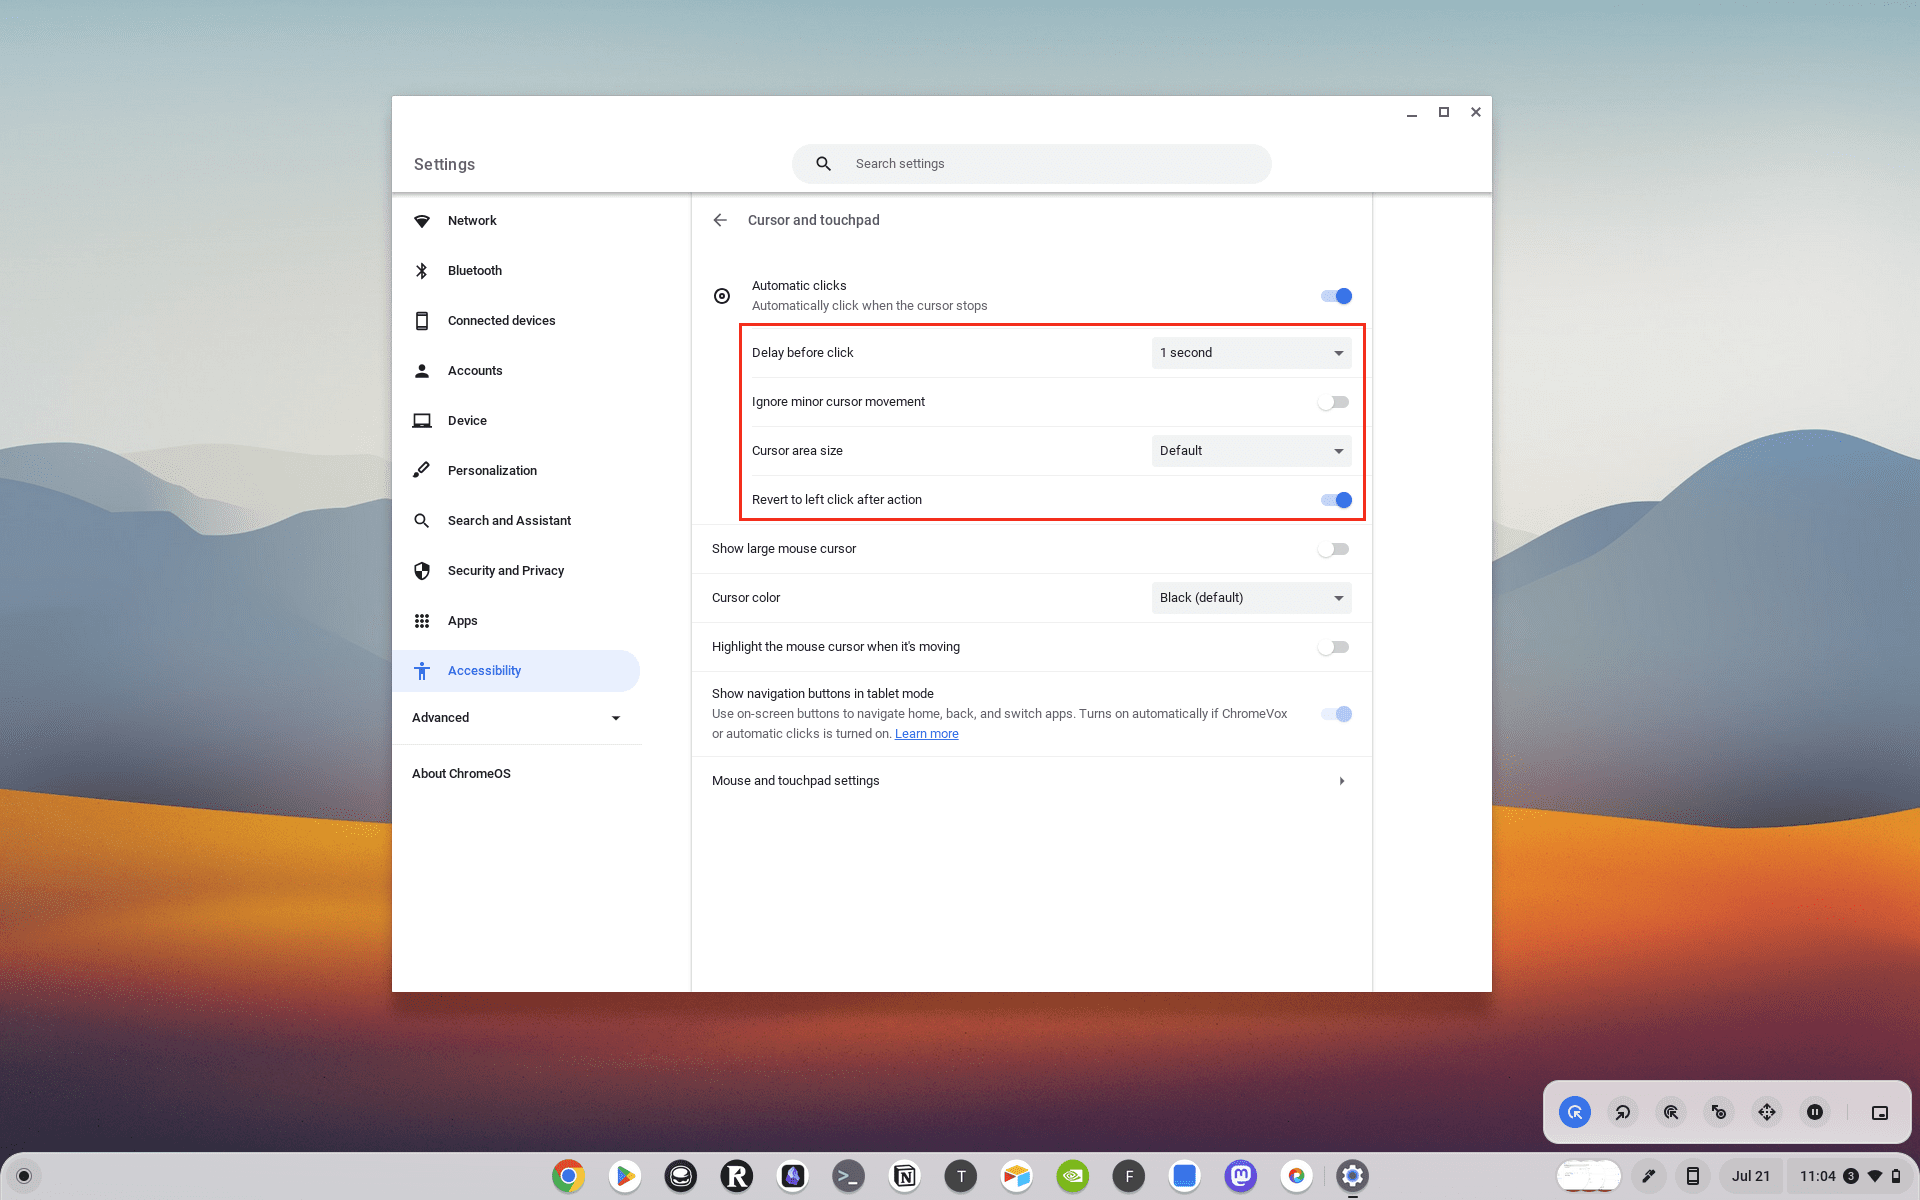
- Under the Mouse and touchpad section, enable the Automatically click when the mouse cursor stops feature.
- Customize the following options based on your needs:
- Delay before click: Choose how long your Chromebook pauses before it automatically clicks.
- Stabilize click location: Keep your ring in one place until your cursor moves outside of it.
- Revert to left click after action: Automatically return to left click after other actions, like right click or double click.
- Movement threshold: To click items within a certain range, adjust the size of your ring.
How to Install an Auto Clicker Extension
The first step to using an Auto Clicker on your Chromebook is to install an Auto Clicker extension. Here’s a step-by-step guide:
- Open the Chrome Web Store: On your Chromebook, open the Google Chrome browser and navigate to the Chrome Web Store.
- Search for Auto Clicker: In the search bar at the top-left corner of the screen, type ‘Auto Clicker’ and press Enter.
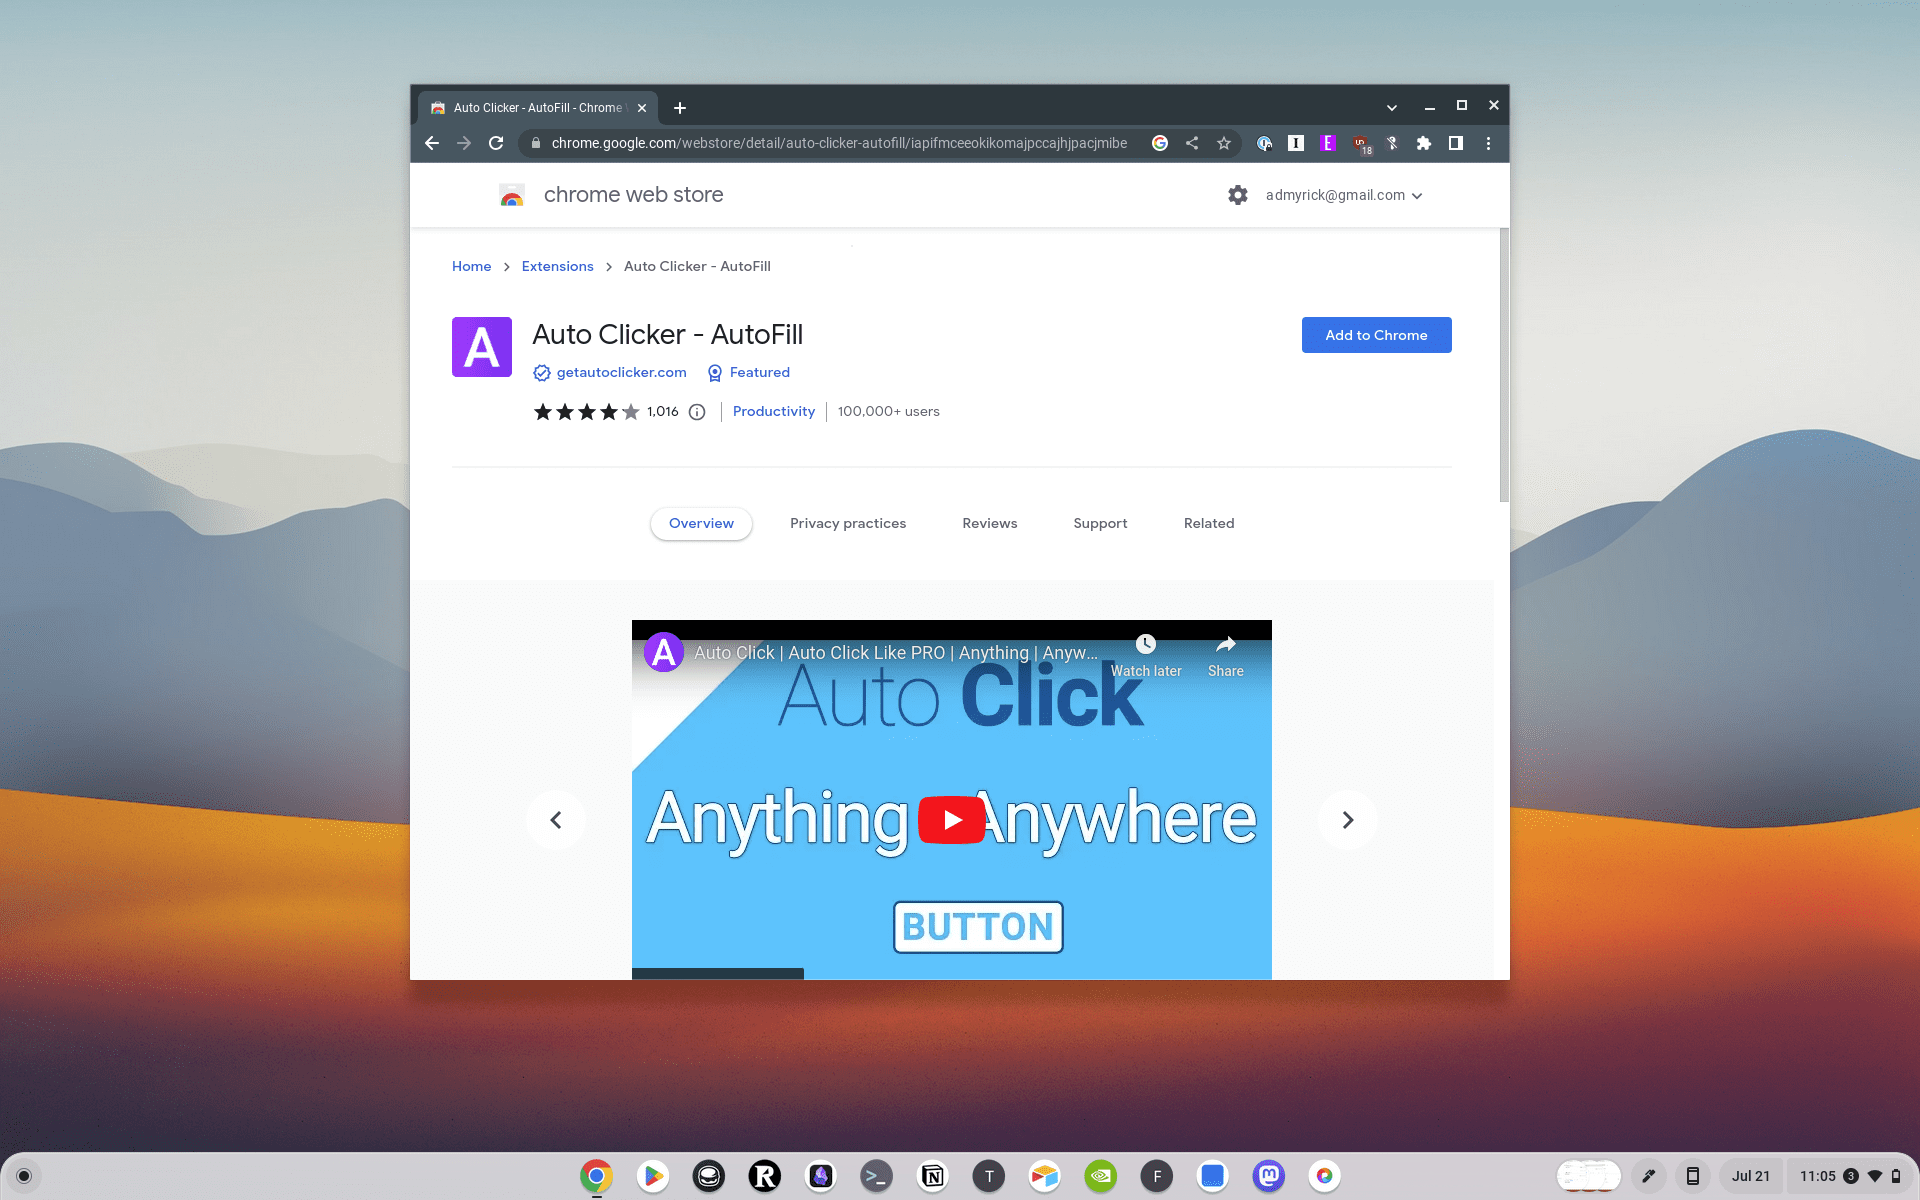
- Choose an Extension: You’ll see a list of Auto Clicker extensions. Read the descriptions and reviews to choose one that suits your needs. Some popular options include ‘Auto Clicker – AutoFill’ and ‘Clicker for Chrome’.
- Install the Extension: Click on the ‘Add to Chrome’ button next to the extension you’ve chosen. A confirmation dialog will appear. Click ‘Add extension’ to confirm.
And that’s it! You’ve successfully installed an Auto Clicker extension on your Chromebook.
How to Use an Auto Clicker Extension
Now that you’ve installed an Auto Clicker extension, you can start using it. Here’s how:
- Open the Extension: Click on the extension icon at the top-right corner of your browser to open it.
- Set the Click Interval: Most Auto Clicker extensions allow you to set the interval between clicks. This can usually be done by entering a number or using a slider.
- Choose the Click Type: Some extensions allow you to choose the type of click (left click, right click, double click, etc.) and the click button (left button, right button, middle button).
- Start the Auto Clicker: Once you’ve set the click interval and click type, you can start the Auto Clicker. This is usually done by clicking a ‘Start’ or ‘Play’ button.
- Stop the Auto Clicker: You can stop the Auto Clicker at any time by clicking a ‘Stop’ or ‘Pause’ button.
Tips for Using an Auto Clicker
While using an Auto Clicker is straightforward, here are a few tips to help you get the most out of this tool:
- Use Responsibly: Auto Clickers can be powerful tools, but they should be used responsibly. Avoid using them for tasks that violate the terms of service of a website or software.
- Test Different Settings: Different tasks may require different click intervals and click types. Don’t be afraid to experiment with different settings to find what works best for your task.
- Monitor Your System: Auto Clickers can consume system resources, especially if the click interval is very short. Monitor your system performance and adjust the click interval if necessary.
Best Auto Clicker for Chromebook
If you want a bit more flexibility when needing to use Auto Clicker for Chromebook, you might want to install an extension as opposed to using the built-in Accessibility option. Here are a few of the best Auto Clicker extensions for Chromebooks:
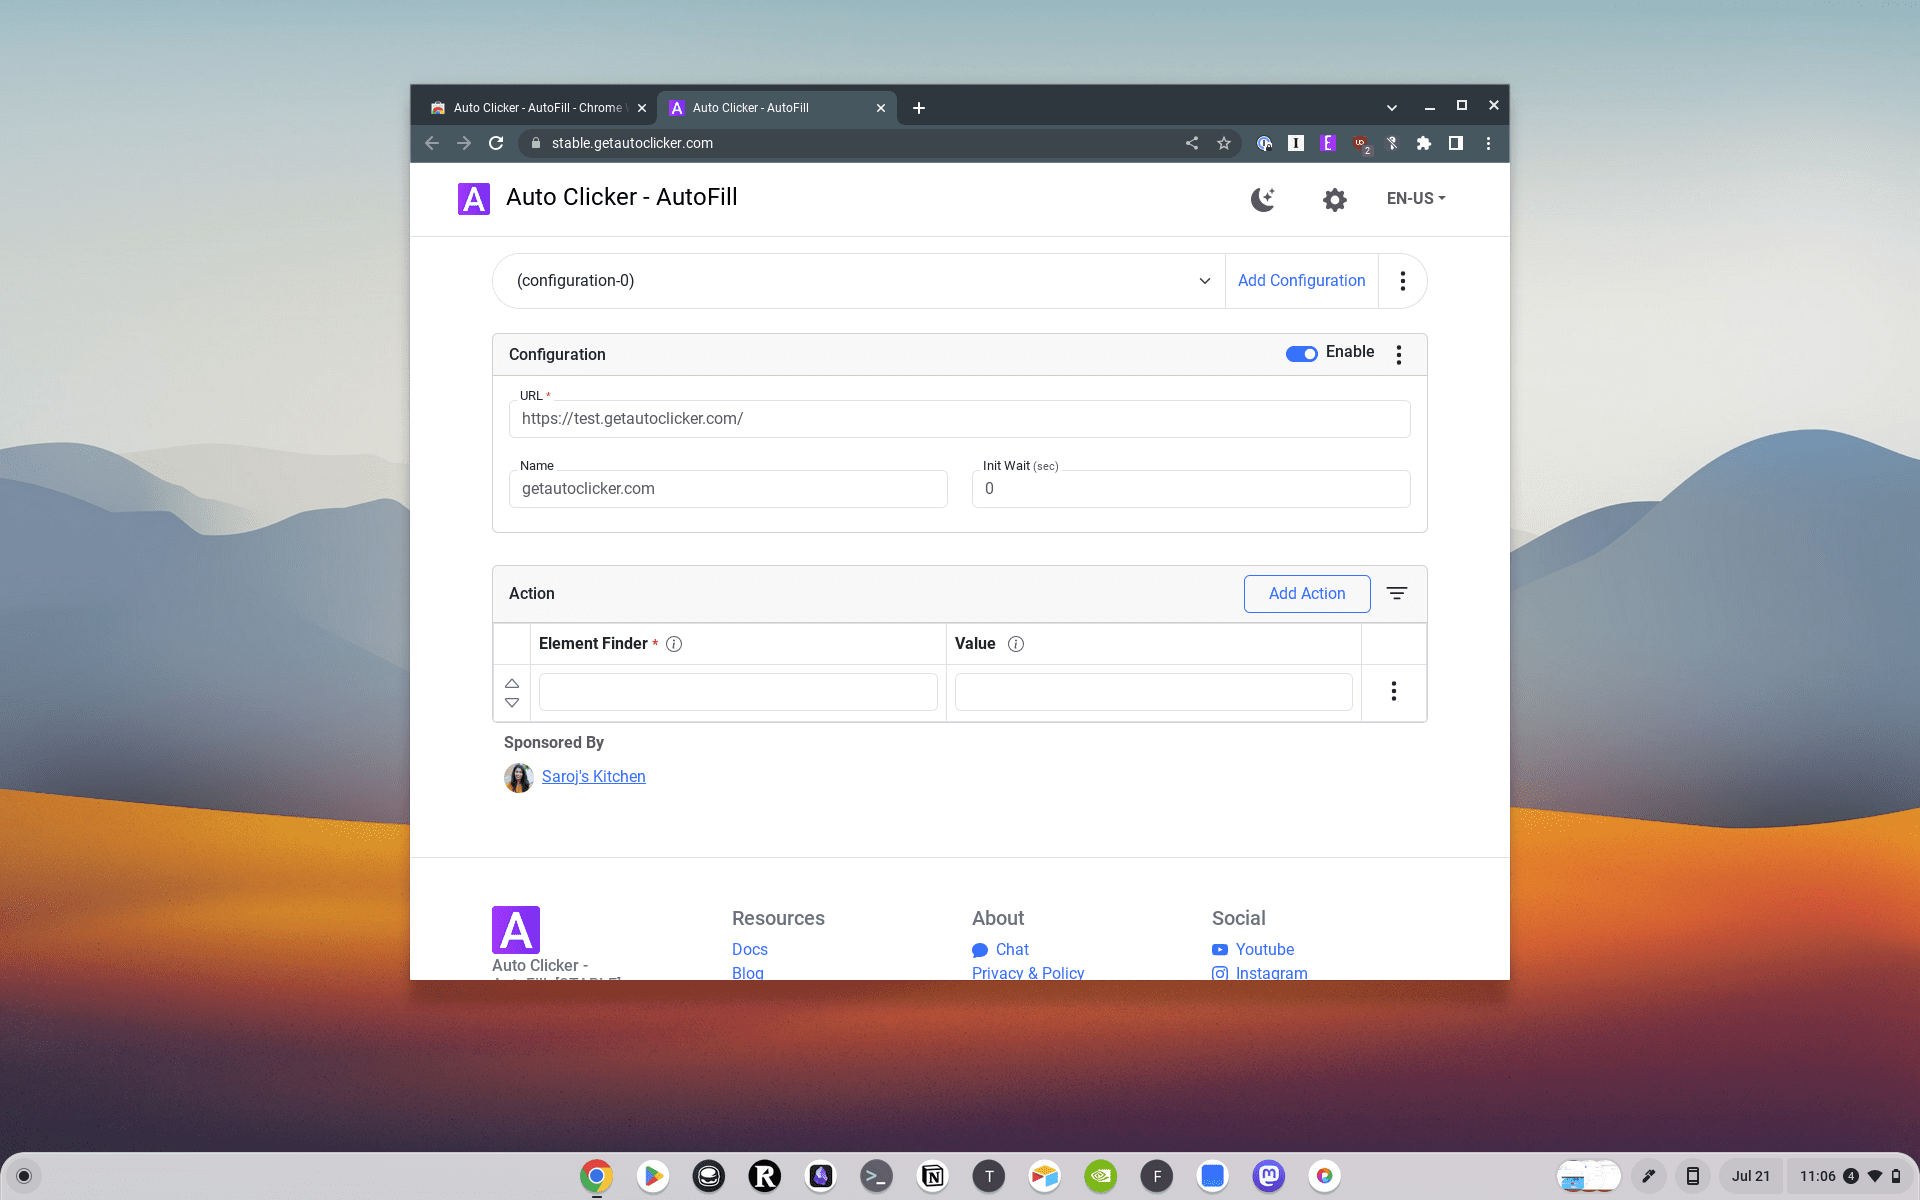
- Auto Clicker – AutoFill: AutoFill input field or auto-click button or link anything anywhere.You can configure and check click speed test. Fill input field or click a button or link anything anywhere. Easy to configure in a few steps and work like PRO.
- GG Auto Clicker 1.1: GG Auto clicker helps you automate mouse clicks on your Chrome browser and has multiple options for automation. The first Chrome extension with multiple clicking features to automate mouse clicks on the chrome browser.
- Auto Clicker: Auto Clicker is designed to automate repetitive clicking tasks. Perfect for testers, developers, avid gamers, and regular users, AutoClicker is your go-to tool for automated clicks. Alleviate the hand stress from intensive grinding in RPG games. With AutoClicker, set your custom click speed and tap, streamline your gameplay, achieve gaming objectives faster, and level up effortlessly.
Conclusion
Auto Clickers are a powerful tool that can automate repetitive clicking tasks, saving you time and effort. By understanding how to install and use an Auto Clicker on your Chromebook, you can take full advantage of this tool and enhance your productivity.
Remember, while Auto Clickers can be a valuable tool, they should be used responsibly and in accordance with the terms of service of any websites or software you use them with. Stay tuned for more tech tips and tricks on how to get the most out of your devices.