
Stable Diffusion has exploded onto the scene, captivating artists, programmers, and anyone with a spark of creativity. This open-source text-to-image AI model, developed by AUTOMATIC1111, can conjure stunning visuals from mere words, turning dreamscapes into reality. But how do you harness this magic on your Windows machine? This comprehensive guide will walk you through the installation process, step-by-step, so you can start generating AI art in no time.
What is Stable Diffusion?
Imagine a digital paintbrush that listens to your every word, translating your wildest ideas into vibrant canvases. That’s Stable Diffusion in a nutshell. It’s a powerful text-to-image diffusion model trained on a massive dataset of text and images. You simply feed it a text prompt describing what you want to see, and it iteratively generates an image that aligns with your vision. It’s like having a collaborative artist who can paint anything you can imagine, and it’s constantly learning and evolving.
Why Install Stable Diffusion on Windows?
While cloud-based text-to-image platforms exist, setting up Stable Diffusion on your own Windows PC offers several advantages:
- Unbridled Creativity: Unleash your imagination without limits. Generate as many images as you want, experiment with different prompts, and refine your creations without worrying about subscription fees or per-image charges.
- Offline Freedom: Work on your art without a constant internet connection. Stable Diffusion thrives offline, freeing you from the constraints of network speeds and potential outages.
- Customization Power: Tweak the model to your liking. Fine-tune the settings, adjust the parameters, and even create your own custom Stable Diffusion models to achieve unique artistic styles.
- Hardware Optimization: Leverage your existing PC hardware. Stable Diffusion can be optimized for both high-end GPUs and less powerful machines, making it accessible to a wider audience.
Now that you’re fired up, let’s dive into the installation process!
Preparing your Windows Canvas:
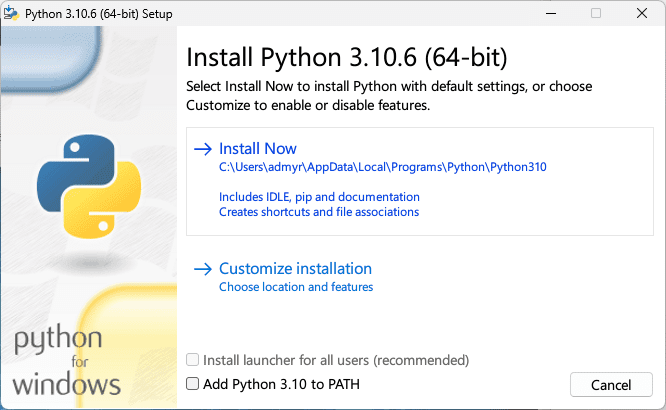
- Install Python 3.10.6: This is the essential foundation for running Stable Diffusion. Download the official installer from python.org and ensure you add Python to your system PATH during setup.

- Install Git: Grab a copy of Git from git-scm.com. It’s used for downloading the Stable Diffusion code from its online repository.

Downloading Stable Diffusion:
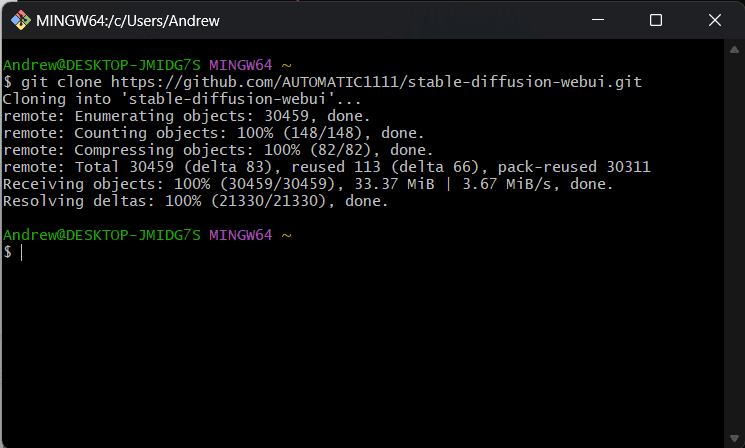
- Clone the Web UI: Open a Command Prompt window and navigate to your workspace folder. Type
git clone https://github.com/AUTOMATIC1111/stable-diffusion-webuiand press Enter. This will download the latest Stable Diffusion web interface code.

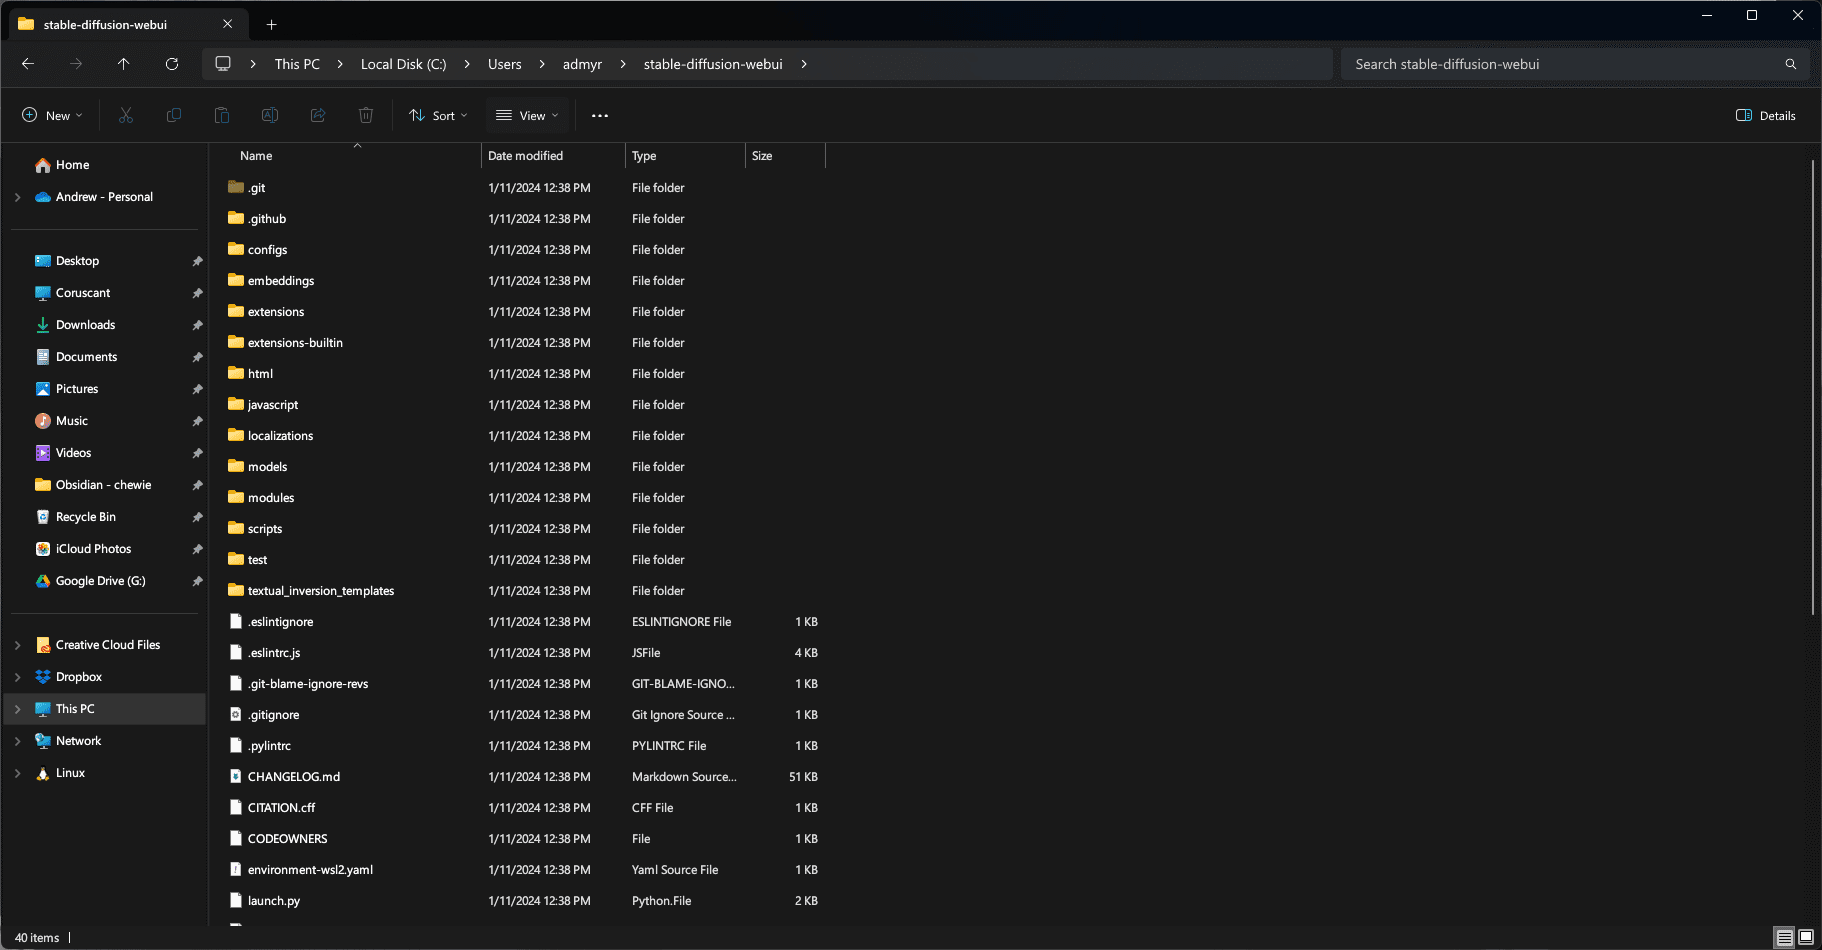
- Double-Check For the Model Folder: In order to ensure that you have properly installed Stable Diffusion, you’ll need to check for a specific folder before downloading a model. Simply open the File Explorer app, and navigate to your User folder. From here, you should see a new “stable-diffusion-webui” folder. If not, try follow the steps above again to ensure a proper installation.

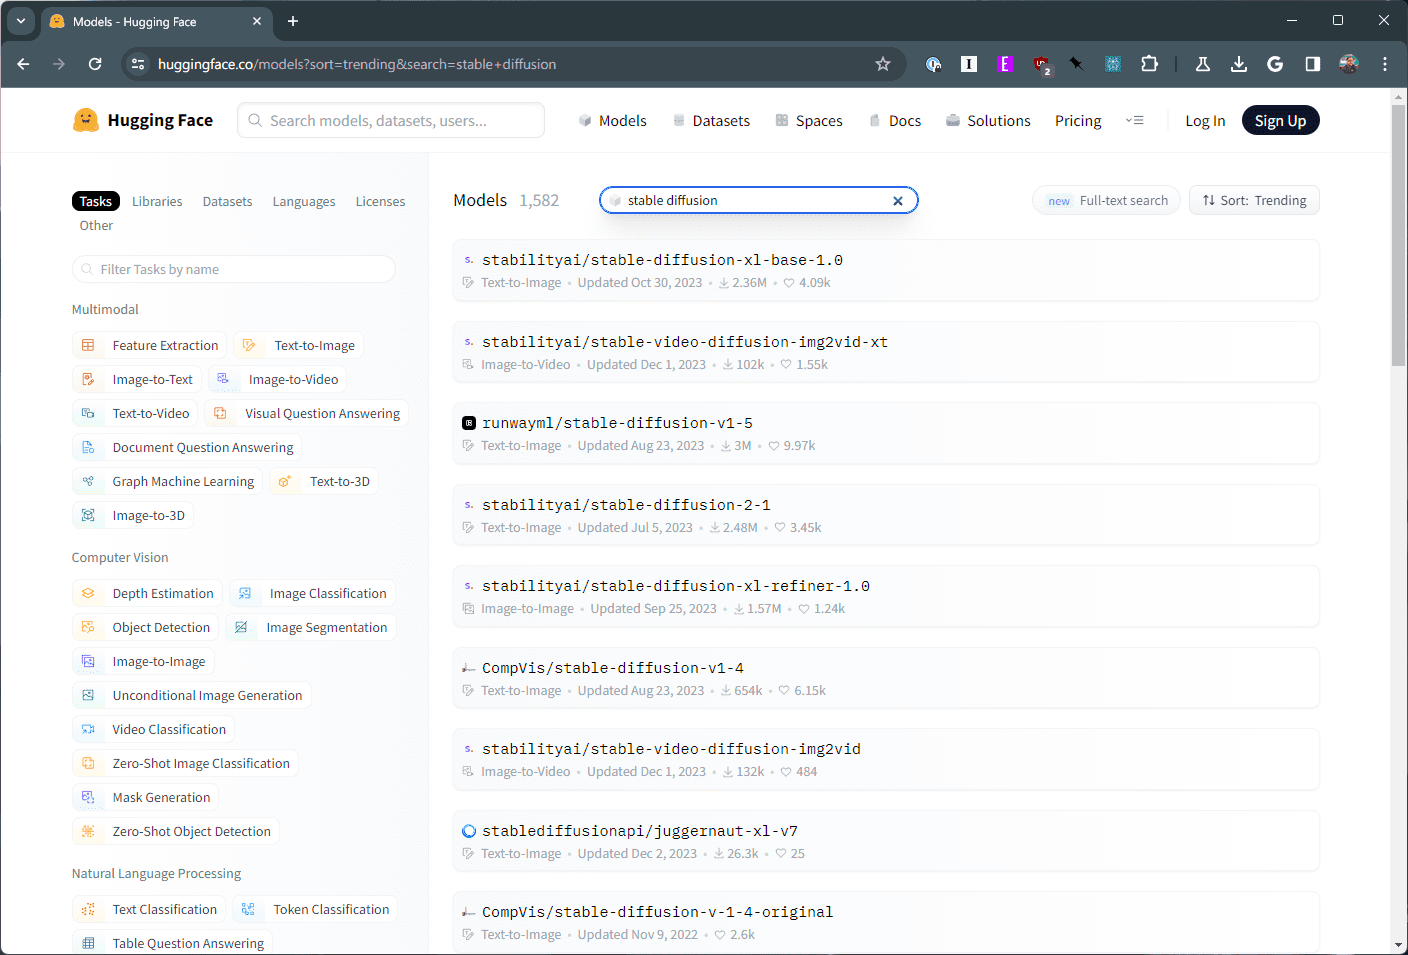
- Download a Model: Head over to Hugging Face (huggingface.co) and create a free account. Search for “stable diffusion” and choose a model that suits your needs. Download the model file to your workspace folder.

Setting Up the Web UI:
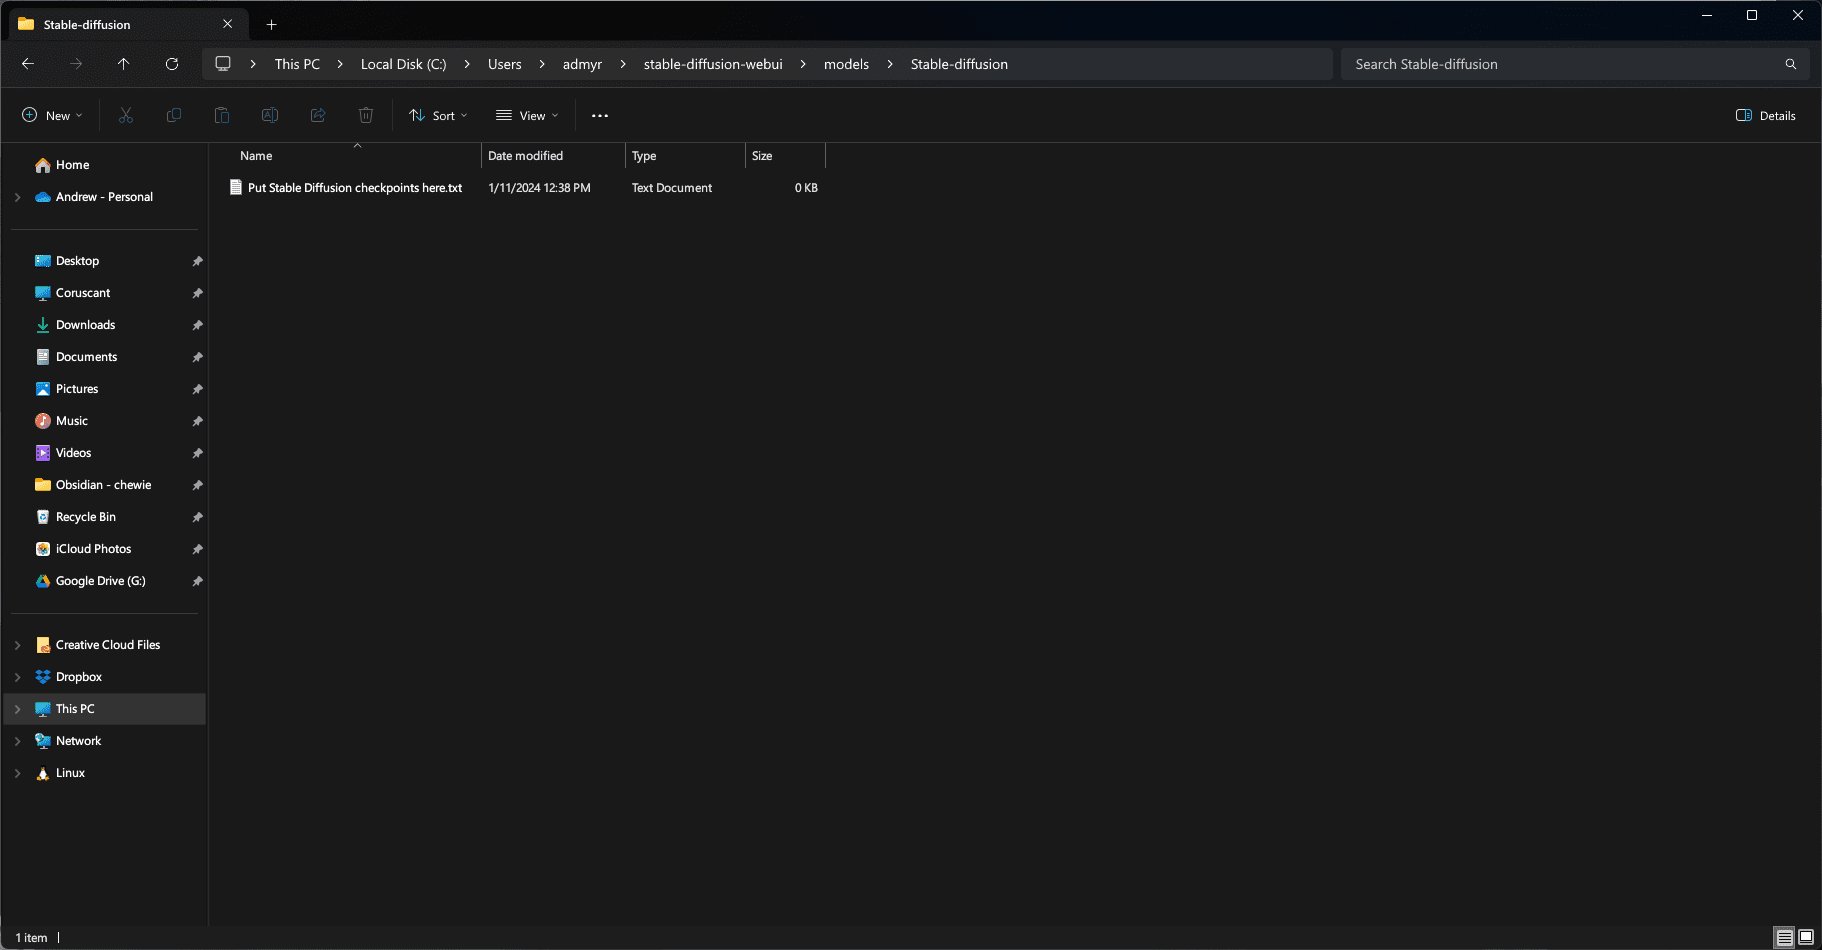
- Move the Model: Navigate to the
modelsfolder within yourstable-diffusion-webuidirectory. Find the subfolder named “stable-diffusion” and move the downloaded model file into it.
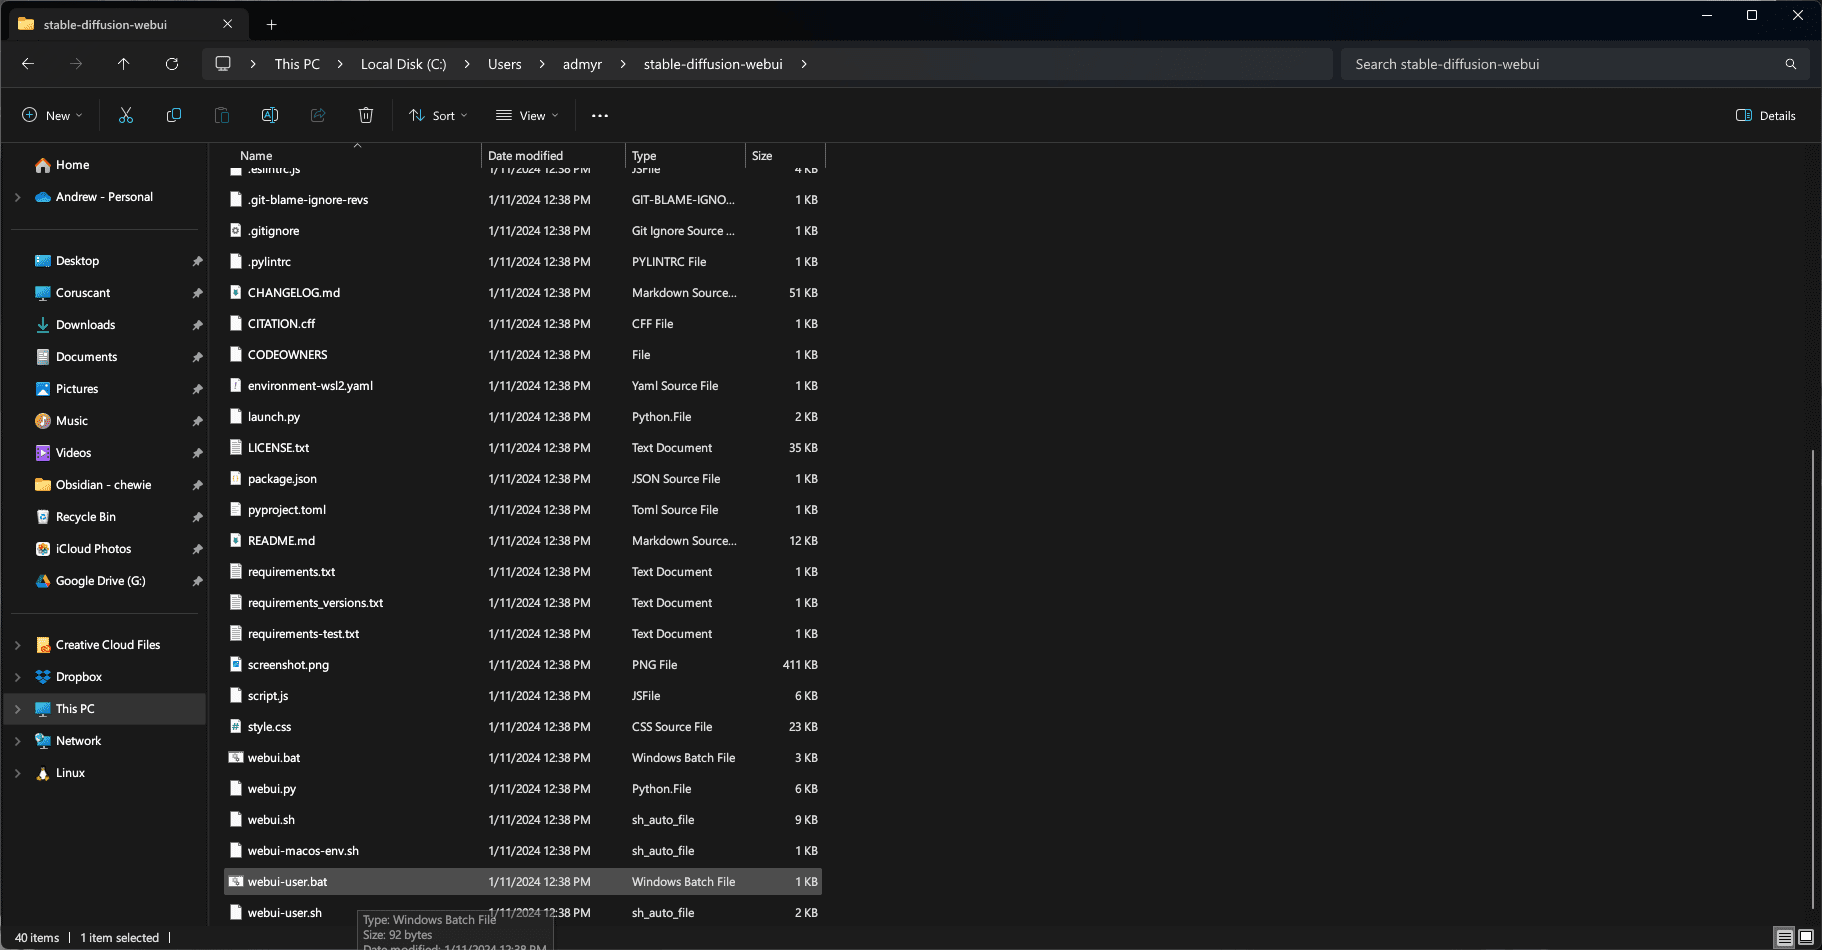
- Run the Setup Script: Open the
webui-user.batfile located in yourstable-diffusion-webuifolder. This will install additional dependencies and configure the web interface. The process might take a few minutes, so be patient.
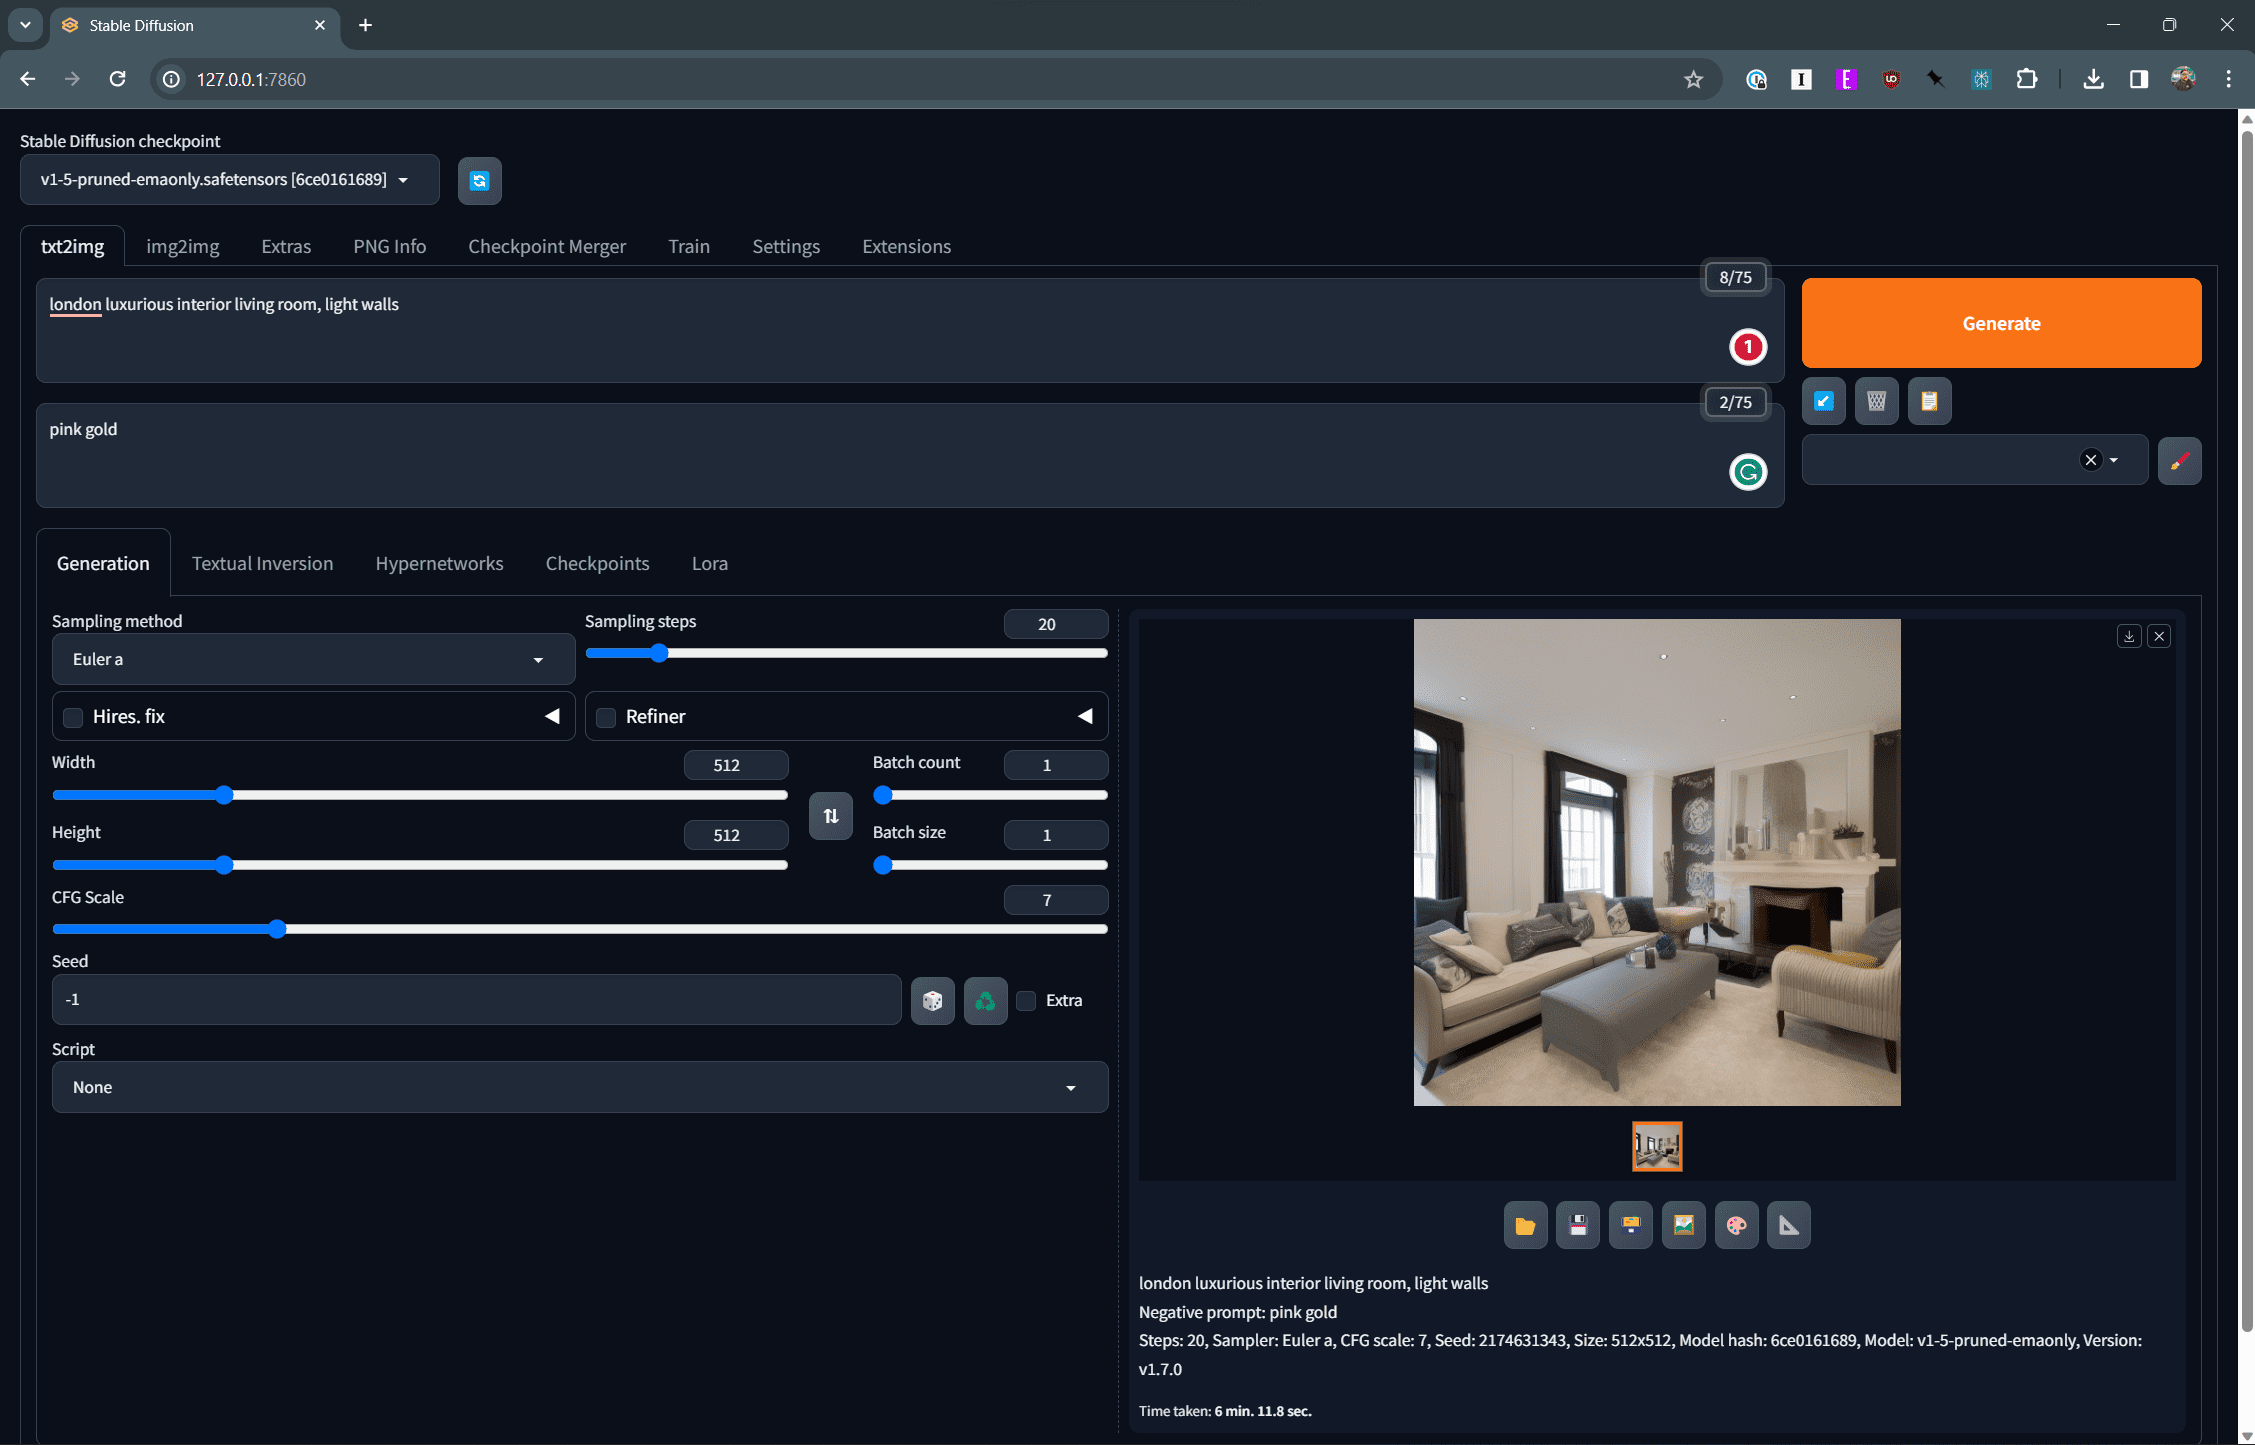
- Start the Web UI: Once the script finishes, open a web browser and navigate to http://127.0.0.1:7860. This will launch the Stable Diffusion web interface, your portal to AI-powered art creation.
Congratulations! You’ve successfully installed Stable Diffusion on your Windows PC. Now, it’s time to unleash your inner artist. Explore the web interface, experiment with text prompts, and witness your imagination come to life in vibrant pixels.
Additional Tips:
- Remember, Stable Diffusion is resource-intensive. A powerful graphics card will significantly improve the image generation speed and quality.
- Check out the official documentation and community forums for more advanced tips, tutorials, and troubleshooting help.
- Embrace the experimental spirit! Stable Diffusion is a playground for creativity. Don’t be afraid to try different prompts, styles, and settings to discover what it can do.
With Stable Diffusion at your fingertips, the possibilities are endless. So, unleash your imagination, paint with words, and let AI be your brushstroke to a world of boundless artistic expression.
How to Use Stable Diffusion on Windows: From Prompts to Paintings
Now that you’ve installed Stable Diffusion on your Windows machine, it’s time to unleash its full potential and transform your words into mesmerizing visuals. This section will guide you through the interface and key features, so you can navigate this AI art studio with confidence.
The Main Canvas: Text-to-Image
The primary function of Stable Diffusion lies in the “Text to Image” tab. This is where your textual dreams find visual form. Here’s how to make the magic happen:
- Crafting the Prompt: This is the cornerstone of your artwork. The text prompt you enter will guide the image generation process. Be descriptive, evocative, and use keywords that capture the essence of your desired image. Remember, the more detailed your prompt, the more accurate the results.
- Fine-tuning the Settings: Dive deeper into the generation process by adjusting various settings. Choose the image size, number of steps, and CFG scale to influence the level of detail, realism, and artistic style. Experiment with different settings to see how they affect the outcome.
- Seeding the Creativity: For added control, utilize the optional “Seed” field. This numerical value acts as a random seed, influencing the initial image composition and ensuring unique results even with the same prompt.
- Hitting the Generate Button: Once you’re satisfied with your prompt and settings, click the “Generate” button. Stable Diffusion will then embark on its journey, iteratively transforming noise into an image that aligns with your vision.
- Iteration is Key: Don’t be afraid to click “Generate” multiple times. Each iteration builds upon the previous one, refining the details and adding texture to your artwork. You can even use the “Interpolate” feature to morph between different generated images, creating artistic transitions.
Beyond the Basics:
Stable Diffusion offers more than just text-to-image conversion. Explore the diverse features beyond the main canvas:
- Inpainting: Breathe life into existing images by specifying areas for AI-generated content. Fill in missing parts, extend landscapes, or add unexpected elements to your existing photos.
- Dreambooth: Train Stable Diffusion on specific images or styles to personalize your art creation. Imagine generating images in the style of your favorite artist or with your own face incorporated into fantasy scenes.
- Stability Settings: Fine-tune the noise and diffusion processes to influence the level of detail, stability, and “strangeness” in your generated images. This is for seasoned artists who want to delve deeper into the AI’s creative engine.
Remember: Stable Diffusion is an ever-evolving tool. New features and capabilities are constantly being developed by the community. Stay updated, explore online resources, and don’t hesitate to experiment. The more you play, the more you’ll unlock the boundless creative potential of this powerful AI art tool.
So, fire up Stable Diffusion, embrace your imagination, and let the words flow. With this guide and a pinch of experimentation, you’ll be crafting stunning AI art in no time, transforming your Windows machine into a portal to a world of boundless artistic expression.
Conclusion
In conclusion, the journey of installing and utilizing Stable Diffusion on Windows is not just about embracing a cutting-edge technology; it represents a significant step forward in the realm of artificial intelligence and digital creativity. From the initial setup to mastering its usage, Stable Diffusion opens up a world of possibilities for artists, developers, and enthusiasts alike. Its seamless integration with the Windows platform ensures that users can leverage its powerful capabilities in a familiar environment, enhancing efficiency and ease of use.
This guide aims to demystify the process, making it accessible to even those who are not deeply technical. By following the detailed steps outlined, users can unlock the full potential of Stable Diffusion, harnessing its ability to generate stunning visuals and contribute to various innovative projects. It’s important to remember that with great power comes great responsibility; hence, adhering to ethical guidelines and respecting intellectual property rights is crucial when using such advanced technology.
As Stable Diffusion continues to evolve, so too will its applications and impact on various industries. The community around it is vibrant and ever-growing, offering a wealth of resources, support, and inspiration. By installing and using Stable Diffusion on Windows, you’re not just installing software; you’re joining a movement at the forefront of AI-driven creativity. Whether you’re a professional looking to streamline your workflow, a student exploring AI, or simply a curious mind, the world of Stable Diffusion is yours to explore, innovate, and transform.