Bing integration in the Start menu of Windows 11 and 10 can be a handy feature for quick searches, but not everyone finds it useful. If you’re among those who prefer a different search engine or simply want to declutter the Start menu, this guide is for you. Here is how you can remove Bing from Start in Windows 10 and 11.
Contents
Why Remove Bing From Start?
Pros:
- Preference for Another Search Engine: If you prefer using Google or another search engine, you might want to remove Bing.
- Cleaner Start Menu: Removing Bing can declutter the Start menu, making it look cleaner.
- Privacy Concerns: Some users prefer to limit the integration of search engines within their operating system for privacy reasons.
Cons:
- Loss of Quick Search Functionality: Bing integration allows for quick web searches directly from the Start menu, and removing it might slow down this process.
- Potential Complexity: The process might seem complex for non-tech-savvy users.
How to Remove Bing From Start in Windows 11 and 10
Disclaimer: This guide involves changes to system settings and should be followed with caution. Always ensure you have proper backups and consult professional support or refer to official Microsoft documentation if needed. The author and this blog are not responsible for any issues that may arise from following this guide.
For Windows 11:
Step 1: Open Registry Editor
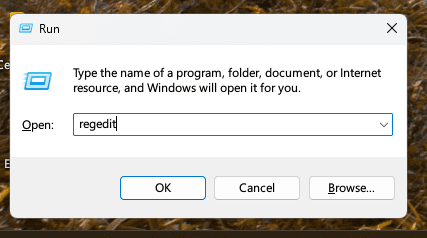
- Press ‘Win + R’: This opens the Run dialog box.
- Type ‘regedit’: Enter this command and press ‘Enter.’

- Navigate to the Right Path: Go to
HKEY_CURRENT_USER\Software\Microsoft\Windows\CurrentVersion\Search.

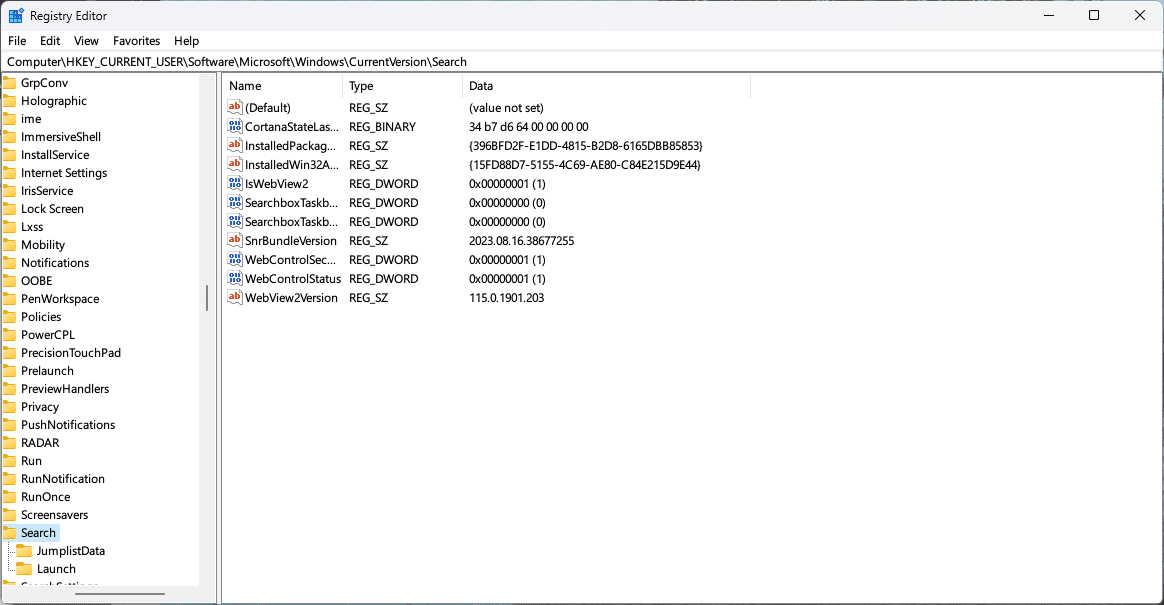
Step 2: Modify the Registry
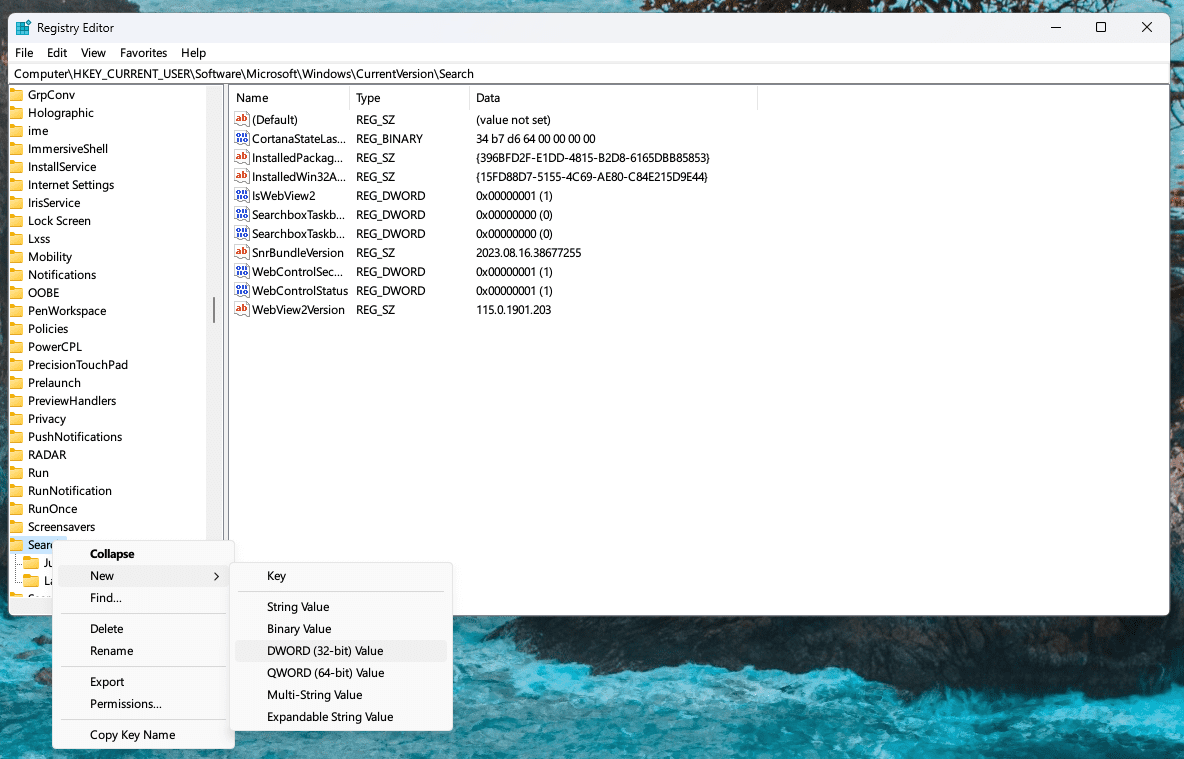
- Right-Click on ‘Search’: Select ‘New’ > ‘DWORD (32-bit) Value.’

- Name the New Value: Name it ‘BingSearchEnabled‘ and press ‘Enter.’
- Double-Click the New Value: Set the ‘Value data’ to 0.

- Restart Your Computer: The changes will take effect after a restart.

How to Remove Bing From Start in Windows 10:
Step 1: Open Group Policy Editor
- Press ‘Win + R’: This opens the Run dialog box.
- Type ‘gpedit.msc’: Enter this command and press ‘Enter.’
- Navigate to the Right Path: Go to
User Configuration > Administrative Templates > Start Menu and Taskbar.
Step 2: Modify Group Policy
- Find ‘Do not use the search-based method when resolving shell shortcuts’: Double-click it.
- Select ‘Enabled’: Click ‘OK.’
- Find ‘Do not use the Web service to find applicable icon pictures’: Double-click it.
- Select ‘Enabled’: Click ‘OK.’
- Restart Your Computer: The changes will take effect after a restart.
Conclusion
Removing Bing from the Start menu in Windows 11 and 10 is like customizing your digital workspace. It’s about aligning the functionality of your system with your preferences and needs.
Remember, while this process offers a personalized experience, it involves changes to system settings that should be handled with care. Always ensure you understand the steps you’re taking and don’t hesitate to seek professional assistance if needed.