Skip to content
LogoTechnipages
LogoTechnipages
  • Topics
        • Android
        • Browsers
        • Gaming
        • Hardware
        • Internet
        • iPhone
        • Linux
        • macOS
        • Office
        • Reviews
        • Software
        • Windows
        • Definitions
        • All Recent Posts
  • Product Reviews
  • About

How to Use Fingerprint Scanner with Incognito Tabs in Chrome

Andrew MyrickJune 5, 2023 Comments (0)
Auto-Refresh-Chrome-Tab-Without-Extension

Google Chrome’s Incognito mode is a handy feature that allows you to browse the internet without your browsing history being stored. However, one drawback of this feature is that if you switch away from an incognito tab, anyone can see it if they gain access to your device. Fortunately, Google Chrome now supports a feature that allows you to use your fingerprint scanner to protect your incognito tabs, adding an extra layer of security to your browsing.

Note: This feature might not be available on all devices as it depends on device capability and Chrome updates.

Contents

  • 1 How to Use Fingerprint Scanner with Incognito Tabs in Chrome
  • 2 Browse Incognito
  • 3 Things to Note:

How to Use Fingerprint Scanner with Incognito Tabs in Chrome

Before we start, make sure your Google Chrome app is updated to the latest version. This can be done by visiting your device’s app store (Google Play Store for Android or App Store for iOS), searching for Google Chrome, and tapping “Update” if available.

  1. Once your app is updated, open Google Chrome on your device. You’ll be on the default browsing tab.
  2. In the address bar, type chrome://flags.
  3. At the top of the page, tap the box named Search flags.
  4. Search for Enable device reauthentication for Incognito.
  5. Tap the box below the listing that is labeled Default.
  6. Select Enabled.
  7. Tap the Relaunch button.
    How to Use Fingerprint Scanner with Incognito Tabs in Chrome - 1
  8. Tap the three dots on the top-right corner of the screen to open the menu.
  9. In the dropdown menu, tap on “Settings.”
  10. In the Settings menu, scroll down until you see “Privacy and security.” Tap on it to open the privacy settings.
    How to Use Fingerprint Scanner with Incognito Tabs in Chrome - 2
  11. Tap the toggle next to Lock Incognito tabs when you leave Chrome to the On position.

How to Use Fingerprint Scanner with Incognito Tabs in Chrome - 3

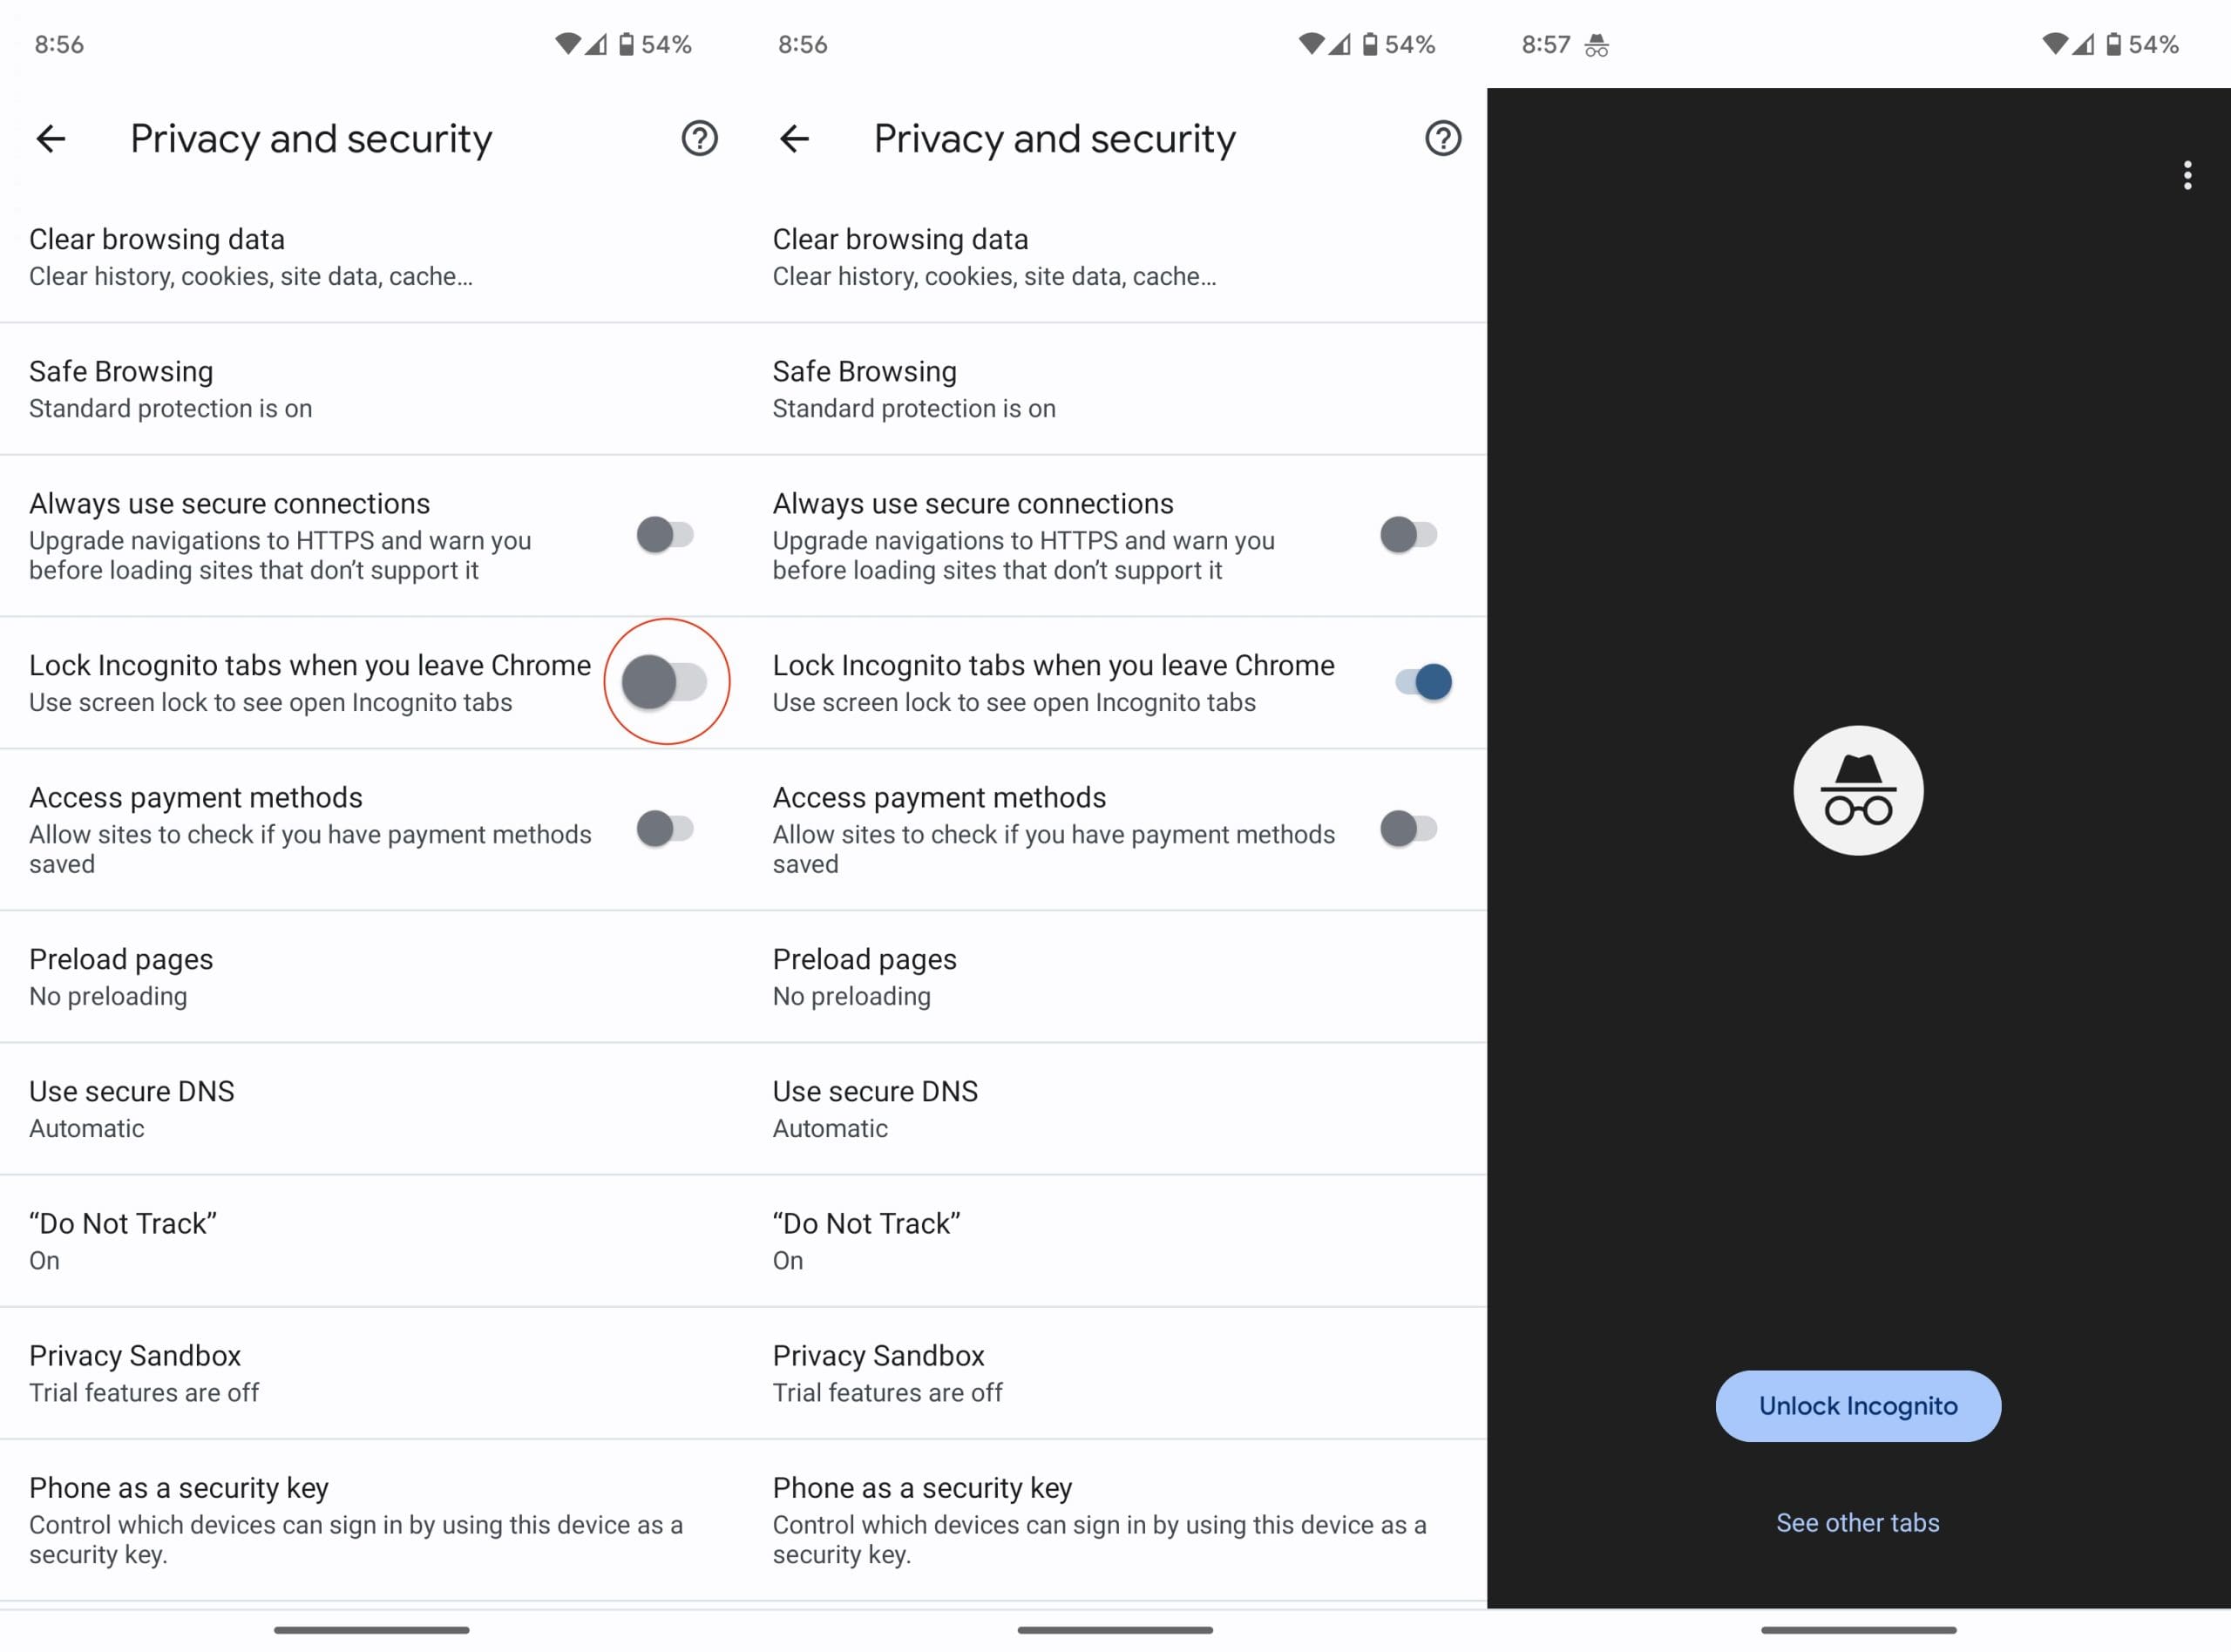
With this feature enabled, Google Chrome will now require fingerprint authentication to open incognito tabs if you’ve closed and reopened the app, or if your device has been locked and unlocked.

Browse Incognito

To use this feature, open an incognito tab as you normally would by tapping the three dots on the top-right of the screen and selecting “New Incognito Tab.” Browse the web as needed.

When you’re done, simply close the app or lock your device. The next time you try to access your incognito tabs, Google Chrome will prompt you to verify your identity with your fingerprint.

Things to Note:

  • This feature only works if your device has a fingerprint scanner and you’ve set it up in your device’s settings.
  • If you don’t lock your device or close Google Chrome, your incognito tabs won’t be locked.
  • If your device doesn’t have a fingerprint scanner, Chrome might offer to protect incognito tabs using your lock screen passcode or pattern.

This feature helps you maintain privacy while browsing in Incognito mode. Even if you leave your device unattended, your browsing activity will stay private. Enjoy safer browsing with Google Chrome!

Categories: Internet

Author Andrew Myrick

Andrew Myrick is a freelance writer based on the East Coast of the US. He enjoys everything to do with technology, including tablets, smartphones, and everything in between. Perhaps his favorite past-time is having a never-ending supply of different keyboards and gaming handhelds that end up collecting more dust than the consoles that are being emulated.

You Might Also Like

  • fix chrome download needs authorization

    What to Do If Chrome Download Needs Authorization

    Madalina DinitaInternet
  • Slack: How To Configure the Default “One-Click Reactions” in Your Workspace

    Mel HawthorneInternet
  • Google Duo: How To Review Your Blocked Users

    Mel HawthorneInternet
  • fix dropbox not showing download option

    Fix: Dropbox Not Showing Download Option

    Madalina DinitaInternet

Leave a Reply

Your email address will not be published. Required fields are marked *

how to allocate more memory to a program

How to Allocate More Memory to a Program in Windows

marvel rivals memory leak fix

Marvel Rivals Using Too Much Memory – How to Fix

how to create a macro in word

How to Create a Macro in Word

how to set video as screen saver

How to Set a Video as Your Screen Saver on Windows 11

how to fix 0xc000007b Error

Error 0xc000007b – What Is It and How to Fix It

profile pic

The Experts Behind Technipages

My name is Mitch Bartlett. I've been working in technology for over 20 years in a wide range of tech jobs from Tech Support to Software Testing. I started this site as a technical guide for myself and it has grown into what I hope is a useful reference for all.

Learn More

technipages logo white
linkedin icon

Technipages is part of Guiding Tech Media, a leading digital media publisher focused on helping people figure out technology. Learn more about our mission and team here.

© 2025 Guiding Tech Media All Rights Reserved

  • About Us
  • Contact
  • Legal & Privacy

© 2025 Guiding Tech Media All Rights Reserved

Information from your device can be used to personalize your ad experience.
Do not sell my personal information.