Navigating the digital world can often feel like a puzzle, especially when it comes to organizing and managing our cherished memories in the form of photographs. Google Photos, with its advanced features and user-friendly interface, has become a go-to solution for photo storage and organization. Yet, there’s a common challenge many users face: adjusting the time and date on their pictures.
Whether it’s due to traveling across time zones, dealing with daylight saving time adjustments, or correcting a camera’s incorrect settings, ensuring that your photos reflect the accurate time and date is crucial for proper organization and reminiscence. In this article, we’ll guide you through the simple steps of changing the time and date on a picture in Google Photos.
Contents
How to Change the Time and Date on Picture for Google Photos on Android and iPhone
For Android and iPhone users alike, the convenience of snapping a picture and instantly uploading it to Google Photos is unparalleled. However, occasionally we encounter the need to adjust the time and date on these pictures. Whether it’s due to a quick timezone change during travel or a simple error, maintaining accurate timestamps is key for organizing our digital memories efficiently.
- Open the Google Photos app on your mobile device.
- Tab the Photos button in the bottom left corner of the toolbar.
- Locate and tap the photo that you want to edit.
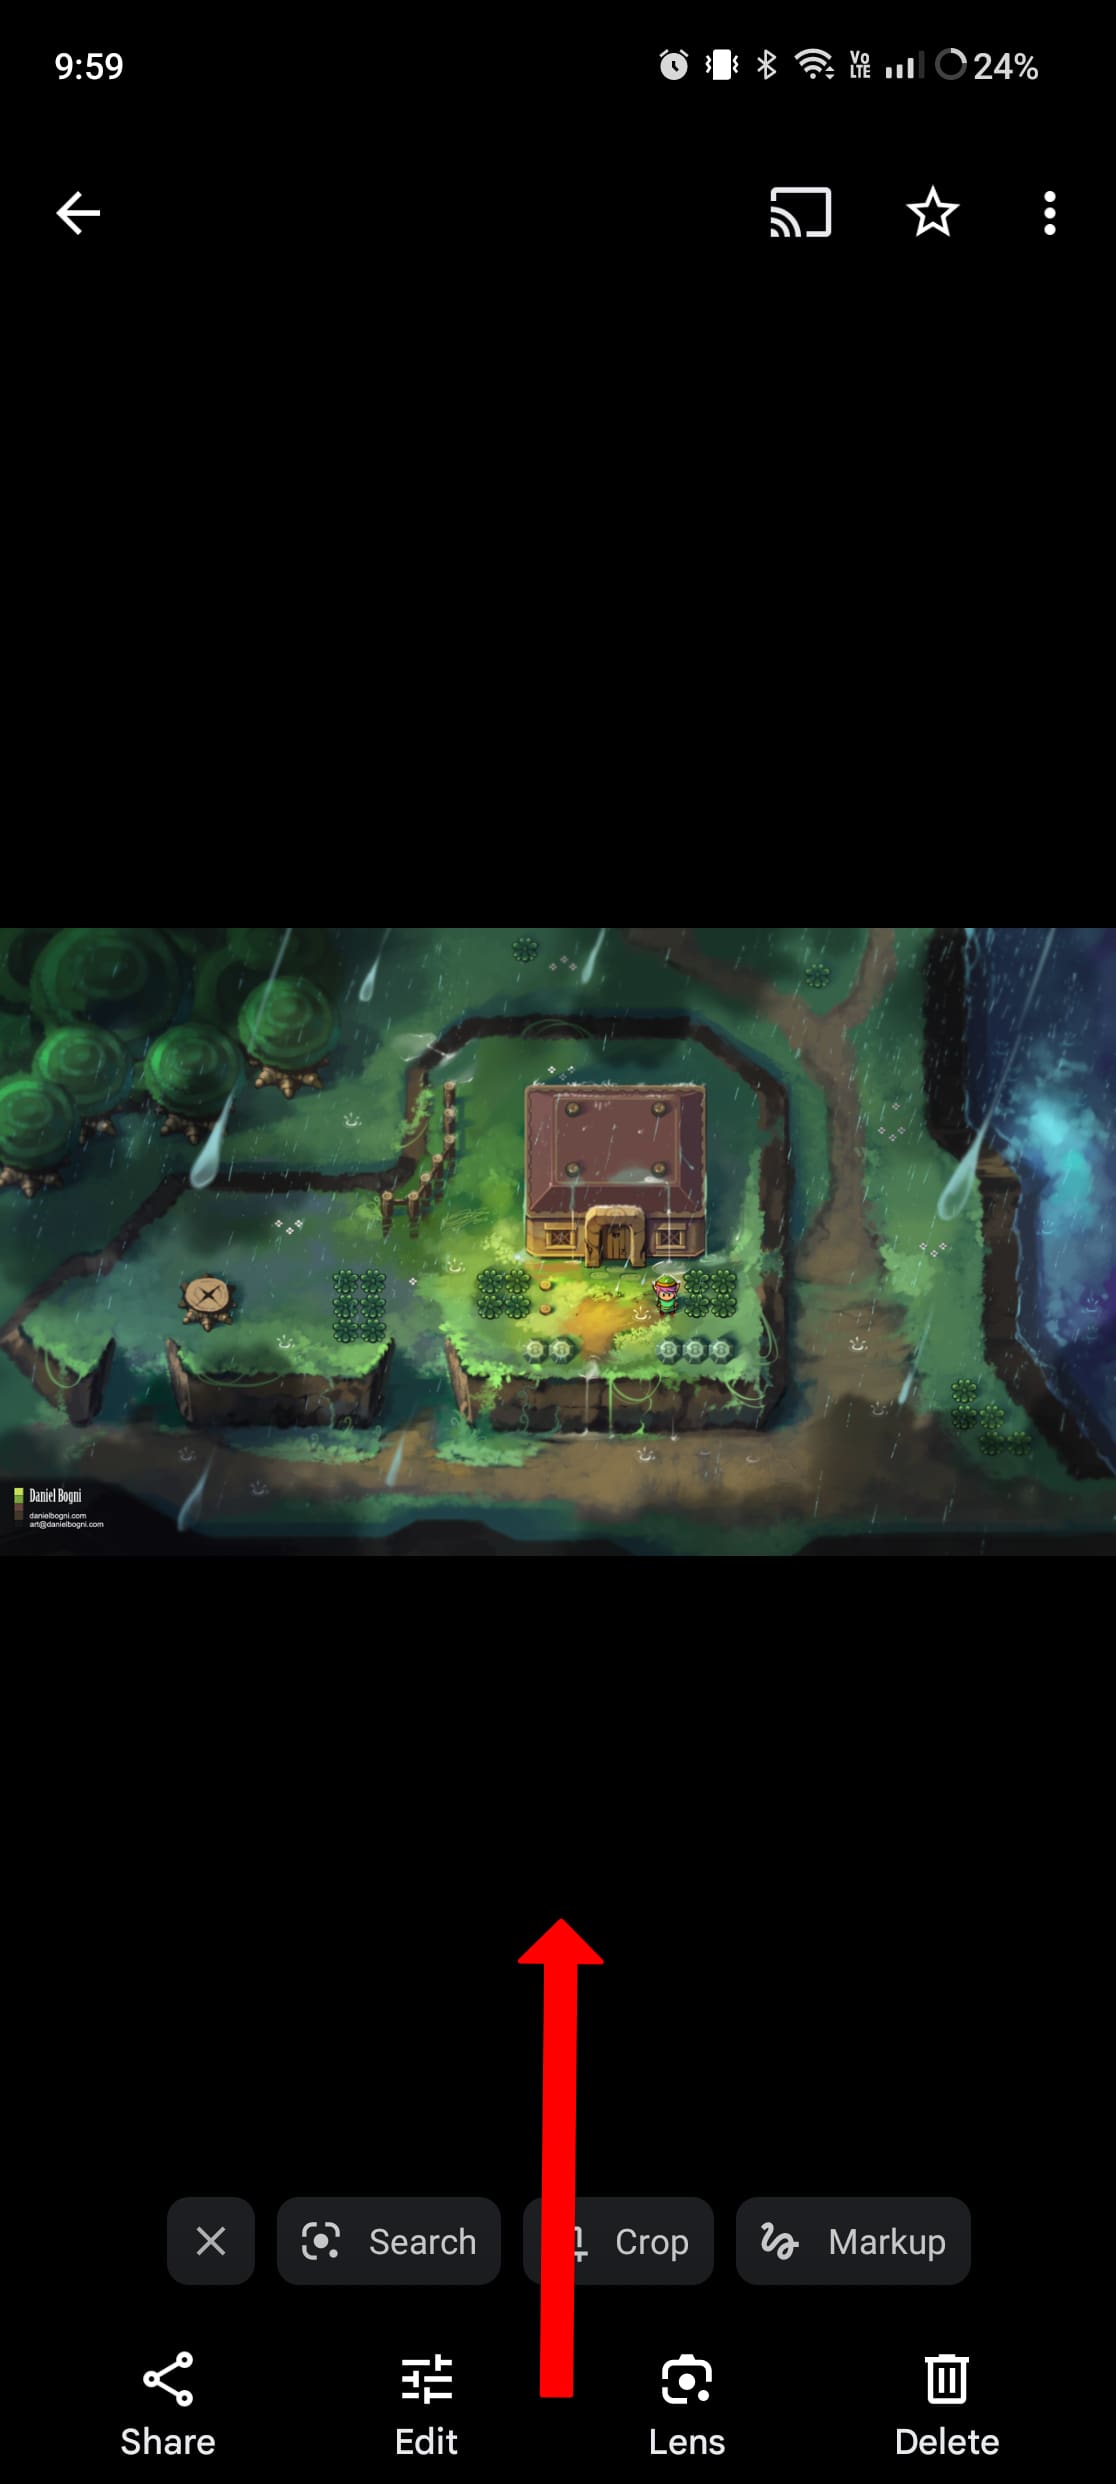
- Swipe up from the bottom to reveal the Photo Details.

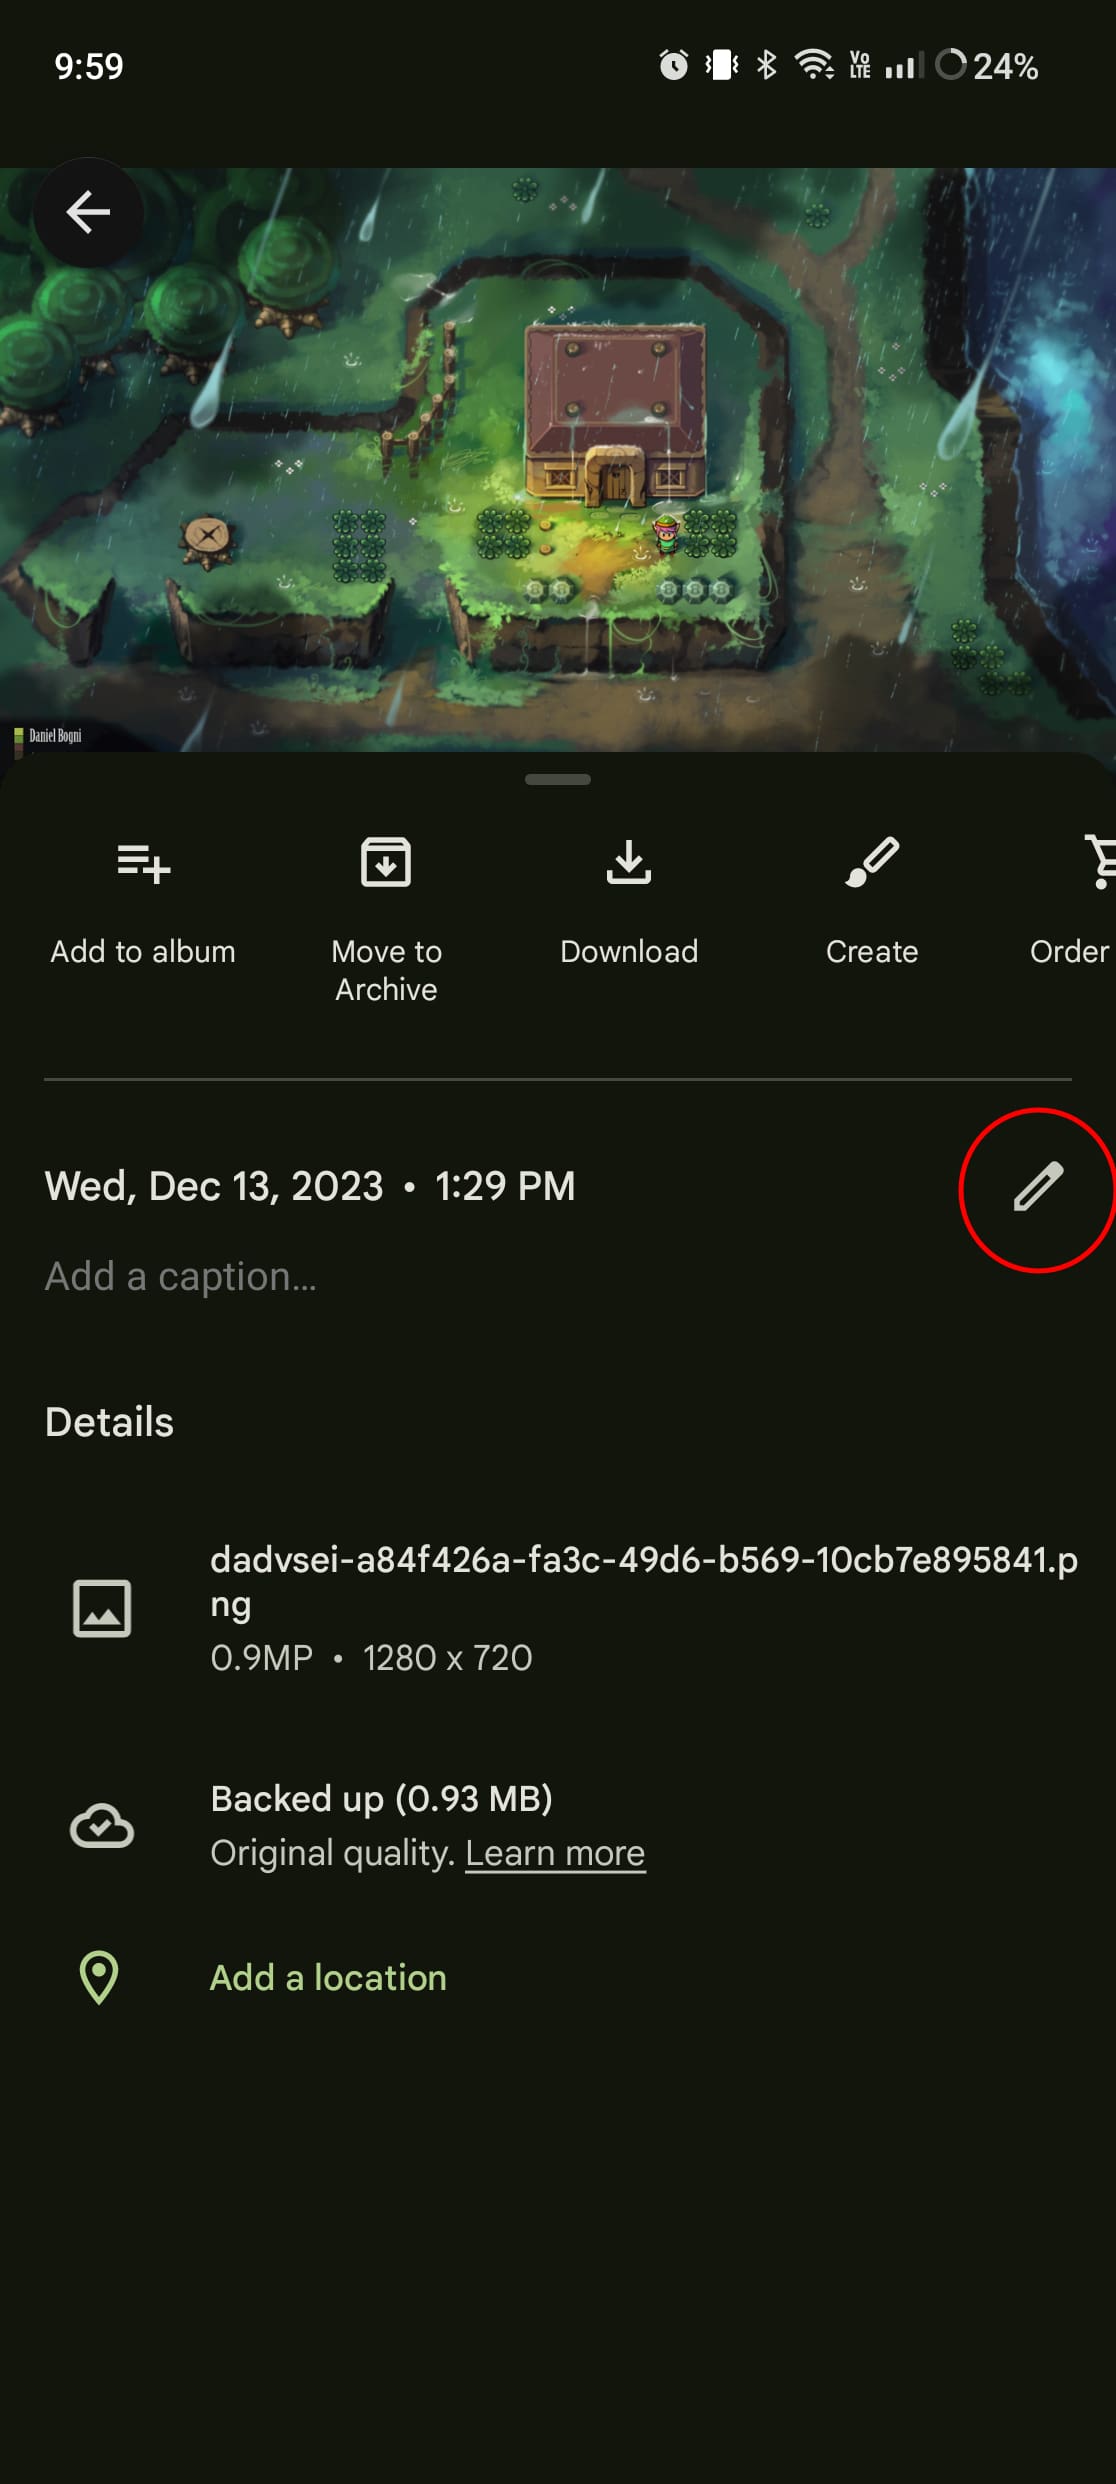
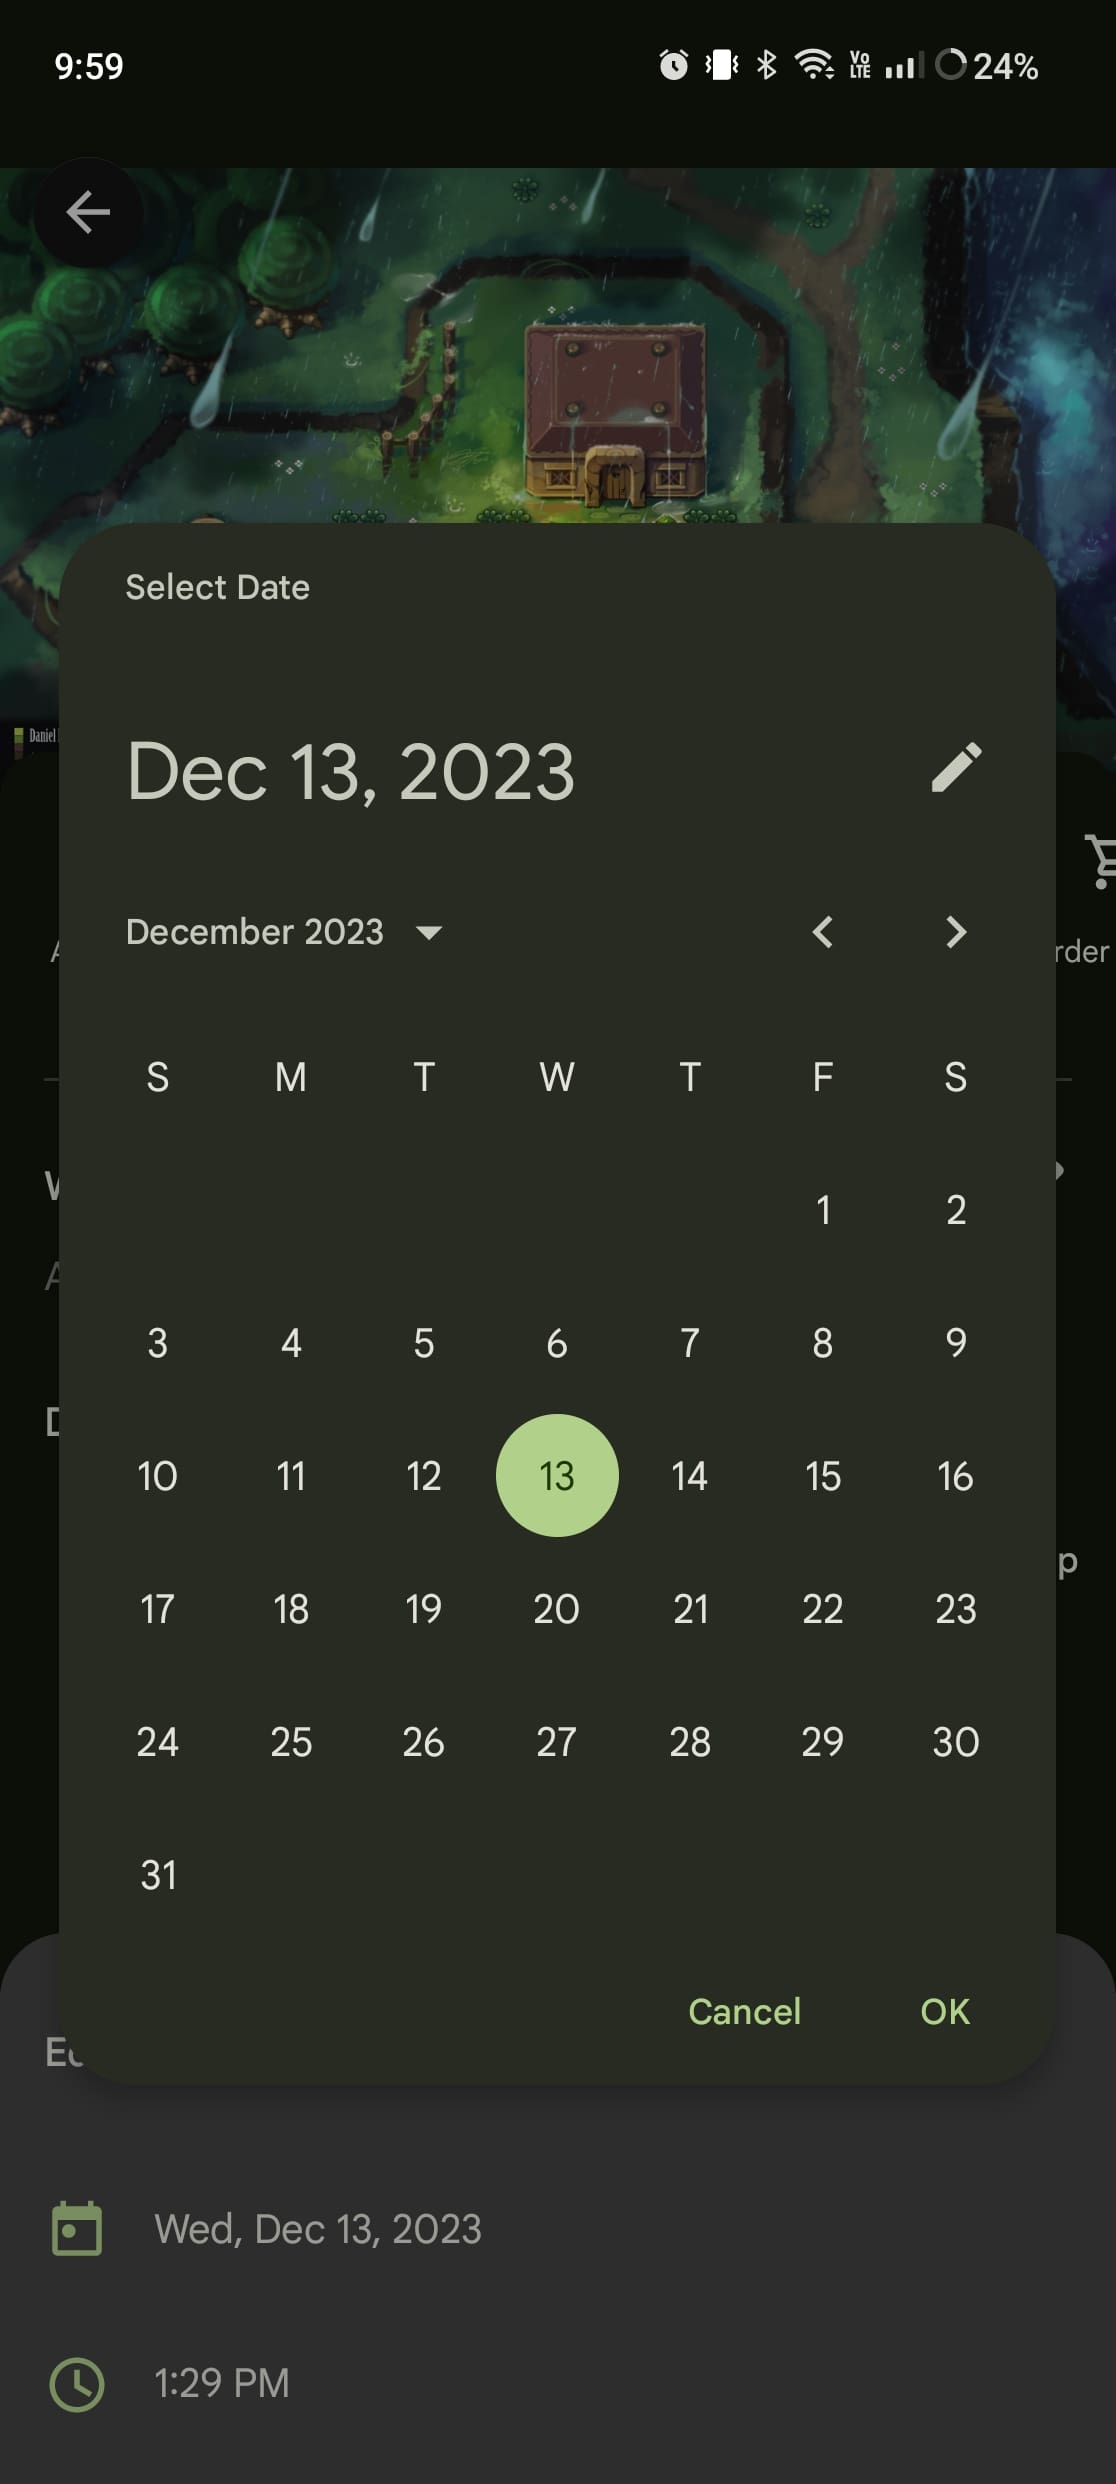
- Tap the Pencil icon next to the Time and Date.
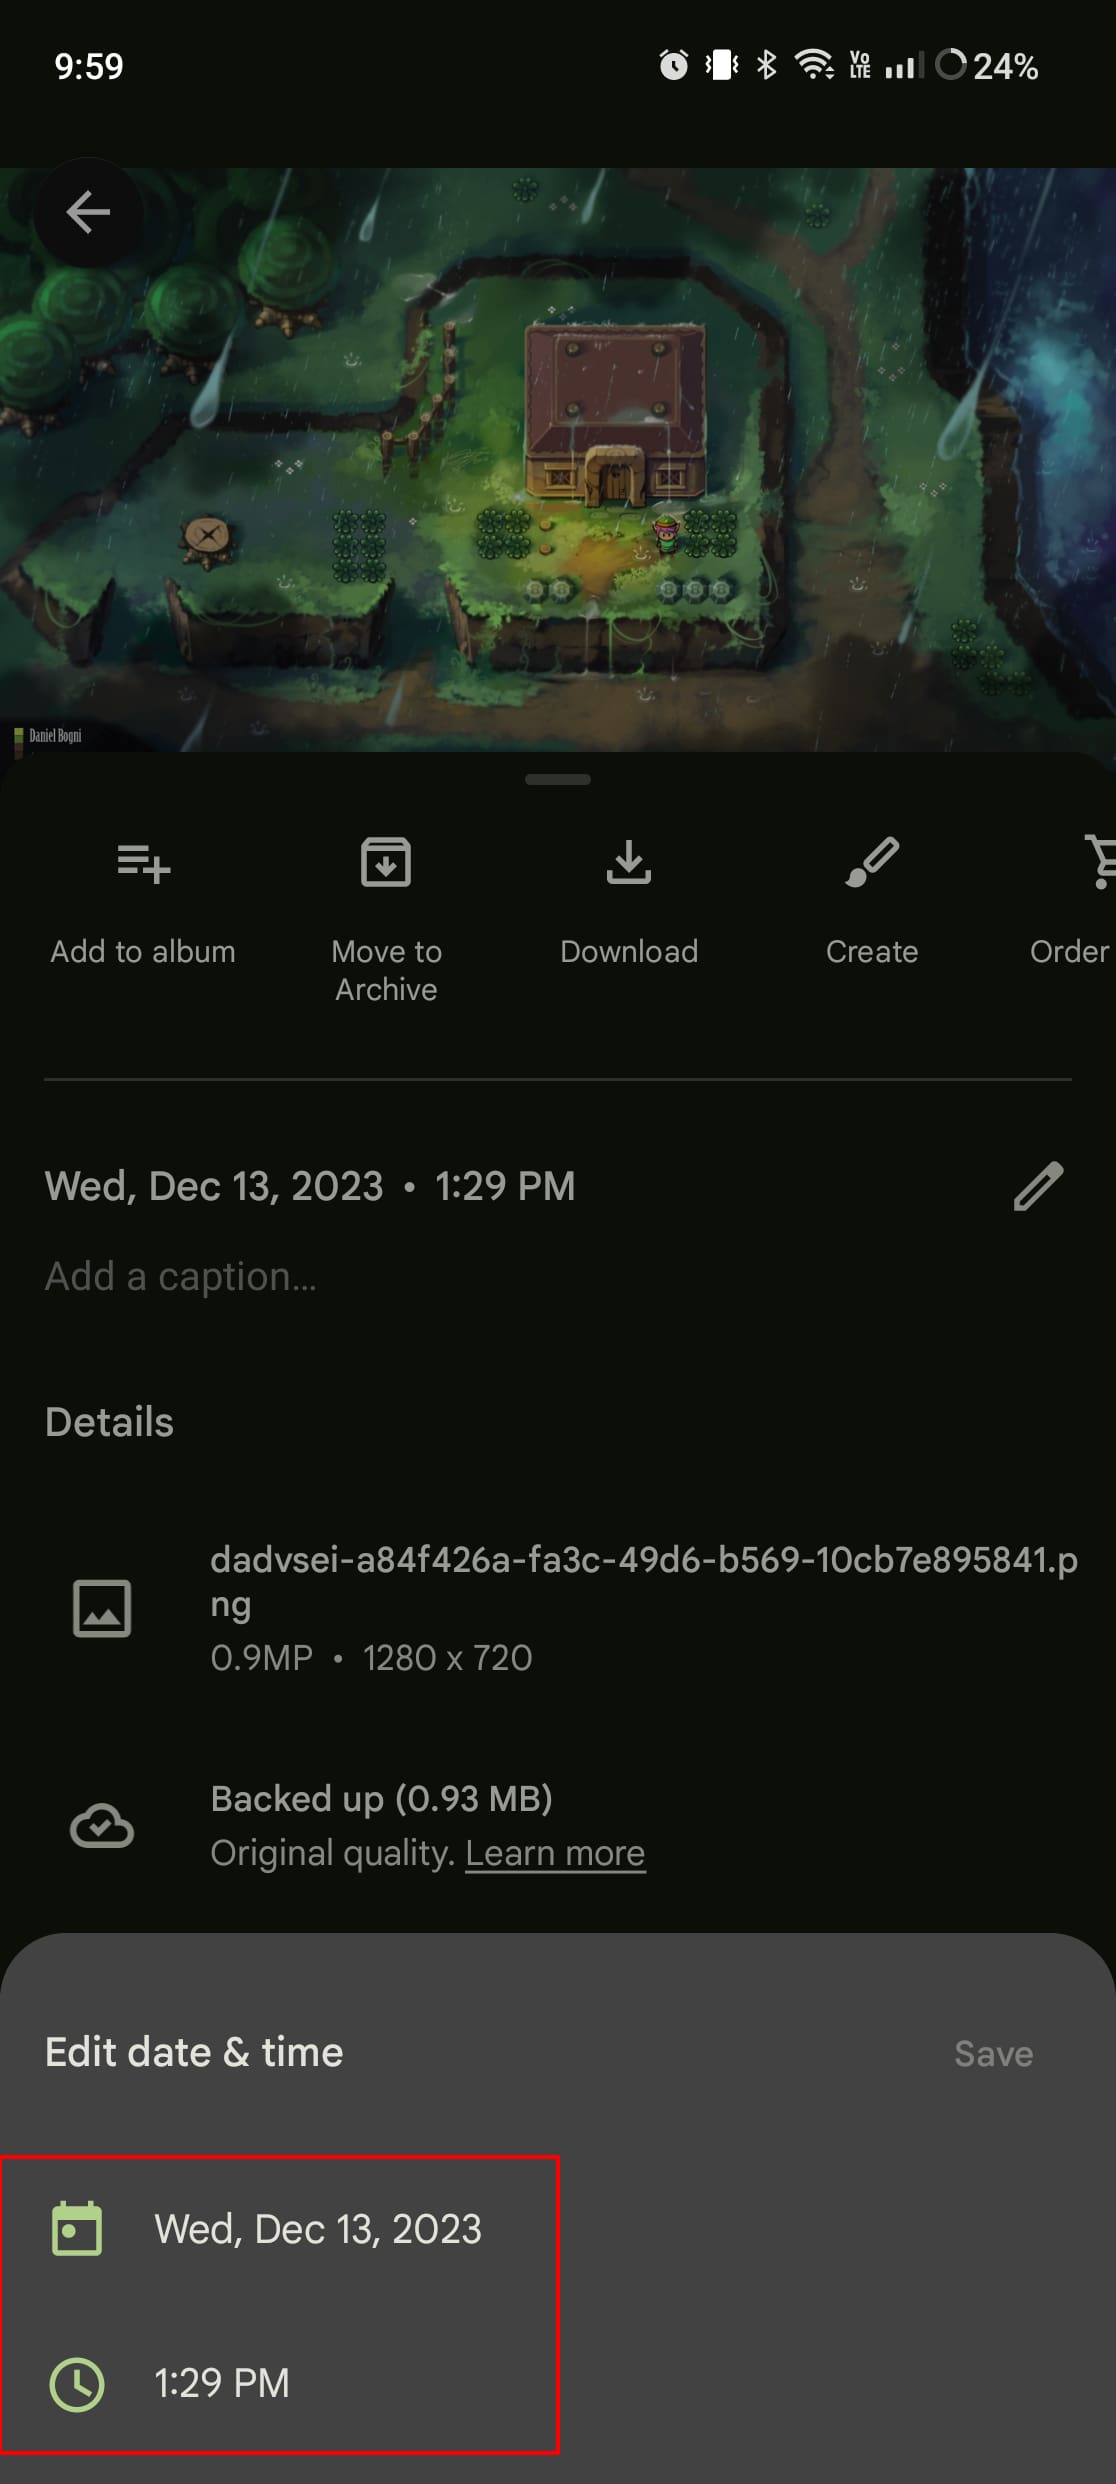
- From the pop-up menu, tap the Date to make any changes.
- Once the changes have been made, click the OK button.
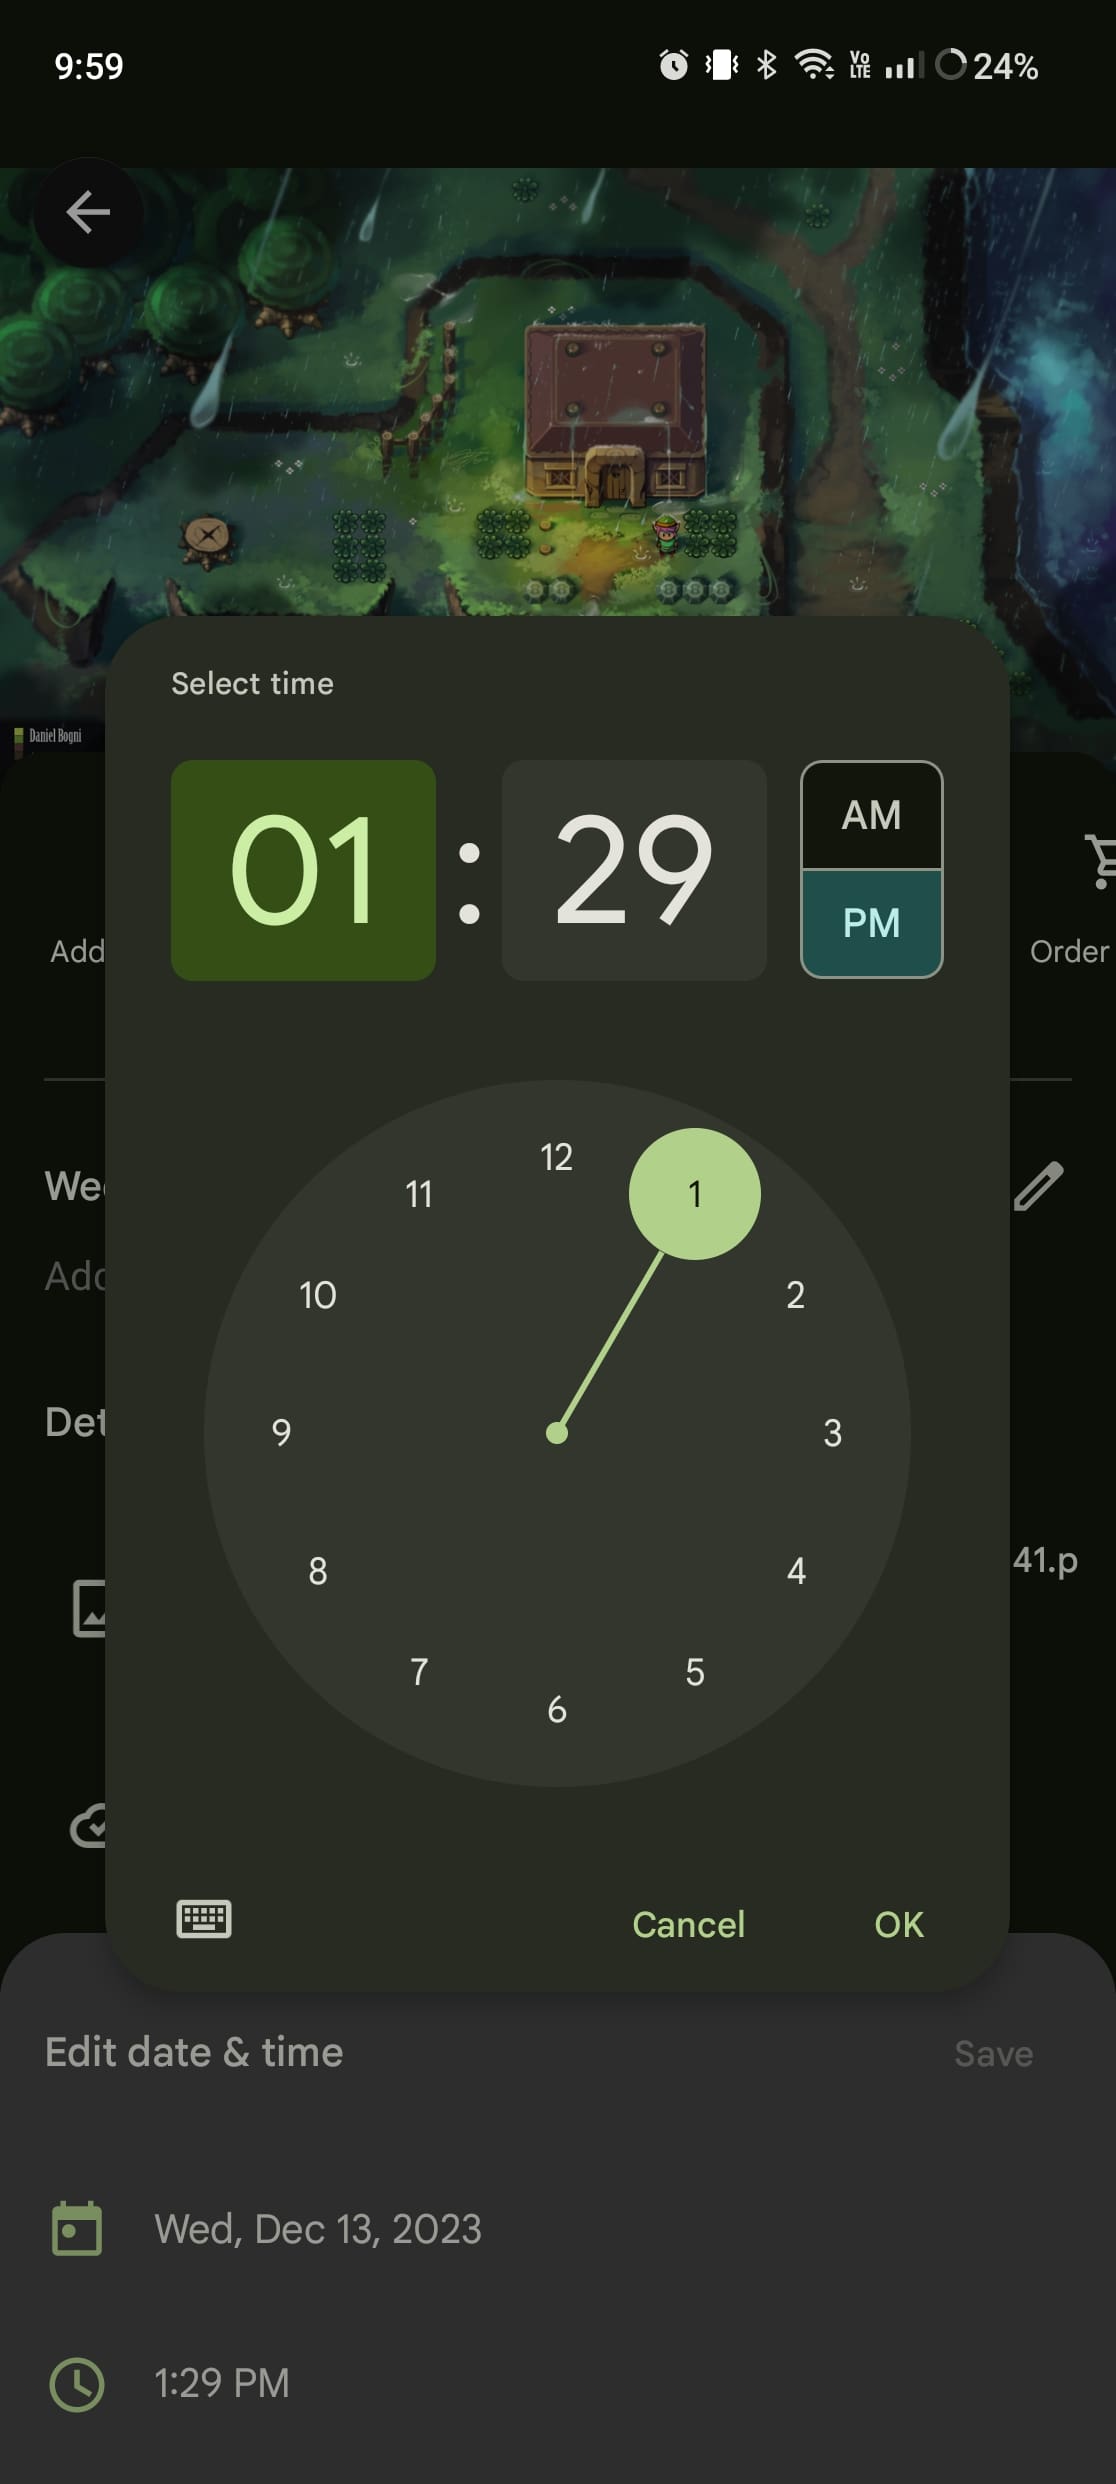
- Tap the Time.
- Make any changes.
- Tap the OK button.
- After you change the time and date, tap the Save button in the top right corner of the menu.
There does seem to be a catch, however, when wanting to change the time and date on pictures for Google Photos on Android and iPhone. Unfortunately, you won’t find the aforementioned “Pencil” button in the Details section for photos that are in your Google Photos library but are also on-device. Instead, you’ll either have to grab a tablet or follow the steps below to change the time and date on pictures for Google Photos on the web.
How to Change the Time and Date on Picture for Google Photos on the Web
While the mobile app is widely used, many users prefer the expansive interface and flexibility offered by the web version of Google Photos. If you’re one of those who like to manage your photo library on a larger screen, this section is tailored for you. This section is specifically for those who prefer to manage their photo libraries on a larger screen.
This approach is ideal for users who handle large volumes of photos or those who enjoy the precision and ease of a desktop environment. Whether you’re a professional photographer sorting through hundreds of shots or someone trying to organize family photos, adjusting the time and date on your pictures via the web can be a seamless and efficient process.
- Open the web browser of your choice.
- Navigate to photos.google.com.
- If necessary, log into your Google account.
- Locate and select the photo that you want to edit.
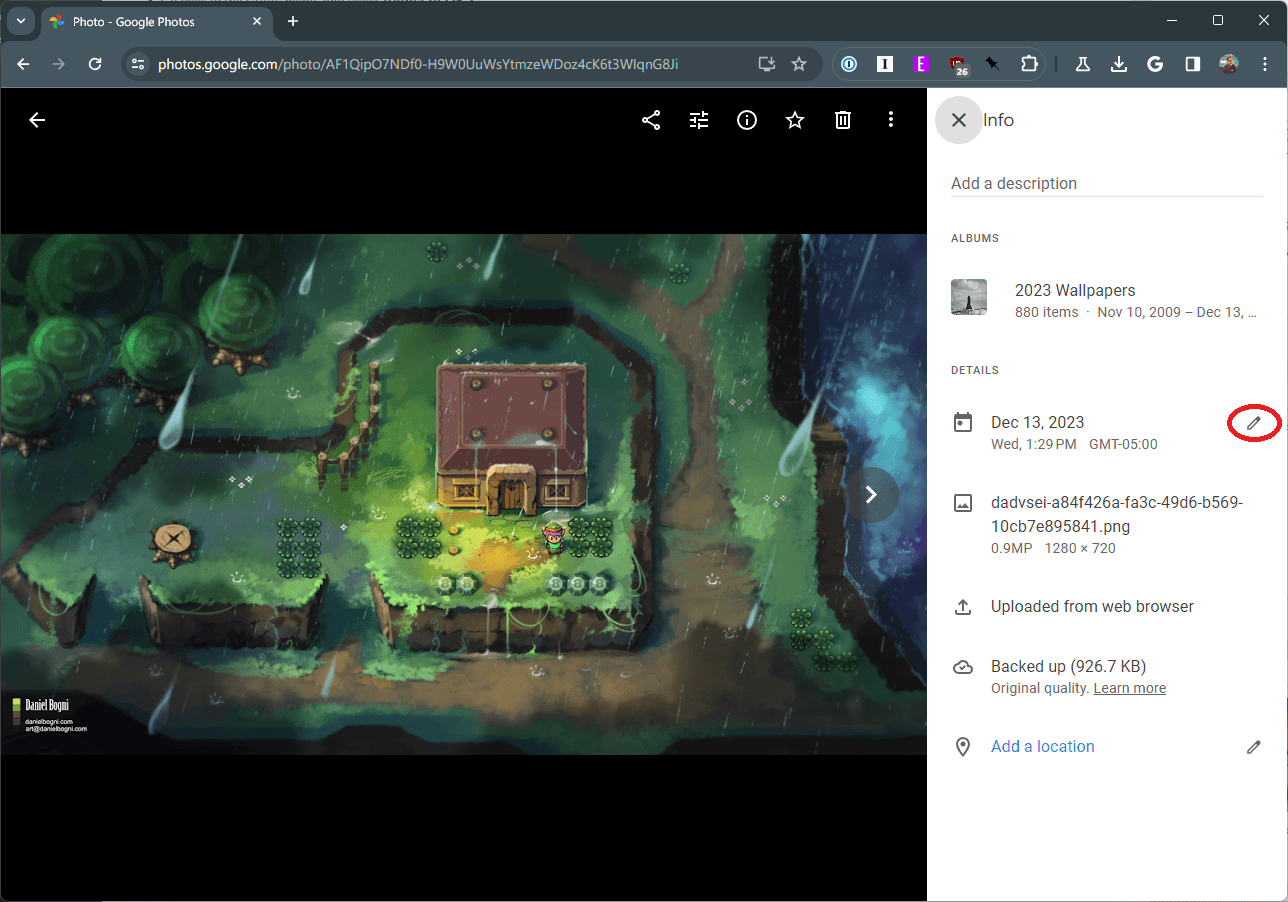
- In the top right corner, click the Info button.

- From the sidebar that pops out, click the Pencil icon next to the Date.
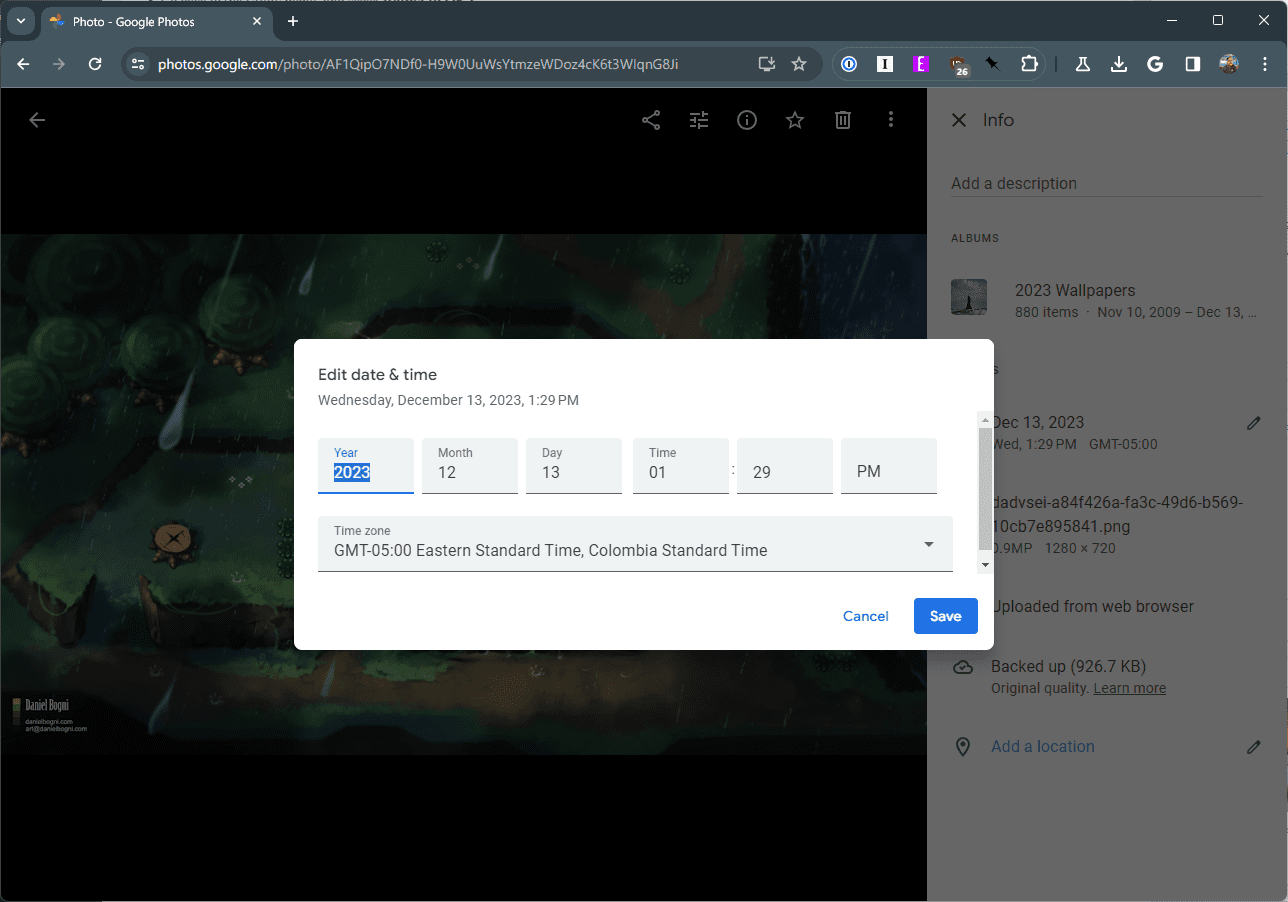
- Change the time and date. You can also change the Time Zone from this menu.
- Once the changes have been made, click the Save button.

It’s important to remember that if you rely on albums based on time frames within Google Photos, that these edited images will either be added or removed automatically. So, make sure that you’re only making edits to the photos that you want, otherwise, your Google Photos Library might end up more disorganized than it was before.
Conclusion
Adjusting the time and date on your photos in Google Photos is more than just a technical task; it’s about preserving the authenticity and context of your memories. With the steps outlined in this article, you can easily correct any discrepancies in your photos’ timestamps, ensuring that your digital memories are as accurate and meaningful as the moments they capture.
Remember, keeping your photos well-organized and correctly timestamped not only enhances your browsing experience but also ensures that your memories are preserved accurately for years to come. Embrace the simplicity and effectiveness of Google Photos to keep your digital photo collection perfectly synchronized with your life’s timeline.