Skip to content
LogoTechnipages
LogoTechnipages
  • Topics
        • Android
        • Browsers
        • Gaming
        • Hardware
        • Internet
        • iPhone
        • Linux
        • macOS
        • Office
        • Reviews
        • Software
        • Windows
        • Definitions
        • All Recent Posts
  • Product Reviews
  • About

Steps to Disable and Enable PIN Codes in Windows 11

Evan MercerDecember 11, 2024 Comments (0)
disable and enable pin codes windows 11

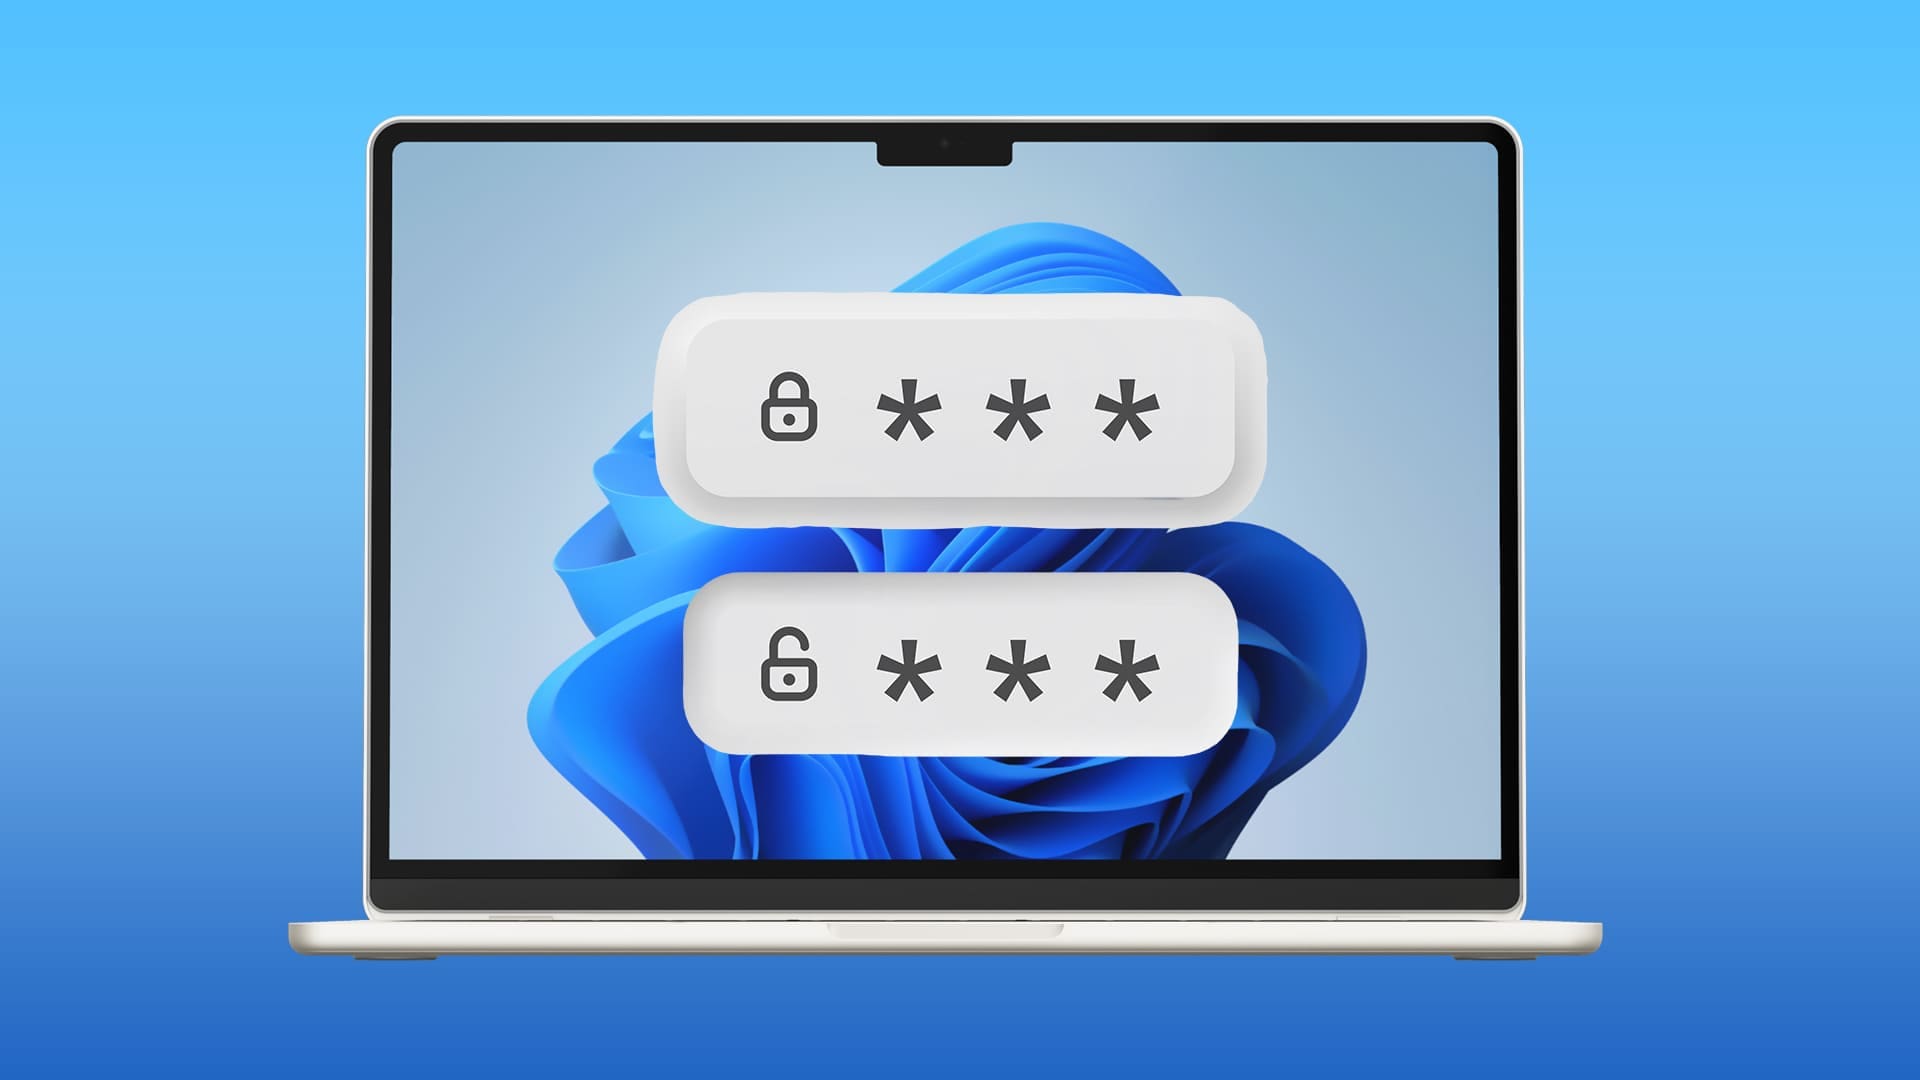
Windows 11 gives you many different ways to secure your account, and most people default to using PIN codes. They’re quicker to type than passwords and generally easy to remember, too. Windows 11 asks you to create a PIN as part of the initial setup process when you install it or launch a Windows 11 device for the first time.

However, you might want to disable this feature or re-enable it later on, at your convenience. Here’s how to disable and enable PIN codes in Windows 11.

Disable and Enable PIN Codes in Windows 11 Through the Settings Menu

You don’t need to download any third-party apps or install extra tools to disable and enable PIN codes. Windows 11 makes this process easy directly in the Settings menu.

To disable your PIN code:

Step 1. Open the “Settings” menu. You can access it from the Start menu or by pressing “Windows” and “I” keys together.

Disable and Enable PIN Codes in Windows 11 Through the Settings Menu 1

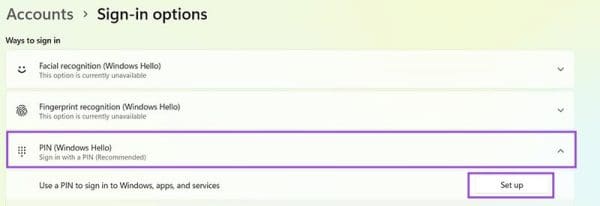
Step 2. Click on “Accounts” in the sidebar menu on the left. Then click “Sign-in options” on the next screen.

Disable and Enable PIN Codes in Windows 11 Through the Settings Menu 2

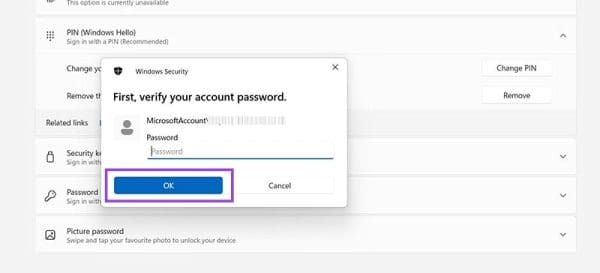
Step 3. Click on “PIN (Windows Hello)” and click “Remove” next to “Remove this sign-in option.” Note that you have to press it twice as Windows will warn you about the dangers of removing your PIN.

Disable and Enable PIN Codes in Windows 11 Through the Settings Menu 3

Step 4. (Optional) If “Remove” is greyed out for you, there’s one last step. You need to look down the same “Sign-in options” page you were on. Find the setting labeled “For improved security, only allow Windows Hello sign-in for Microsoft accounts on this device (Recommended)” and toggle it off. Then, close “Settings,” reopen it, and the “Remove” button should be visible.

Disable and Enable PIN Codes in Windows 11 Through the Settings Menu 4

Step 5. You’ll be prompted to sign into your account. Enter your password and press “OK” to prove your identity and confirm that you wish to remove your PIN code. Note: If Windows prompts you to make a new PIN, just click “Cancel” to back out so you don’t accidentally re-enable PIN protection.

Disable and Enable PIN Codes in Windows 11 Through the Settings Menu 5

To enable PIN codes:

Step 1. Open the “Settings.” You can get there by pressing “Windows” and “I” together or just clicking the “Settings” shortcut in the Start menu.

Disable and Enable PIN Codes in Windows 11 Through the Settings Menu 1

Step 2. Go to “Accounts” and then scroll down a little and click “Sign-in options.”

Disable and Enable PIN Codes in Windows 11 Through the Settings Menu 2

Step 3. Click “PIN (Windows Hello)” and then click “Set up.” You’ll then be prompted to log into your account, so enter the password to proceed.

Disable and Enable PIN Codes in Windows 11 Through the Settings Menu 6

Step 4. Type in your PIN. You can use just numbers or toggle the option to include letters and symbols, if you prefer. Type it exactly the same in both boxes, then click “OK.” Wait a moment for the system to log your change. The next time you log in, you’ll be prompted for your PIN.

Disable and Enable PIN Codes in Windows 11 Through the Settings Menu 7
Categories: Windows

Author Evan Mercer

I’m a computer science grad who loves to tinker with smartphones and tablets in my spare time. When I’m not writing about how to fix techy problems, I like hanging out with my dogs and sipping nice wine after a tough day.

You Might Also Like

  • Encryption Header

    How to Turn Off Windows File Encryption (EFS)

    Mitch BartlettWindows
  • Win11 Install Telnet Header

    How to Install Telnet in Windows 11

    Mitch BartlettWindows
  • authentication-error-function-requested-not-supported-windows-10

    Fix Windows 10 Remote Desktop Authentication Errors

    Madalina DinitaWindows
  • microsoft-word-pasting-not-working

    How to Quickly Erase All Images in a Word Document

    Judy SanhzWindows

Leave a Reply

Your email address will not be published. Required fields are marked *

how to allocate more memory to a program

How to Allocate More Memory to a Program in Windows

marvel rivals memory leak fix

Marvel Rivals Using Too Much Memory – How to Fix

how to create a macro in word

How to Create a Macro in Word

how to set video as screen saver

How to Set a Video as Your Screen Saver on Windows 11

how to fix 0xc000007b Error

Error 0xc000007b – What Is It and How to Fix It

profile pic

The Experts Behind Technipages

My name is Mitch Bartlett. I've been working in technology for over 20 years in a wide range of tech jobs from Tech Support to Software Testing. I started this site as a technical guide for myself and it has grown into what I hope is a useful reference for all.

Learn More

technipages logo white
linkedin icon

Technipages is part of Guiding Tech Media, a leading digital media publisher focused on helping people figure out technology. Learn more about our mission and team here.

© 2025 Guiding Tech Media All Rights Reserved

  • About Us
  • Contact
  • Legal & Privacy

© 2025 Guiding Tech Media All Rights Reserved

Information from your device can be used to personalize your ad experience.
Do not sell my personal information.

Last Updated on December 11, 2024 by Evan Mercer