The Galaxy S24, Samsung’s latest flagship smartphone, has once again raised the bar for mobile technology. With its cutting-edge features, stunning display, and powerful performance, it’s no wonder that tech enthusiasts and everyday users alike are eager to get their hands on it. One of the first steps to unleashing the full potential of your new Galaxy S24 is inserting the SIM card.
This not only enables cellular service but is crucial for connecting to mobile networks and making the most of your device’s capabilities. In this comprehensive guide, we’ll walk you through the process of inserting a SIM card into your Galaxy S24, ensuring a smooth setup for your new gadget.
Contents
Locating the SIM Card Tray
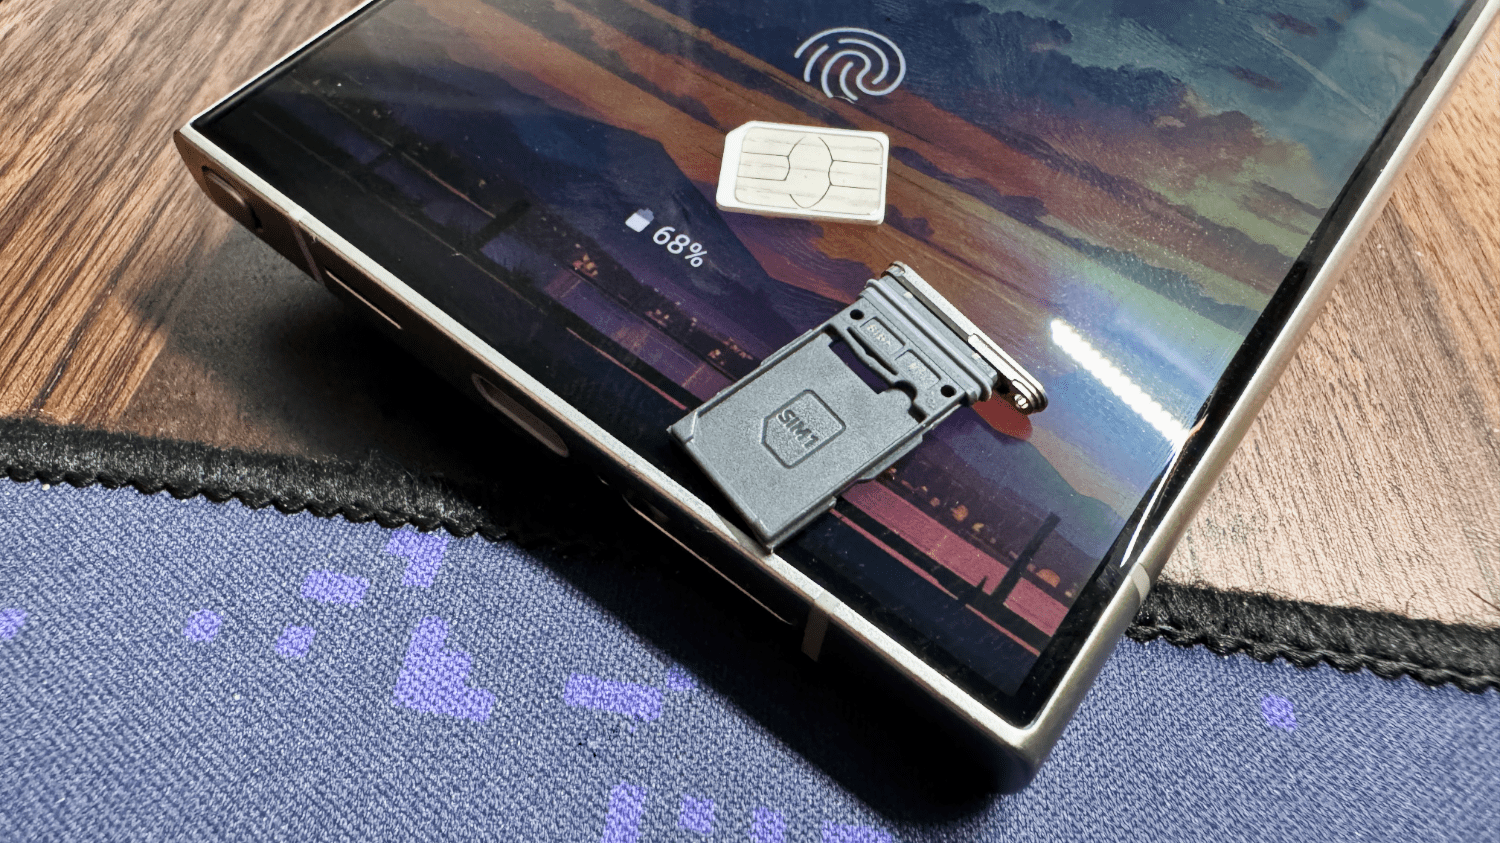
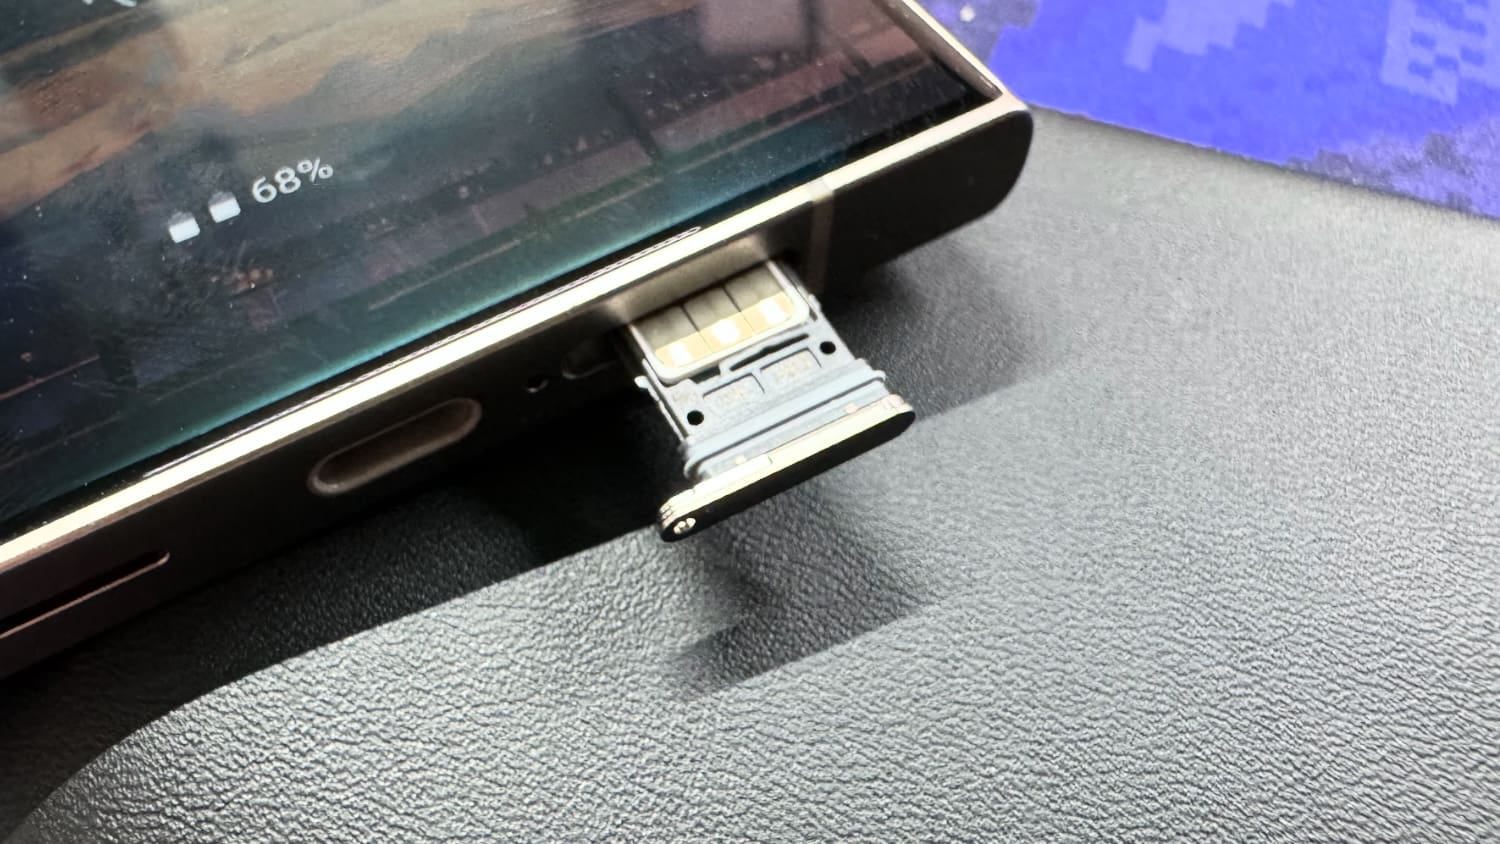
The SIM card tray on the Galaxy S24 is located on the top left side of the device. You’ll notice a small pinhole next to the tray. This is where you’ll insert the SIM ejection tool that comes with your phone.
Inserting the SIM Card
Follow these steps to insert the SIM card into your Galaxy S24:
- Turn off your device to avoid any potential damage during the SIM card installation process.
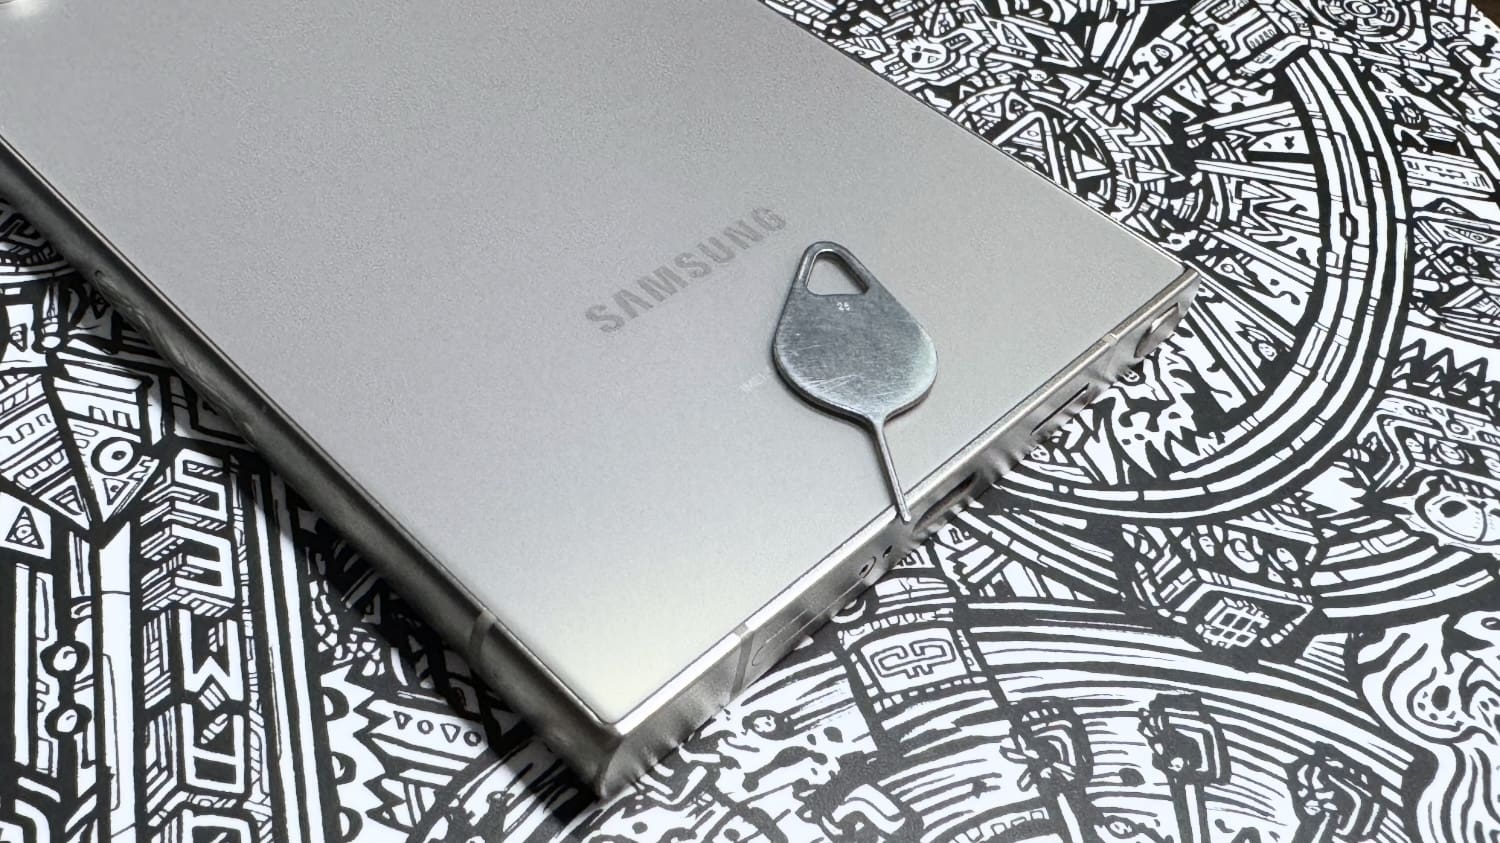
- Locate the SIM ejection tool that came with your phone. If you don’t have the tool, you can use a small paper clip.
- Insert the SIM ejection tool into the pinhole next to the SIM card tray. Apply gentle pressure until the tray pops out slightly.
- Carefully remove the SIM card tray from your device.

- Place your SIM card onto the tray, ensuring that the gold contacts face downwards and the card is aligned with the tray’s notch.
- Gently push the SIM card tray back into your device until it clicks into place.
- Turn on your Galaxy S24. Your device should now recognize the SIM card and connect to your mobile network.

Dual SIM Capabilities
The Galaxy S24 supports dual SIM functionality, allowing you to use two SIM cards simultaneously. This feature is perfect for those who want to separate their personal and work numbers or travel frequently and need to switch between local SIM cards. To use dual SIM on your Galaxy S24, follow these steps:
- Turn off your device.
- Remove the SIM card tray as described above.
- Place your primary SIM card in the first slot and your secondary SIM card in the second slot, ensuring that the gold contacts face downwards and the cards are aligned with the tray’s notches.
- Insert the SIM card tray back into your device.
- Turn on your Galaxy S24.
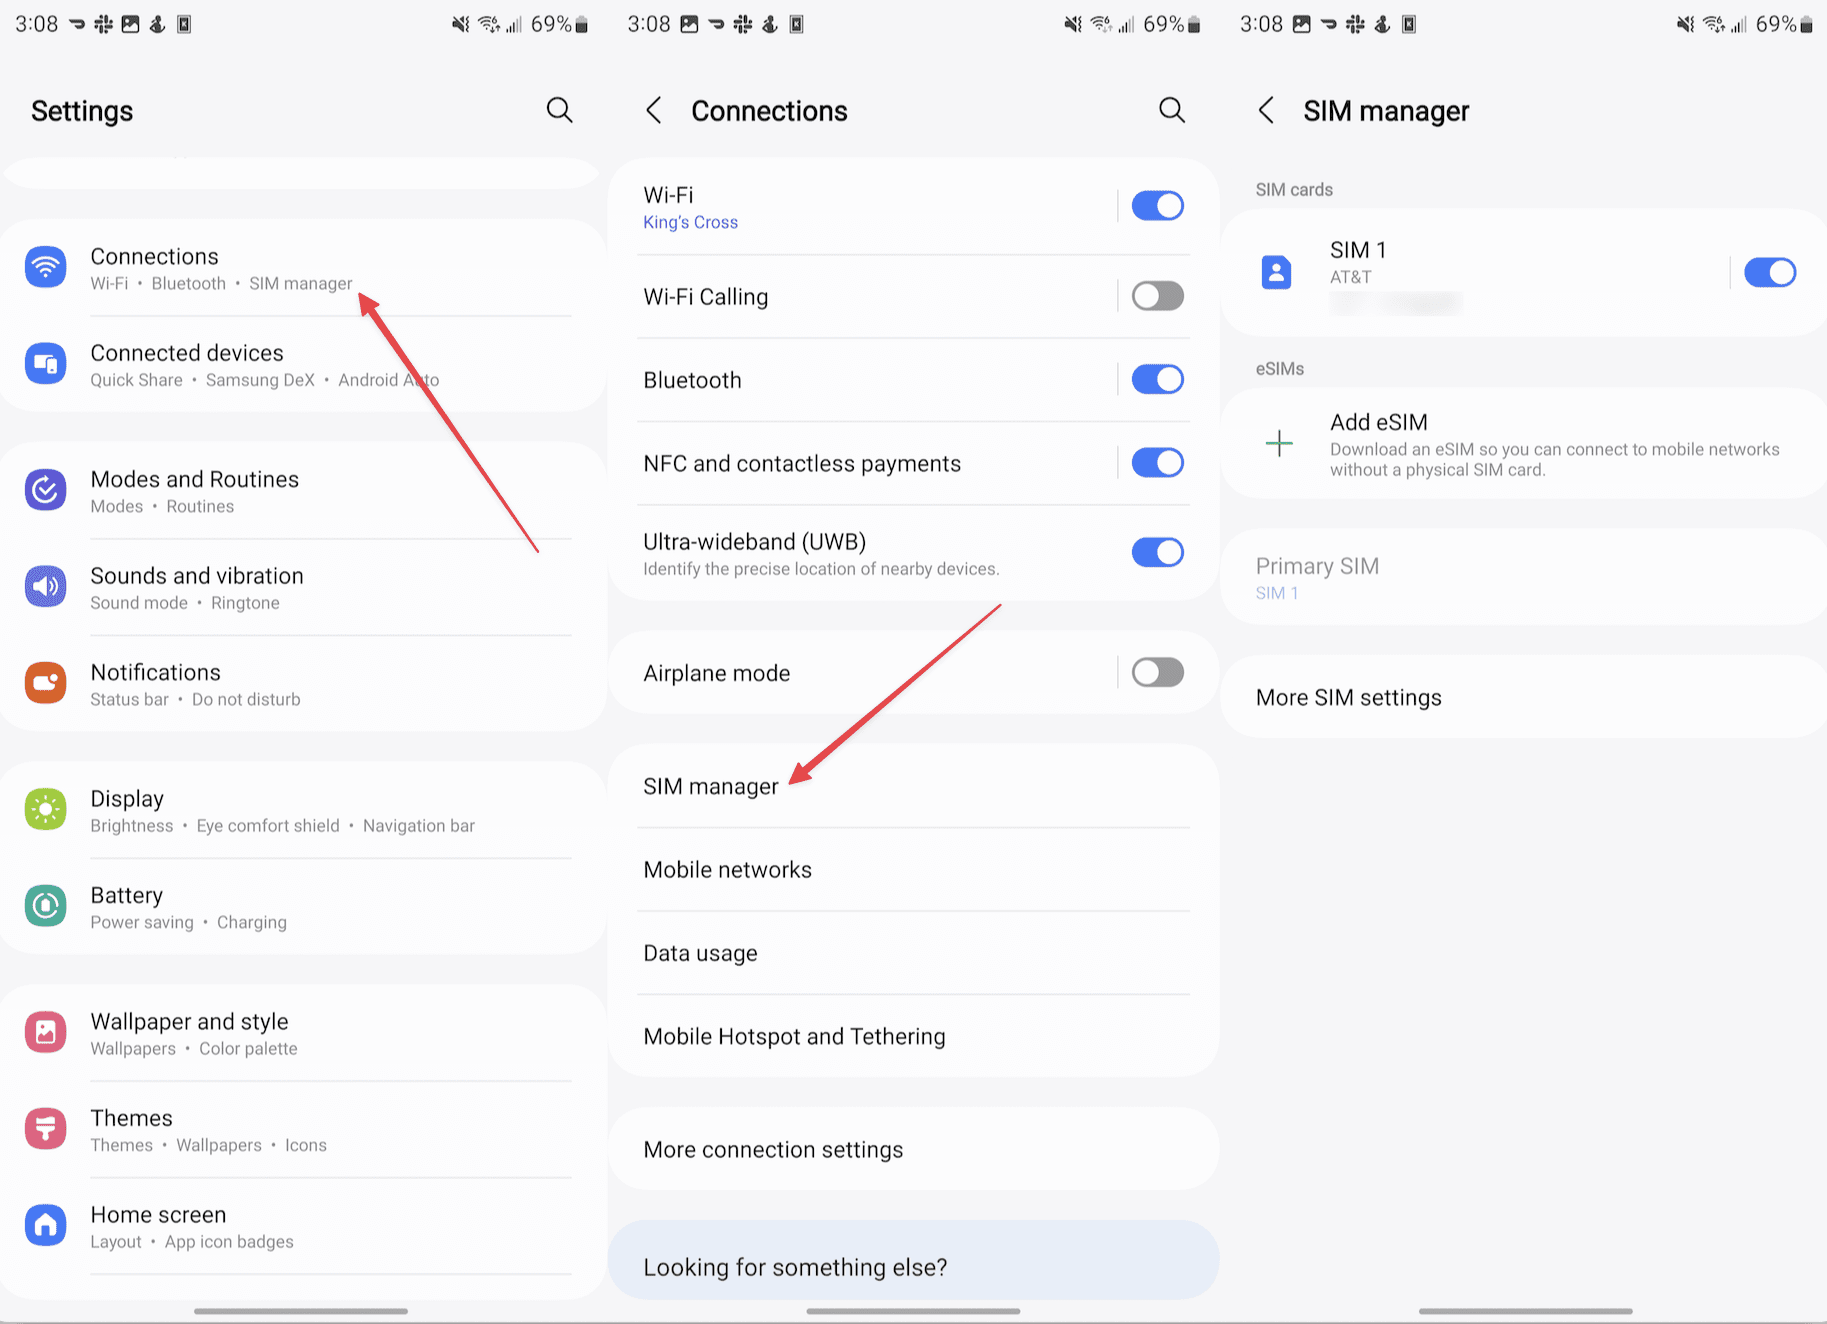
- Go to Settings > Connections > SIM card manager to configure your dual SIM settings.
In conclusion, inserting a SIM card on the Galaxy S24 is a straightforward process. By following the steps outlined in this article, you’ll be able to set up your device and enjoy its advanced features in no time.
Troubleshooting Common Issues
- No Service or Signal: If your Galaxy S24 doesn’t connect to the network, ensure you’re in a covered area. You may also need to restart your device or toggle airplane mode on and off to refresh the connection.
- Incorrect SIM Size: If the SIM card doesn’t fit in the tray, do not attempt to force it. Contact your carrier for a Nano-SIM card that’s compatible with the Galaxy S24.
- Damaged SIM Tray: If the SIM tray is damaged during insertion or removal, contact Samsung or visit a Samsung store for assistance. Using a damaged tray can cause connectivity issues or damage the internal SIM card slot.
Frequently Asked Questions
- Can I use a micro SIM or standard SIM card in the Galaxy S24? No, the Galaxy S24 only supports nano SIM cards. If you have a micro or standard SIM card, you’ll need to obtain a nano SIM card from your carrier or use a SIM card adapter.
- What should I do if my Galaxy S24 doesn’t recognize my SIM card? If your Galaxy S24 doesn’t recognize your SIM card, ensure that the card is properly inserted and aligned with the tray’s notch. If the issue persists, try restarting your device or contacting your carrier for assistance.
- Can I use an eSIM with my Galaxy S24? Yes, the Galaxy S24 supports eSIM functionality. To set up an eSIM, go to Settings > Connections > SIM card manager and follow the on-screen instructions.
Conclusion
Inserting a SIM card into the Galaxy S24 is a straightforward process that requires minimal effort. By following the steps outlined in this article, users can easily locate the SIM card tray, properly insert their SIM card, and ensure their device is ready for use. Additionally, the Galaxy S24’s dual SIM capabilities provide users with even more flexibility in managing their personal and professional communications. With these simple instructions, Galaxy S24 users can confidently set up their devices and enjoy all the benefits that this cutting-edge smartphone has to offer.