

The Basic Input/Output System (BIOS) is a fundamental part of any computer, bridging the hardware and software. Keeping your BIOS updated is essential for maintaining optimal system performance and stability. In this blog post, we’ll guide you through the process of updating the BIOS on your Asus ROG Ally.
Before we delve into the steps, it’s important to understand what BIOS is. BIOS is a type of firmware used during any computer’s booting process (start-up). It initializes and tests the system hardware components and loads a bootloader or an operating system from a mass memory device. Updating the BIOS can improve hardware compatibility, add features, and fix bugs.
Contents
Precautions Before Updating BIOS
Updating BIOS is a critical process that could potentially harm your system if not done correctly. Here are some precautions you should take:
- Ensure your system is plugged into a power source to prevent shutdown during the update.
- Back up your data to avoid potential data loss.
- Don’t turn off your system or restart it during the update.
How to Update BIOS on Asus ROG Ally
- Power on your ASUS ROG Ally and log into your Windows account.
- After you are logged in, exit the Armoury Crate app and go to your Windows desktop.
- Locate and open the MyASUS app.
- In the top left corner, click (or tap) the three horizontal lines to reveal the side menu.
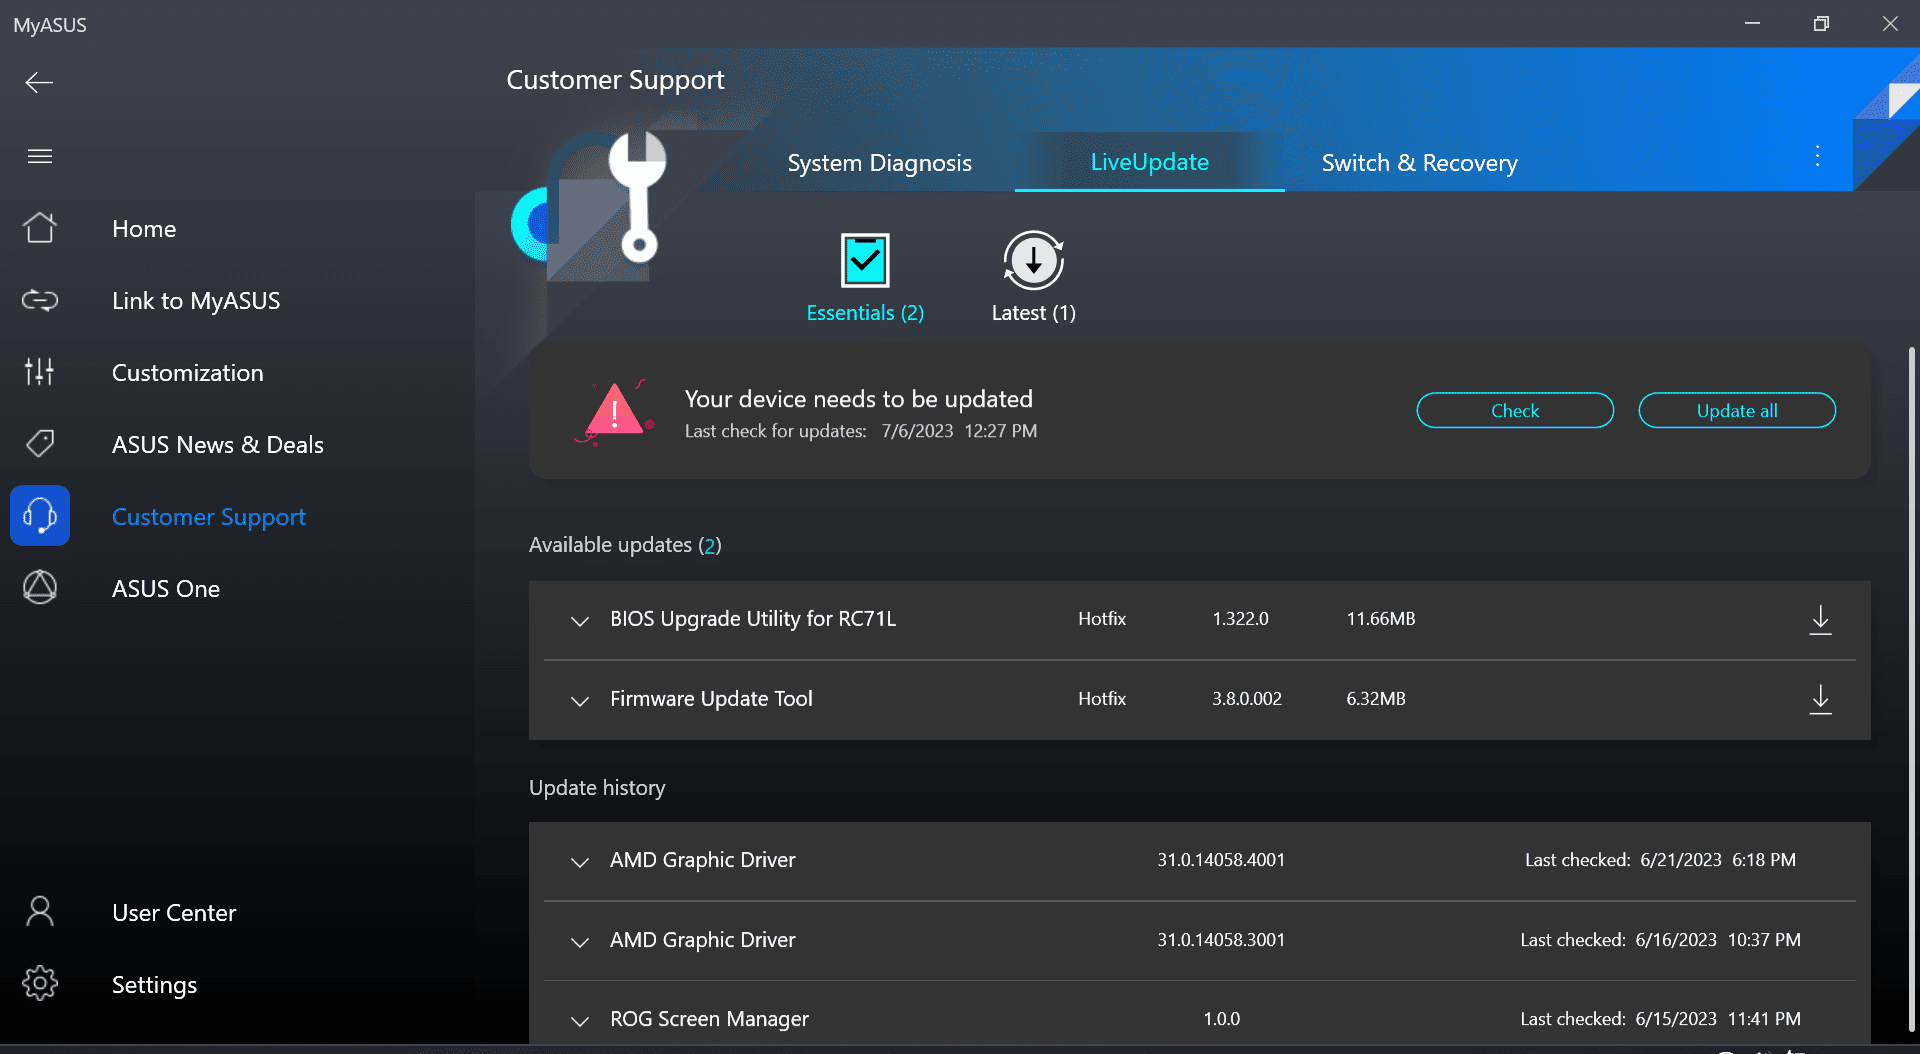
- Select Customer Support from the list of options.

- At the top of the page, on the right side of the window, select the LiveUpdate tab.
- Click the Check button.
- Wait a few moments.
- If applicable, look for the BIOS Upgrade Utility for RC71L option under the Available updates section.
- Click the Download button next to the update if it’s available.
- Wait for the download to finish, then restart your ROG Ally when prompted.
- Keep your ROG Ally plugged in while the BIOS update is installed.

After the BIOS update has successfully been installed, your ROG Ally may restart again to apply any changes, similar to performing a Windows update. Patience is key, as you don’t want your ROG Ally to accidentally power off, which could result in you needing to re-install Windows completely.
Check for Other Important Updates
While ensuring that the BIOS is regularly updated on your ASUS ROG Ally is important, that’s not the only update you should pay attention to. There are many different things going on that help make the Ally work and run the way it does out of the box. So it’s also essential to keep the gaming handheld updated everywhere possible.
The first is through the Armoury Crate software that provides the handheld interface you see when you power on the ROG Ally. And in addition to the Armoury Crate app itself, you’ll also be able to update different aspects of the Ally from the app. Here’s how you can do so:
- Power on your ASUS ROG Ally and log into your Windows account.
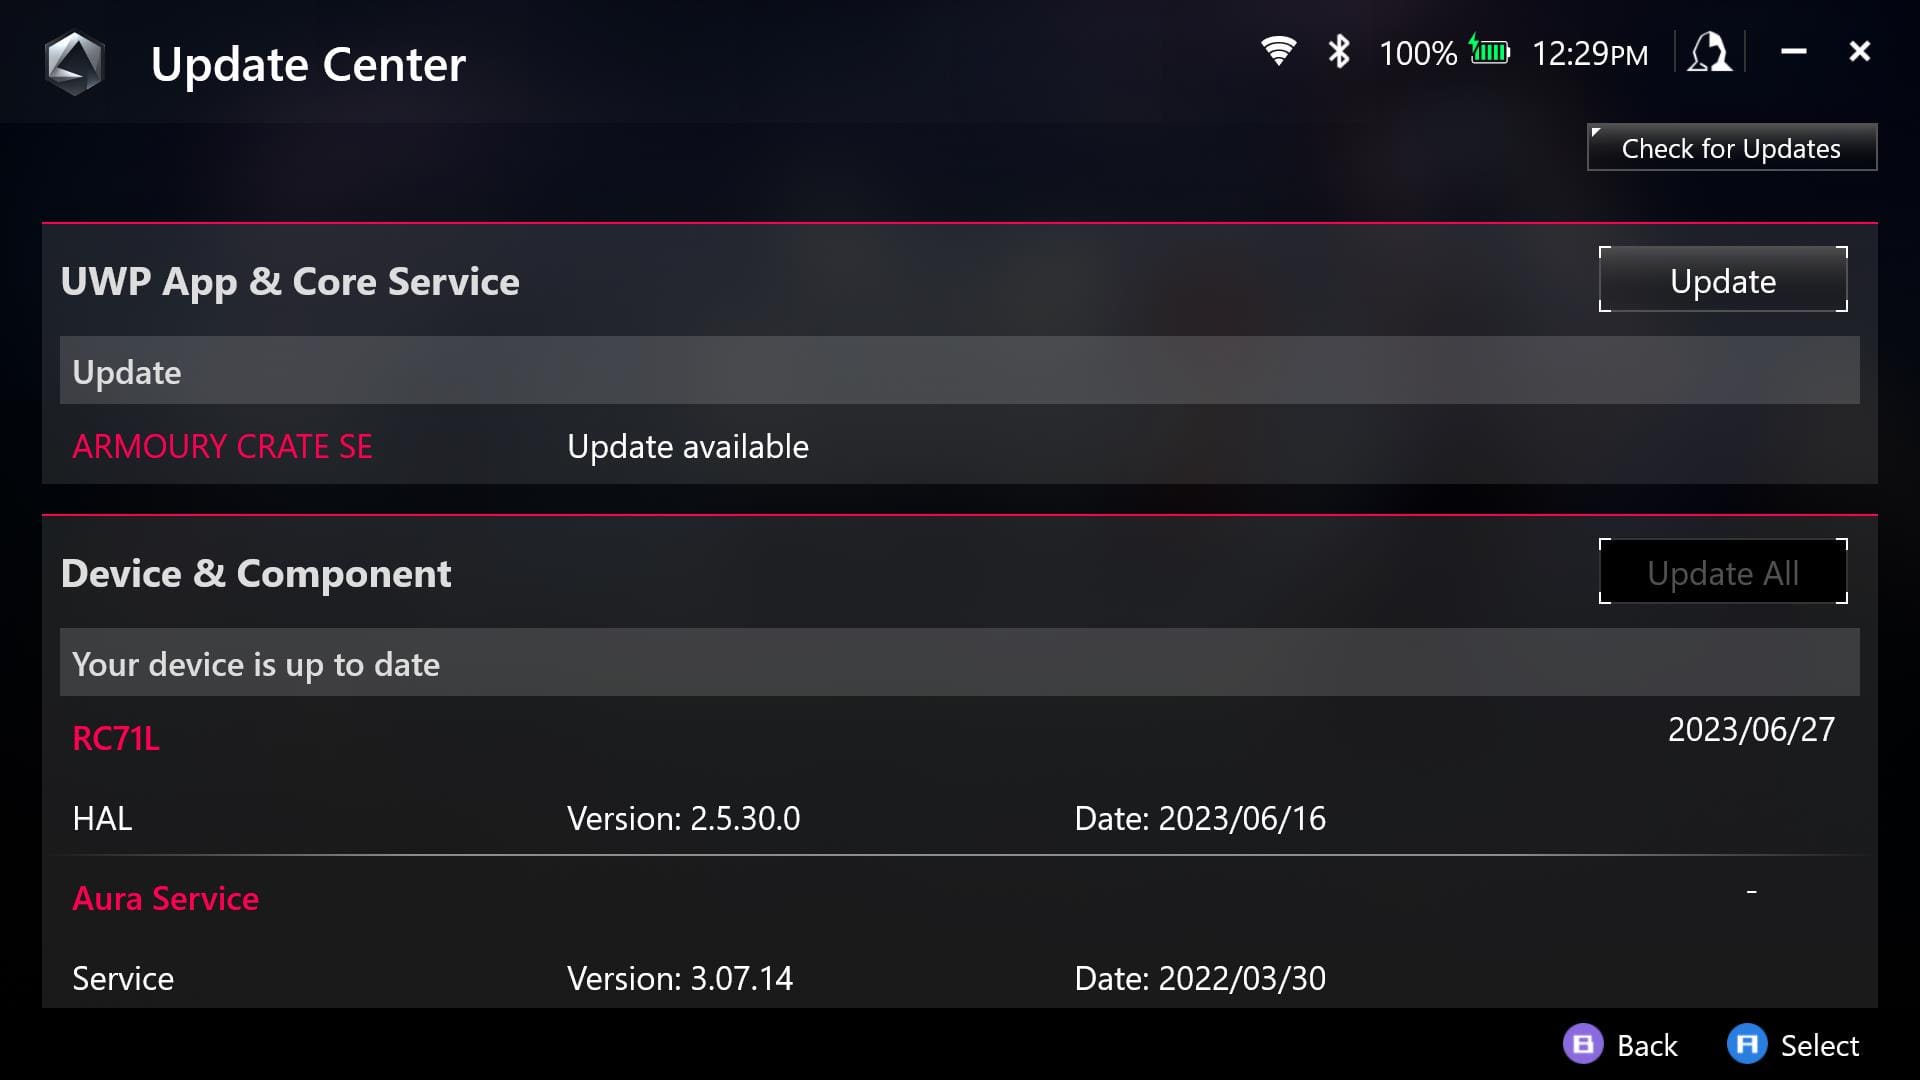
- After you are logged in, navigate to the Content panel within the Armoury Crate application.

- Highlight and select Update Center.
- Wait a moment, then tap the Check for Updates button in the top right corner.
- After a few moments, any available updates should appear.
- If available, highlight and select the Update button next to the app or services that need to be updated.


Ensure Windows Is up to Date
Last but certainly not least is the need to make sure that Windows is updated to the latest version. Because this is a Windows PC, Microsoft is releasing regular updates to provide improvements to stability along with new features and more. Here are the steps that you’ll need to take to update Windows from your ASUS ROG Ally:
- Exit the Armoury Crate app on your ROG Ally.
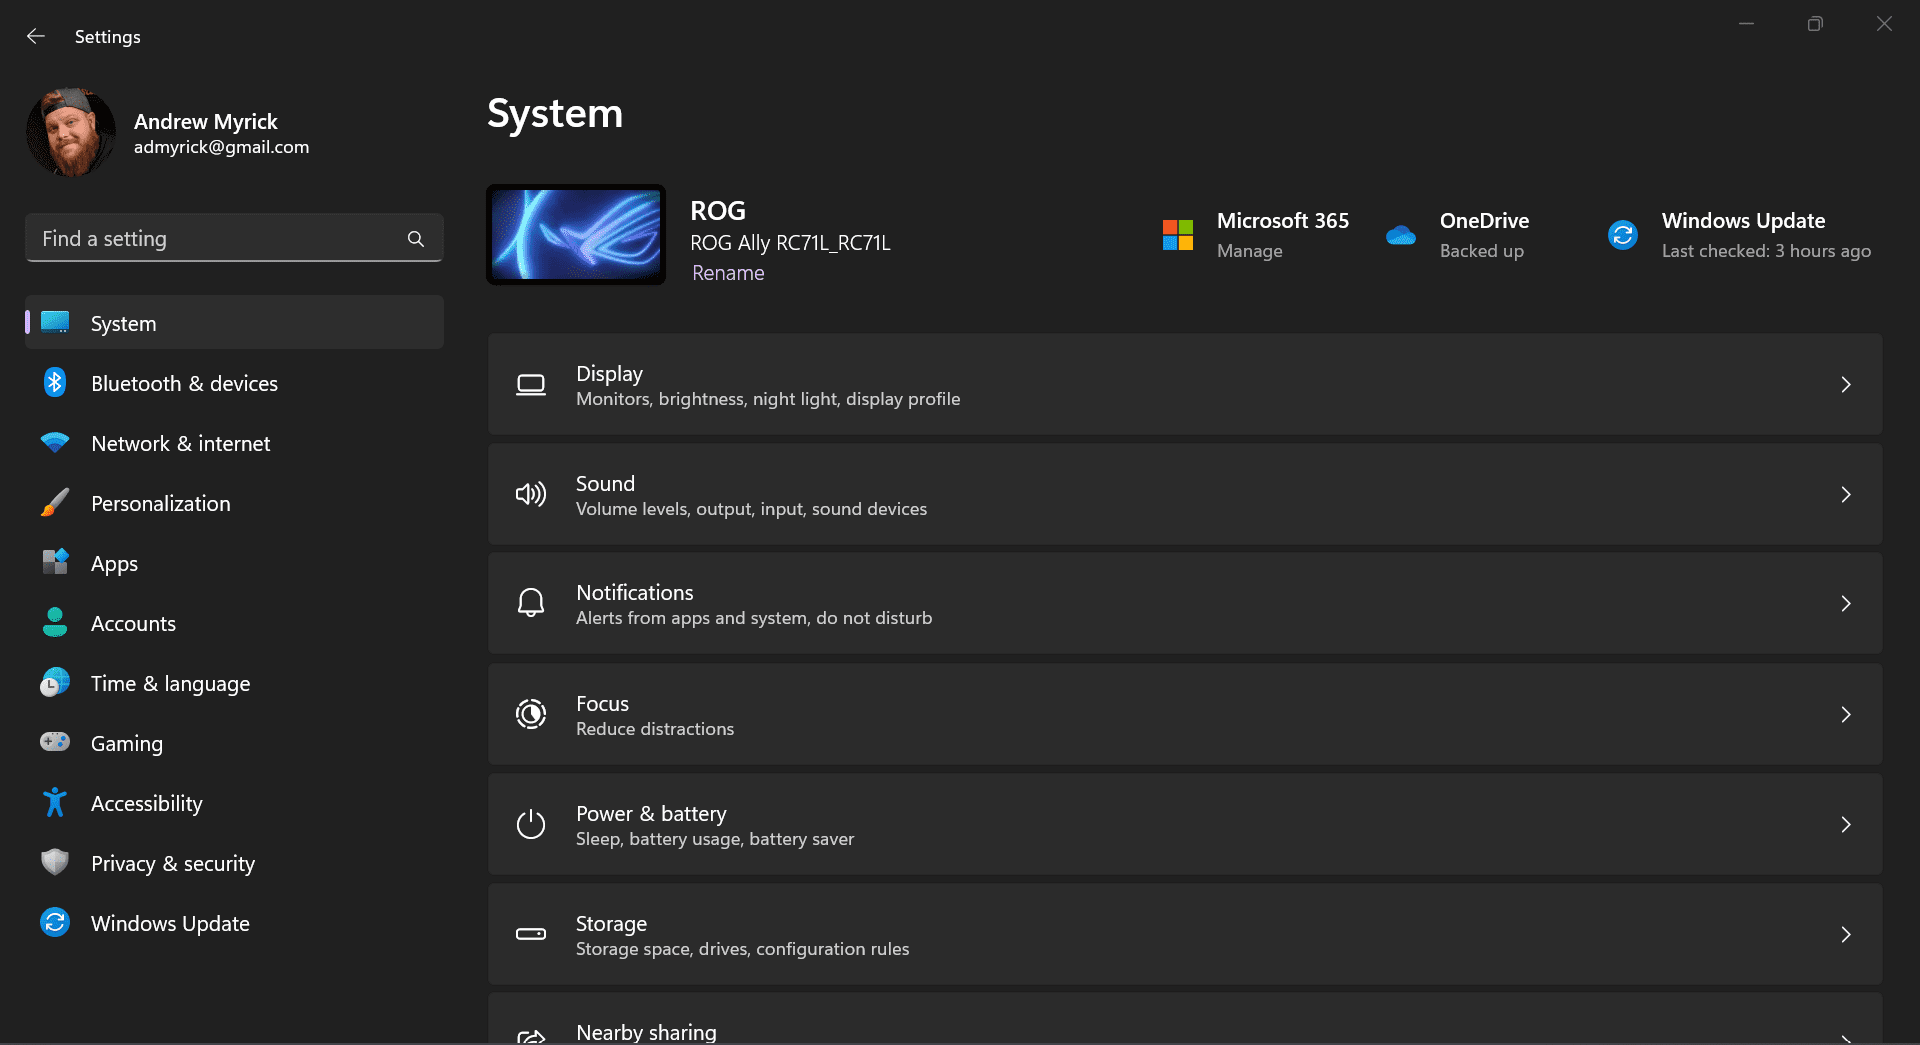
- From the Windows Desktop, tap the Start button in the taskbar.
- Search for and open the Settings app.

- In the sidebar on the left, scroll down and select Windows Update.
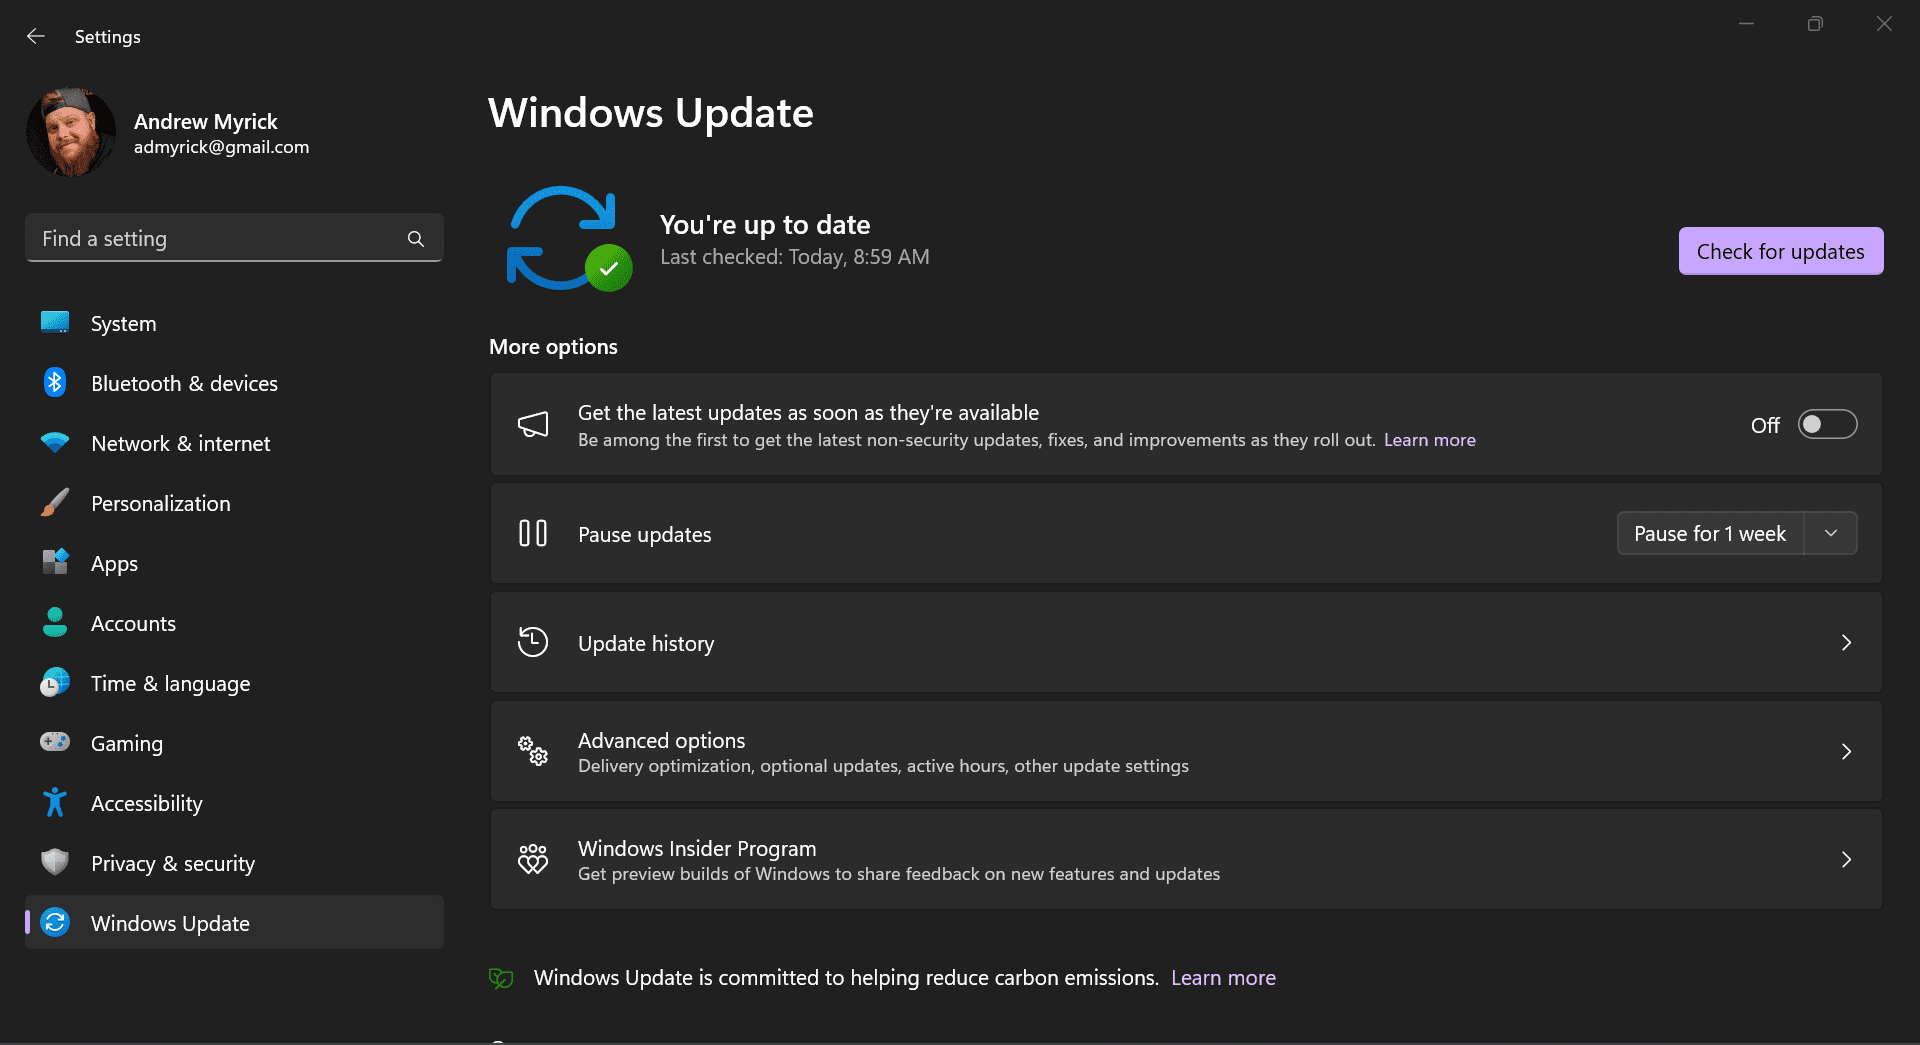
- Select the Check for updates button on the right side of the screen.
- If any updates are available, select the Download and Install button that appears.
- Wait until the updates are finished downloading.
If you were updating any other Windows computer, you’d be prompted to restart after downloading the updates. Just follow the on-screen steps, make sure your ROG Ally stays connected to power, then wait for the updates to be installed. Then, you’ll be back up and running with the latest updates.
Conclusion
Keeping your BIOS updated is crucial for maintaining the performance and stability of your Asus ROG Ally. While the update process requires care, it can be done safely by following the correct steps and taking the necessary precautions. With this guide, you should now be able to update the BIOS on your Asus ROG Ally. Enjoy the improved performance and new features of your updated system!


Thank you, this helps me a lot
I just got my Ally today