Skip to content
LogoTechnipages
LogoTechnipages
  • Topics
        • Android
        • Browsers
        • Gaming
        • Hardware
        • Internet
        • iPhone
        • Linux
        • macOS
        • Office
        • Reviews
        • Software
        • Windows
        • Definitions
        • All Recent Posts
  • Product Reviews
  • About

Fix: Empty File Appeared on Windows 11 Desktop

Madalina DinitaJuly 27, 2023 Comments (0)
windows 10 blank file on desktop

At times, unexplainable things happen in the Windows 11 universe. For example, a blank file with no name may suddenly appear on your desktop. That’s quite strange, don’t you think?

Want to hear something stranger? You can delete this mysterious file as many times as you want, it always comes back like some kind of zombie.

Contents

  • 1 Why is There an Empty File on My Desktop?
    • 1.1 How to Permanently Delete Empty Files From Desktop
      • 1.1.1 Method 1
      • 1.1.2 Method 2
      • 1.1.3 Method 3
      • 1.1.4 Method 4

Why is There an Empty File on My Desktop?

Empty files on the desktop are usually remnants of old Microsoft Office installations.

If you try to edit the file properties, you’ll see that is not actually a real file. Right-click on it and you’ll see there’s no Properties option available in the context menu. You only have three options: Cut, Create Shortcut and Delete. You can’t even hide that file. That’s because it’s not a file, it’s a system icon.

How to Permanently Delete Empty Files From Desktop

Method 1

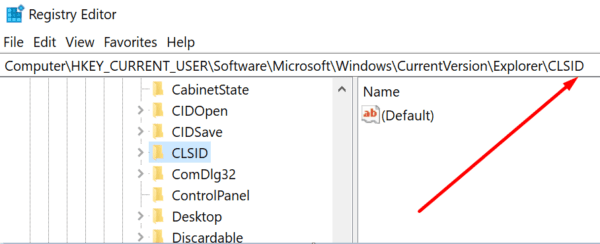
  1. Open the Registry Editor and navigate to the following path:
    • HKEY_LOCAL_MACHINE\SOFTWARE\Microsoft\Windows\ CurrentVersion\Explorer\Desktop\NameSpace\
  2. Locate all the 138508BC-1E03-49EA-9C8F-EA9E1D05D65D and 0875DCB6-C686-4243-9432-ADCCF0B9F2D7 occurrences.
  3. Remove all of them.
  • Other users fixed this problem by removing the following key: [HKEY_USERS\UserName\Software\Microsoft\Windows\ CurrentVersion\Explorer\CLSID].

clsid registry editor windows 10

Method 2

  1. Launch the Registry Editor and go to this path:
    • HKEY_LOCAL_MACHINE\SOFTWARE\Microsoft\Windows\CurrentVersion\Explorer\MyComputer\NameSpace\namespace key registry editor windows 10
  2. Right-click on NameSpace → Export → save it to your desktop as NameSpace.
  3. Then right-click NameSpace again and delete the key.
  4. Select Yes when prompted to permanently delete the key.
    • Rest assured, even if you get an error, the files inside the NameSpace key have been removed.
  5. Return to your desktop. Double-click on the NameSpace file. By doing so, you’ll import the files back to the Registry.

Method 3

  1. Launch File Explorer and click on View.
  2. Then click on Options ( far right corner).file explorer view options
  3. Click the View tab and go to Advanced settings.
  4. Uncheck Always show icons, never thumbnails if it’s ticked. If the option is not ticked, check the box, hit OK, and then go back and uncheck it.

file explorer always show icons never thumbnails

Method 4

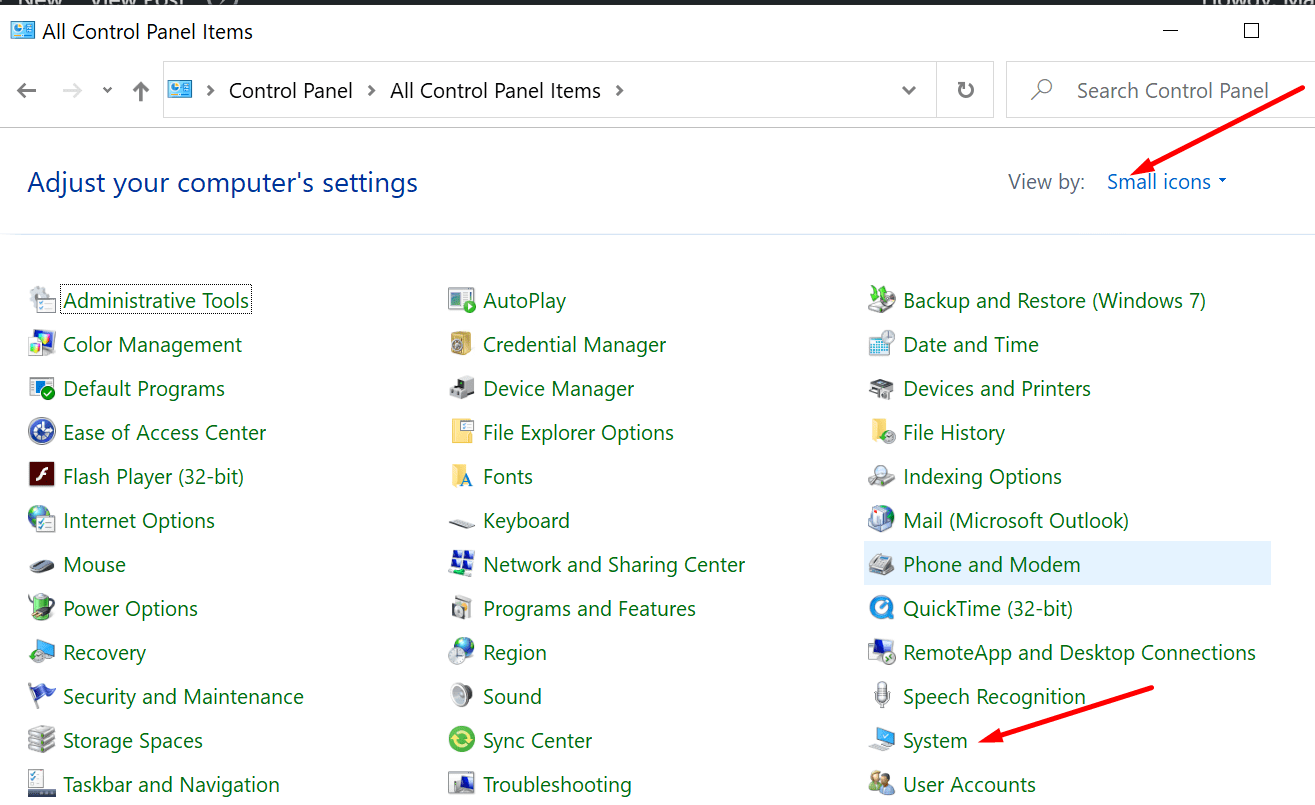
  1. Open the Control Panel and select View by Icons, not Category.
  2. Then go to System.control panel system
  3. Go to Advanced System Settings (left pane).
  4. Click on the Advanced tab, go to the Performance section, and select Settings.system properties advanced
  5. Locate the option called Show Thumbnails instead of Icons.show thumbnails instead of icons
  6. Check if it’s ticked. If it is un-ticked, tick it and hit OK. If it is already ticked, uncheck the box, hit OK. Repeat, tick it, and hit OK.

Let us know if you managed to permanently remove the empty files from your Windows 11 desktop.

Categories: WindowsTagged Updated0723

Author Madalina Dinita

Madalina has been a Windows fan ever since she got her hands on her first Windows XP computer. She is interested in all things technology, especially emerging technologies -- AI and DNA computing in particular.

You Might Also Like

  • Gear Icon Header

    Enable/Disable Numlock at Windows Startup

    Mitch BartlettWindows
  • Windows Settings Header

    Windows 11: Fix “This publisher has been blocked from running software…”

    Mitch BartlettWindows
  • Win11 Send to Email Header

    Windows 11: “Mail recipient” Missing from “Send to” Menu

    Mitch BartlettWindows
  • Windows 10 Disable Quick Searches

    Windows 11: How to Disable Quick Searches

    Madalina DinitaWindows

Leave a Reply

Your email address will not be published. Required fields are marked *

how to allocate more memory to a program

How to Allocate More Memory to a Program in Windows

marvel rivals memory leak fix

Marvel Rivals Using Too Much Memory – How to Fix

how to create a macro in word

How to Create a Macro in Word

how to set video as screen saver

How to Set a Video as Your Screen Saver on Windows 11

how to fix 0xc000007b Error

Error 0xc000007b – What Is It and How to Fix It

profile pic

The Experts Behind Technipages

My name is Mitch Bartlett. I've been working in technology for over 20 years in a wide range of tech jobs from Tech Support to Software Testing. I started this site as a technical guide for myself and it has grown into what I hope is a useful reference for all.

Learn More

technipages logo white
linkedin icon

Technipages is part of Guiding Tech Media, a leading digital media publisher focused on helping people figure out technology. Learn more about our mission and team here.

© 2025 Guiding Tech Media All Rights Reserved

  • About Us
  • Contact
  • Legal & Privacy

© 2025 Guiding Tech Media All Rights Reserved

Information from your device can be used to personalize your ad experience.
Do not sell my personal information.

Last Updated on July 27, 2023 by Mitch Bartlett